


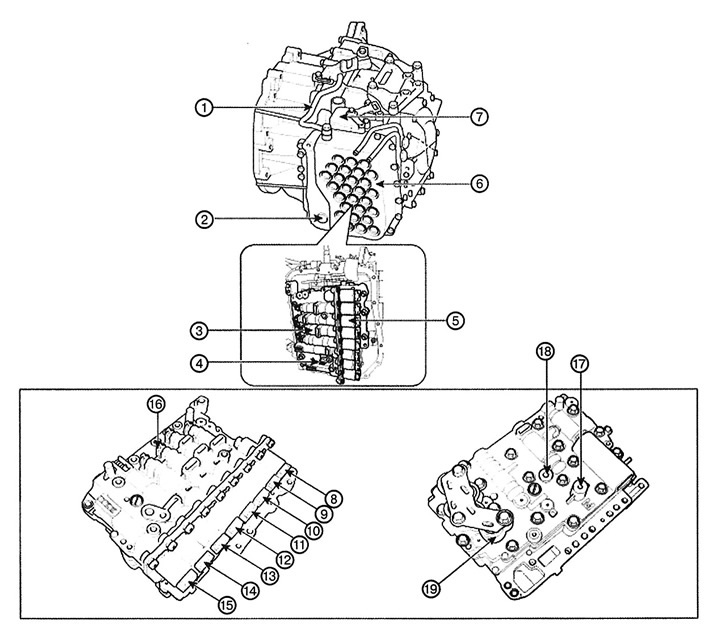
1. Breather hose
2. Oil level check plug
3. Valve body
4. Oil temperature sensor
5. Solenoid valve
6. Valve body cover
7. Lock switch
8. T/Con (VFS N/L)
9. 35R (VFS.N/H)
10. 2/6B (VFS.N/L)
11. UD (VFS.N/H)
12. OD (VFS.N/H)
13. SS-B (ON/OFF)
14. SS-A (ON/OFF)
15. Pressure main (VFS N/H)
16. PCV adjustment screw
17. Pressure UD/B
18. LR/B pressure (low gear and reverse gear brake)
19. Battery
Removal and installation the valve body
1. Remove the battery and battery tray.
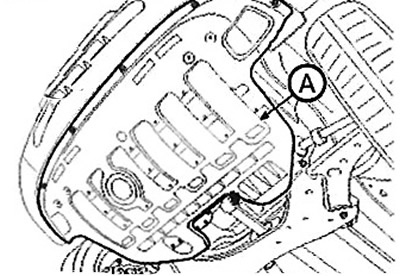
2. Remove the engine protection (A).
3. Unscrew the drain plug and drain the automatic transmission oil.
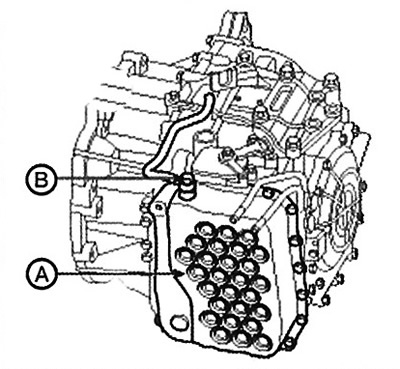
4. Loosen the eye bolt (B) and remove the valve body cover (A).
Note:
1. Tightening torque:
- Valve body cover bolts (A): 9.8 - 11.8 Nm.
- Eye bolt (B): 39.2-44.1 Nm.
2. First, unscrew the bolts located in the engine compartment.
3. Replace the eye bolt gasket with a new one.
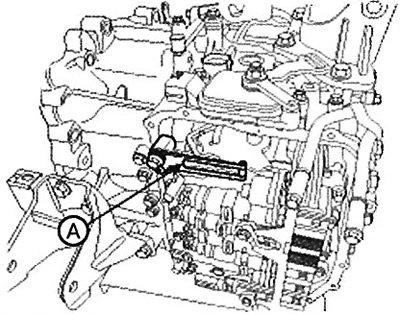
5. Loosen the bolt and remove the plate with the spring (A).
Note: Tightening torque: 24.5 - 35.3 Nm.
6. Disconnect the solenoid valve (B), the oil temperature sensor connector (A), and then remove the three mounting bolts.
Note: Tightening torque: 9.8-11.8 Nm.
The article is borrowed from the website: www.hyundaibook.ru
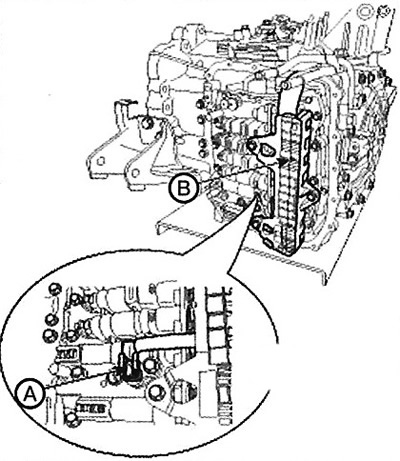
7. Remove the valve body assembly (A).
Note: Tightening torque: 9.8-11.8 Nm.
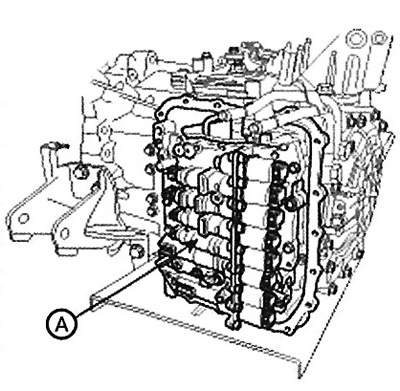
8. Installation is carried out in the reverse order of removal.
Note:
- Apply automatic transmission fluid or petroleum jelly to the O-rings to prevent damage.
- Apply a 2.5 mm bead of Threebond 1281B or LOCTITE FMD-546 sealant to the valve body cover mating surfaces.
- Add oil to the gearbox.