
Contents: Removal ⇓ Installation ⇓
Removal
Attention.
- To avoid damage to painted surfaces, use protective coatings.
- To avoid damage, disconnect the connectors carefully, holding the connector with your hand.
Note: Label all wires and hoses to avoid mistakes when reconnecting. To relieve pressure in the fuel system before removing the engine, start the engine without the fuel pump relay. Then stop the engine with the ignition key.
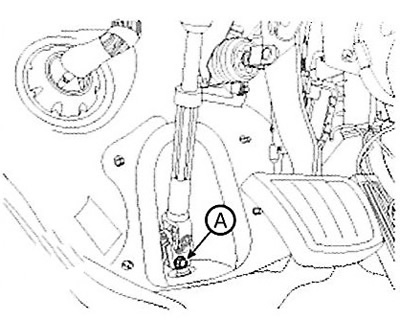
1. Disconnect the cable from the negative terminal (A) of the battery.
Note: Tightening torque: 4.0-6.0 Nm.
2. Remove the engine cover (B).
3. Remove the air duct (C).
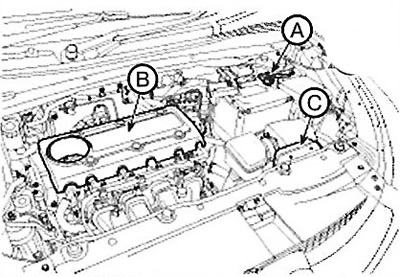
4. Disconnect the breather hose (A), air intake hose (B) and remove the air cleaner assembly (C).
Note:
Tightening torque:
- Hose clamp bolt: 2.9-4.9 Nm.
- Air filter mounting bolts: 7.8-11.8 Nm.
5. Disconnect the positive battery terminal, then remove the battery (D).
Note:
- Tightening torque: 7.8-11.8 Nm.
- Bracket bolt: 9.8-11.8 Nm.
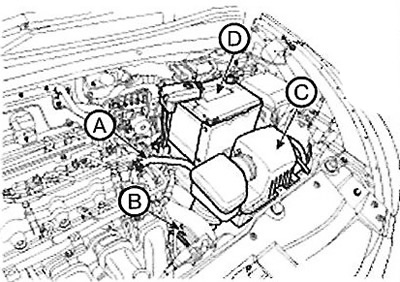
6. Disconnect the engine control module (ECM) connector, then remove the battery pack (A) and battery tray (B).
Note: Tightening torque: 9.8-11.8 Nm.
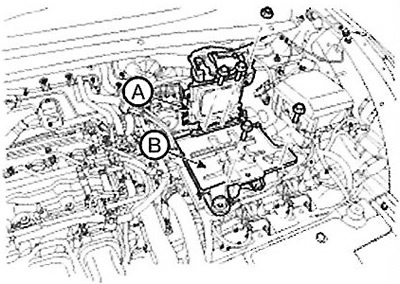
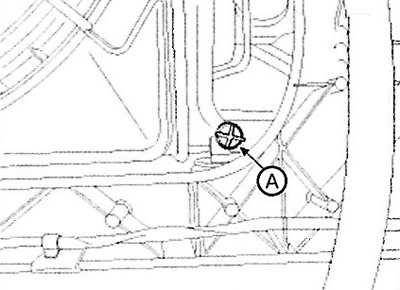
7. Remove the engine protection (A).
Note: Tightening torque: 19.6-24.5 Nm.
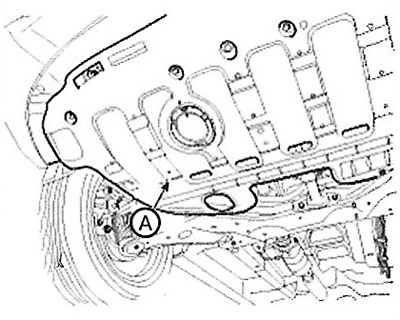
8. Loosen the drain plug (A) and drain the coolant. Remove the radiator cap to speed up the draining process.
Caution: Never remove the radiator cap when the engine is hot. Otherwise, hot fluid may be ejected from the radiator under high pressure, which may cause severe burns.
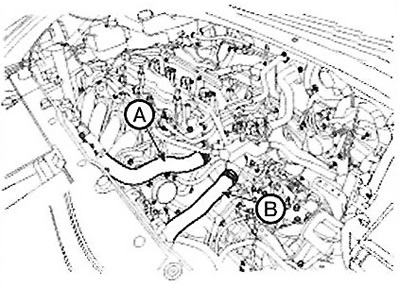
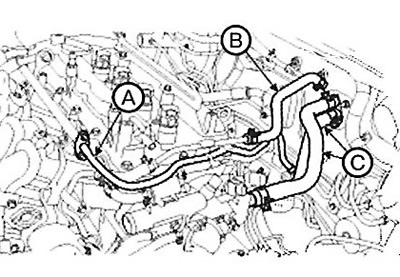
9. Remove the upper (A) and lower (B) radiator hoses.
10. Drain the refrigerant and remove the high and low pressure pipes.
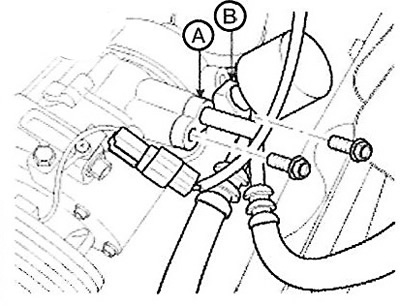
11. Disconnect the positive (+) cable (A) from the fuse block and the front connector (B).
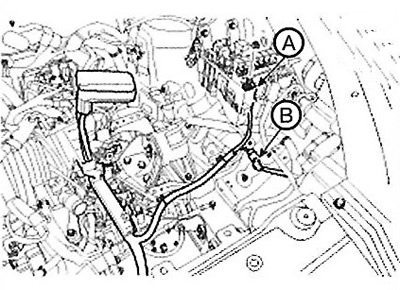
12. Disconnect the connectors and wiring clamps from the engine.
(1) Oil Control Valve (OCV) Connector (A)
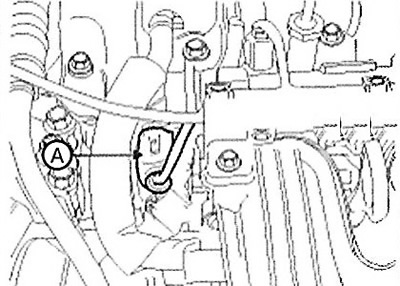
(2) Connector (A) of the variable intake manifold geometry system (VIS).
(3) Oil pressure sensor (B).
(4) Knock sensor connector (C).
(5) Connector (D) of the air conditioning compressor switch.
(6) Generator connector (E).

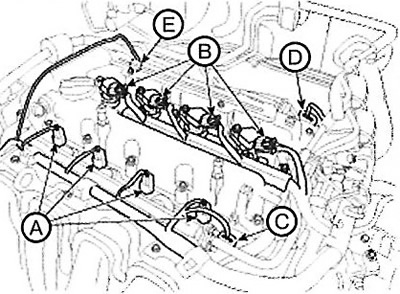
(7) Connectors (A) of injectors.
(8) Ignition coil connectors (B).
(9) Connector (C) of the intake camshaft position sensor.
(10) Connector (D) of intake camshaft position sensor.
(11) Connector (E) of the exhaust oil control valve (OCV).
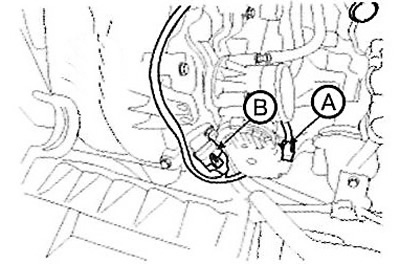
(12) Connector (A) of the electronic throttle control (ETC) system.
(13) Connectors (B) for manifold absolute pressure (MAP) and intake air temperature (IATS) sensors.
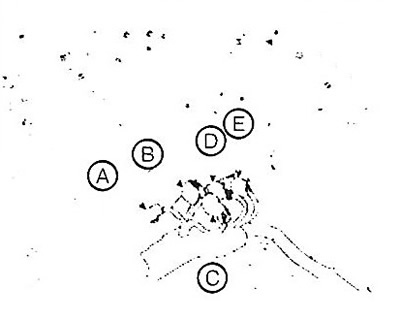
(14) Connector (A) of the purge control solenoid valve (PCSV).
(15) Connector (B) of the coolant temperature sensor (ECTS).
(16) Capacitor connector (C).
(17) Connector (D) of the crankshaft speed sensor.
(18) Oxygen sensor connector (E).
13. Disconnect the wiring harness connectors and the transmission control cable.
14. Remove the front wheels.
15. Remove the shock absorbers, stabilizer rods and steering rod ends.
16. Disconnect the drive shafts from the hubs.
17. Loosen the bolt (A) securing the steering shaft universal joint.
18. Disconnect the power steering return hose to drain the oil. Then remove the hose connecting the power steering pump and the expansion tank.
19. Disconnect the fuel hose (A), brake booster vacuum hose (B) and heater hoses (C).
20. Remove the front muffler (A).
Note: Tightening torque: 39.2-58.8 Nm.
21. Remove bracket A from the rear roller stop.
Notes: Tightening torque: 107.9 - 127.5 Nm.
22. Remove the subframe.
23. Support the engine and gearbox with a jack.
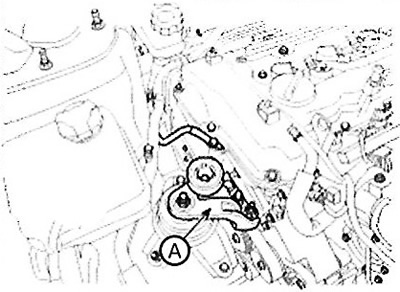
24. Disconnect the ground wire, then remove the engine mounting bracket (A).
Note: Tightening torque: 63.8-83.4 Nm.
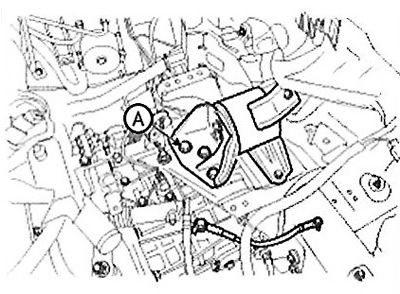
25. Disconnect the ground wire, then remove the transmission support bracket bolt (A).
(The material is reprinted from another resource: «HyundaiBook.ru»)
Note: Tightening torque: 88.3-107.9 Nm.
26. Remove the engine and gearbox assembly by raising the vehicle.
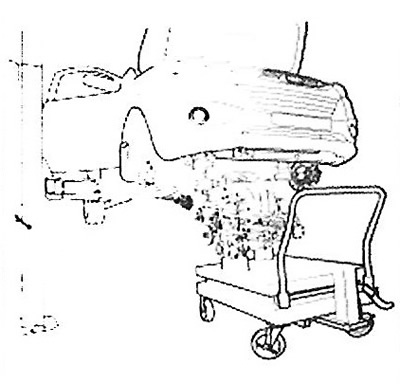
Caution: When removing the engine and transmission assembly, be careful not to damage surrounding components or the body.
Installation
1. Installation is carried out in reverse order.
2. Adjust the gear shift cable.
3. Adjust the throttle control cable.
4. Fill with engine oil.
5. Fill the gearbox with working fluid.
6. Fill the power steering fluid.
7. Fill the radiator and expansion tank with coolant.
8. Set the heater control to the "HOT" (HOT AIR) position.
9. Clean battery terminals and wire clamps before installation.
10. Check for fuel leaks.
11. After assembling the fuel line, turn the ignition switch to the ON position (do not turn on the starter) to allow the fuel pump to operate for about two seconds and create pressure in the fuel line.
12. Repeat this operation two or three times, then check for fuel leaks.
13. Remove air from the cooling system.
14. Start the engine and let it warm up (until the radiator fan comes on 3-4 times).
15. Stop the engine and let it cool. Check the coolant level and top up if necessary. This will remove air from the cooling system.
16. Replace the radiator cap securely, start the engine again and check for leaks.