
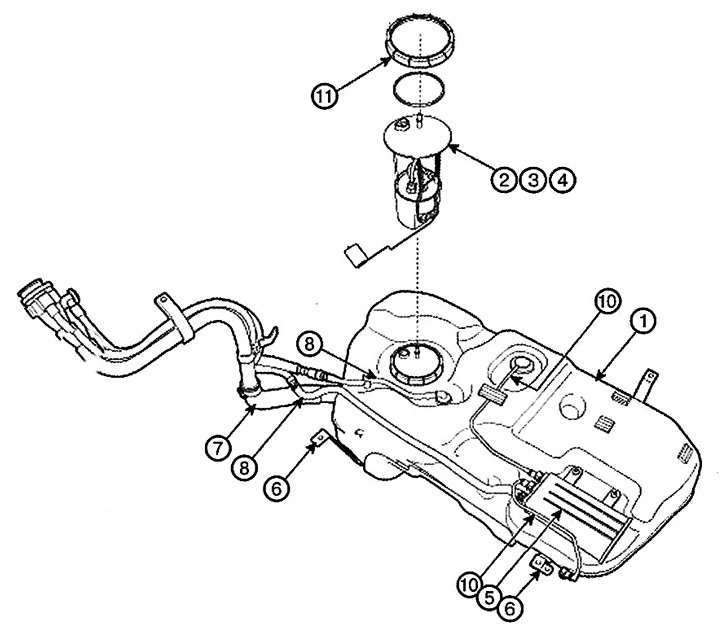
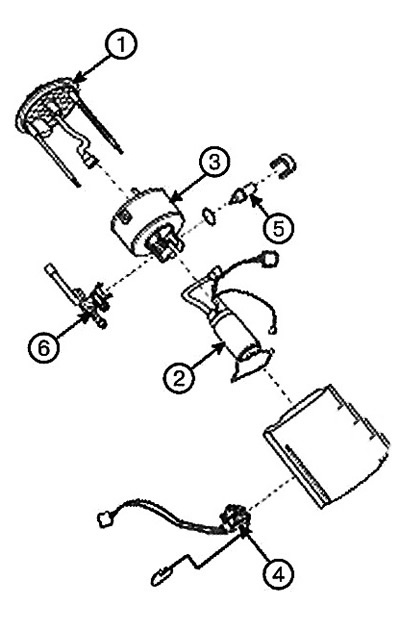
1. Fuel tank
2. Fuel pump
3. Fuel filter
4. Fuel pressure regulator
5. Carbon filter
6. Fuel tank mounting clamp
7. Filler neck hose
8. Breather hose
9. Ventilation hose
10. Steam pipeline
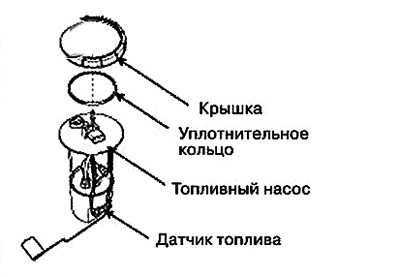
11. Fuel pump cover
Fuel tank
Removal
1. Release any residual pressure in the fuel line (see section "Relief of residual pressure in the fuel line").
2. Remove the rear left seat.
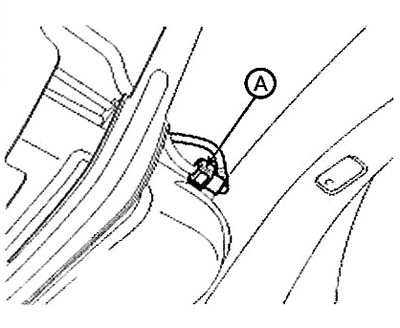
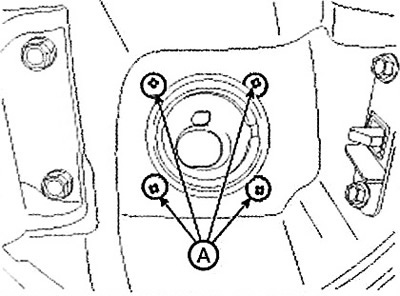
3. Remove the fuel pump servicing hatch (A).
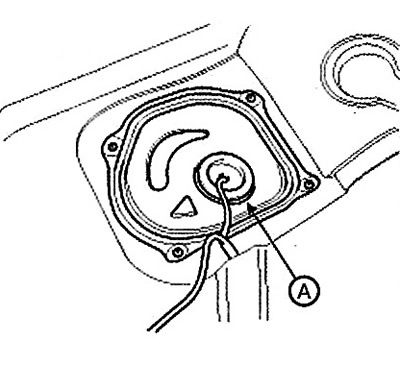
4. Disconnect the fuel pump connector (A).
5. Disconnect the quick-release coupling (B) of the fuel supply line.

6. Remove the rear left wheel.
7. Raise the vehicle and support the fuel tank with a jack.
8. Remove the center muffler assembly.
9. Remove the driveshaft.
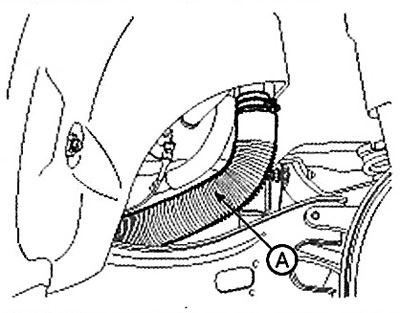
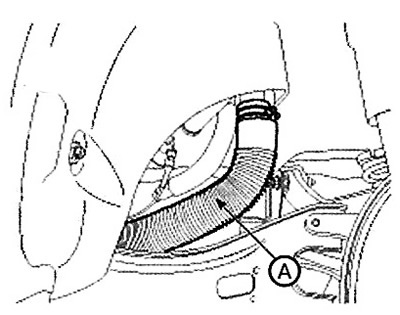
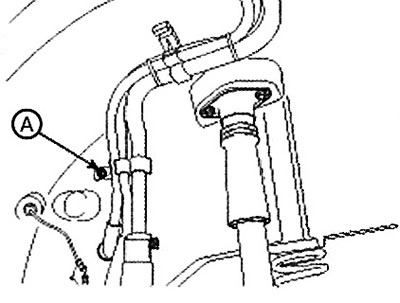
10. Disconnect the filler neck hose (A).
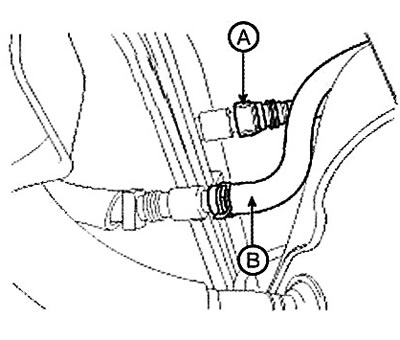
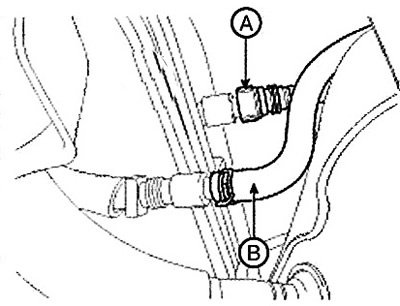
11. Disconnect the quick-release connection (A) of the breather hose and the quick-release connection (B) of the ventilation hose.
12. Disconnect the quick-release coupling (A) of the steam pipe.
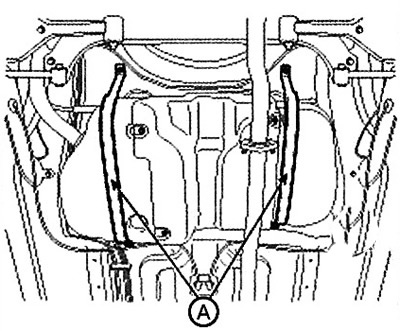
13. Remove the fuel tank mounting strap (A) and the fuel tank.
Installation
Installation is carried out in reverse order.
Note: Tightening torque: Fuel tank clamp mounting nuts: 39.2-54.0 Nm.
Fuel pump
Removal
1. Release residual pressure in the fuel line.
2. Remove the rear left seat.
3. Remove the fuel pump service hatch (A).
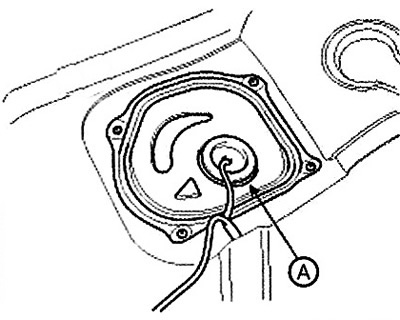
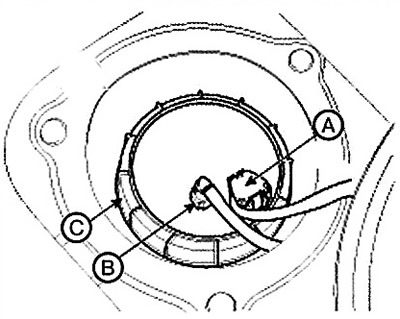
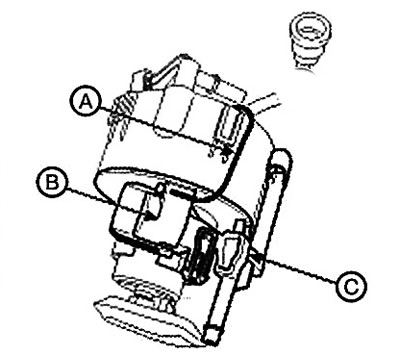
4. Disconnect the fuel pump connector (A).
5. Disconnect the quick-release coupling (B) of the fuel supply line.
6. Remove the cover (C) using the special tool (№: 09310-2S100), then remove the fuel pump from the fuel tank.
 |
 |
Installation
Installation is carried out in reverse order.
Note:
- Fuel pump cover fastening: 58.9 - 68.7 Nm.
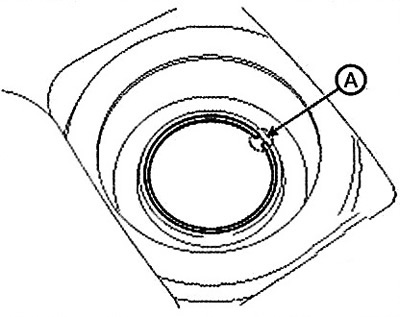
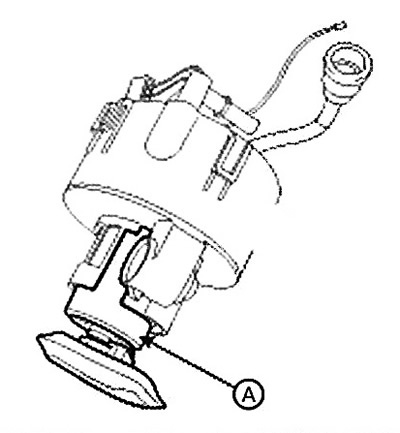
- Ensure that the fuel pump is installed correctly (pay attention to the groove (A) on the fuel tank).
Fuel filter
Replacement
1. Remove the fuel pump.
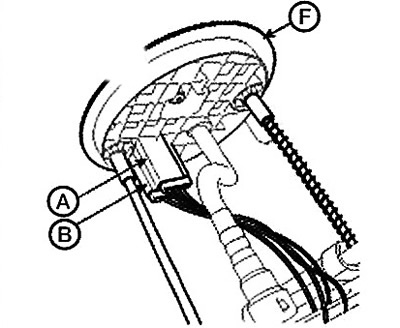
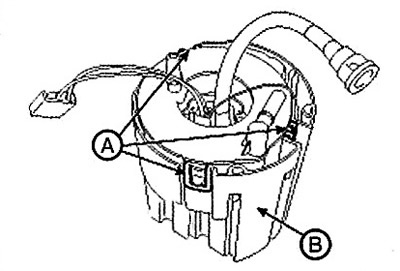
2. Disconnect the electric pump wiring connector (A) and the fuel sensor wiring connector (B).
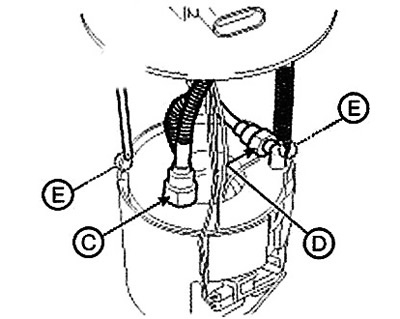
3. Disconnect the quick-release couplings (C, D) of the fuel line.
4. Remove the head (F) assembly by releasing the fasteners (E).
 |
 |
5. Remove the housing (B) by releasing the fasteners.
6. Disconnect the ground wire (A).
7. Release the clamps, remove the fuel pressure regulator (B), then remove the auxiliary pump (C).
Caution: Do not damage the sealing ring.
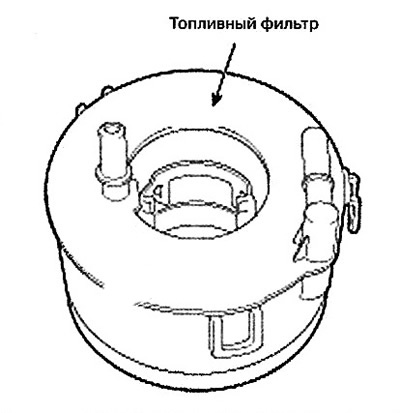
8. Separate the electric pump (A) from the fuel filter.
 |
 |
1. Head assembly
2. Electric pump
3. Fuel filter
4. Fuel sensor
5. Fuel pressure regulator
6. Additional pump
Filler neck assembly
Removal
1. Open the filler cap and remove the screws (A) securing the filler cap assembly.
2. Remove the left rear wheel and wheel arch protection.
3. Disconnect the filler neck hose (A).
4. Disconnect the quick-release coupling (A) of the breather hose and the ventilation hose (B).
5. Loosen the bracket mounting nut (A) and remove the filler neck assembly.
Installation
Installation is carried out in reverse order.
Note: Tightening torque: Filler neck bracket mounting nuts: 3.9 - 5.9 Nm.
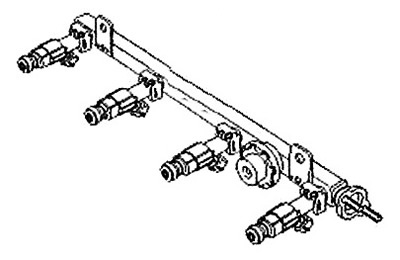
Fuel rail
Removal
1. Turn the ignition key to the OFF position and disconnect the negative (-) cable from the battery.
2. Relieve residual pressure in the fuel line (see section "Relieving residual pressure in the fuel line").
Caution: A diagnostic trouble code (DTC) may be displayed after removing the fuel pump relay. Clear this code using a scanner (GDS) after completing the work to relieve residual pressure in the fuel line.
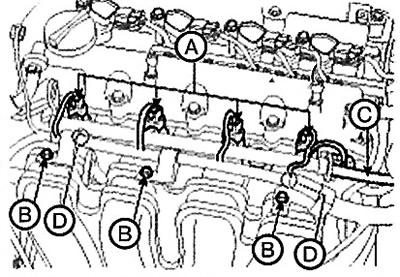
3. Disconnect the injector connector (A).
4. Loosen the mounting bolt (B) of the harness bracket.
5. Loosen the fastening nut and disconnect the fuel supply line (C).
6. Loosen the mounting bolt (D) and remove the fuel rail and injectors as an assembly.
 |
 |
Installation
Installation is carried out in reverse order.
Note: Tightening torque:
- Fuel rail mounting bolt: 18.6 - 23.5 Nm.
- Fuel rail and fuel supply line fastening nut: 7.8 - 9.8 Nm.