
Contents: Petrol engines ⇓ Diesel engines ⇓
Petrol engines
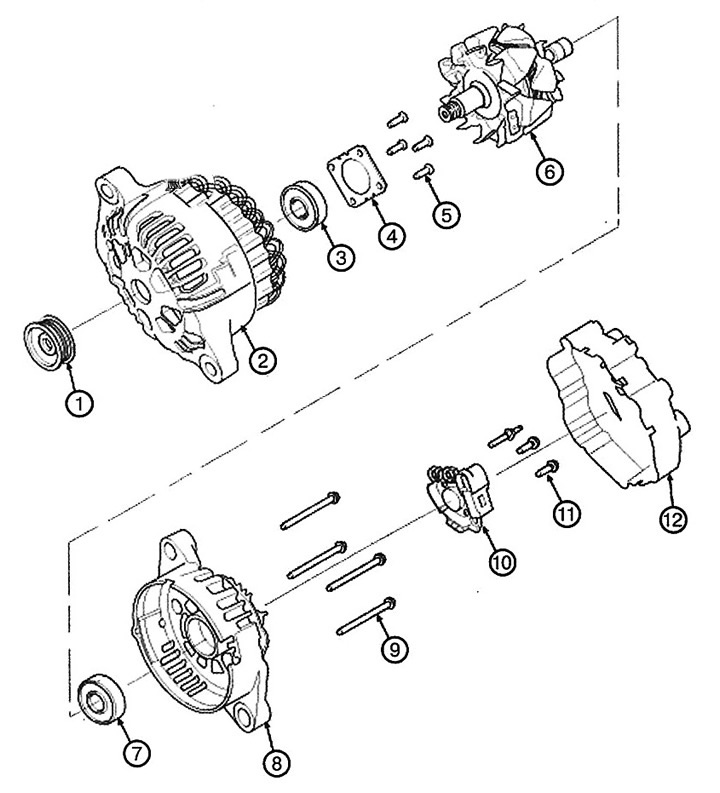
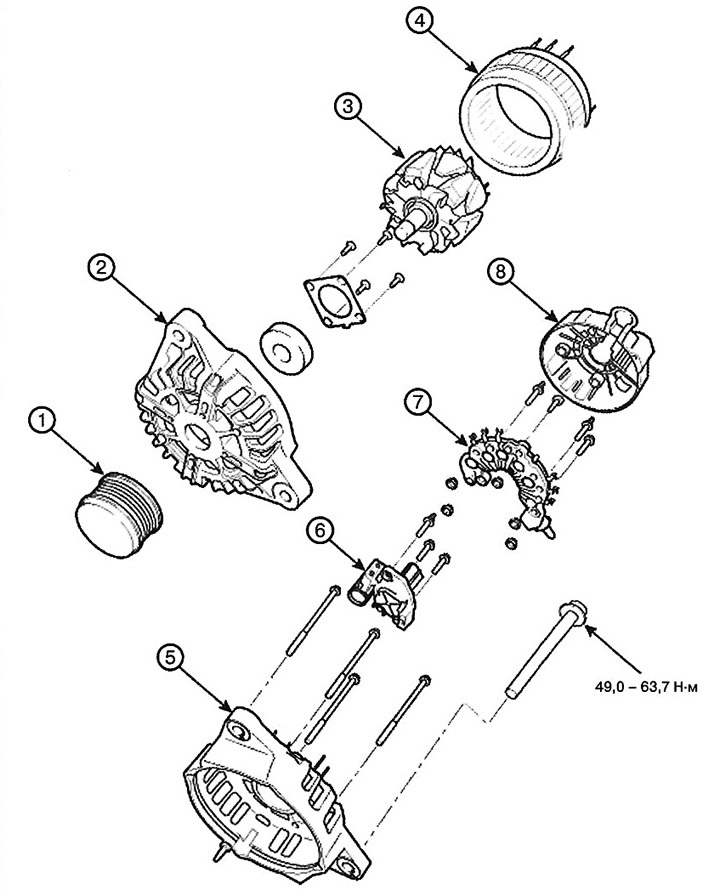
1. Pulley
2. Front body
3. Front bearing
4. Bearing cover
5. Bearing cap bolt
6. Rotor
7. Rear bearing
8. Rear body
9. Tie bolt
10. Brush holder
11. Brush holder bolt
12. Back cover
Replacement
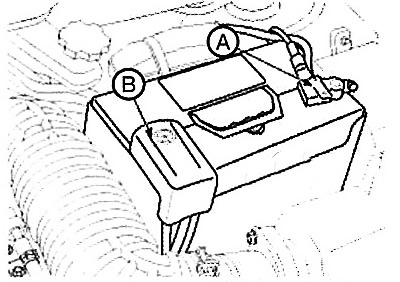
1. Disconnect the negative battery terminal first, then the positive one.
2. Remove the intake manifold.
3. Disconnect the generator connector and remove the cable from the "B" terminal of the generator.
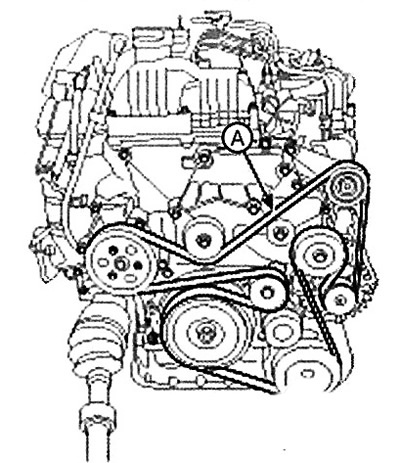
4. Remove the accessory drive belt.
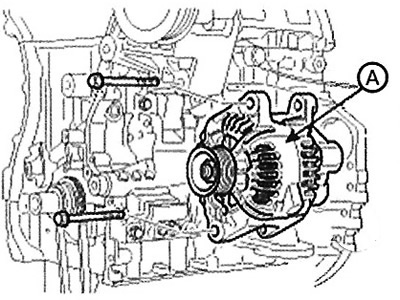
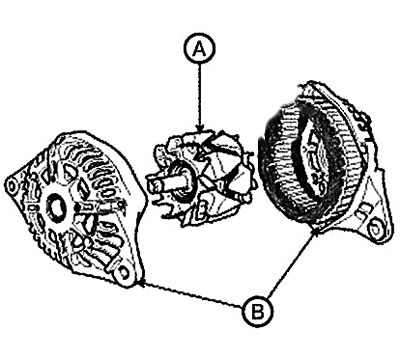
5. Loosen the clamp bolt, then remove the generator (A).
Note: Tightening torque: 49.0-63.7 Nm
6. Installation is carried out in the reverse order of removal.
Disassembly and assembly
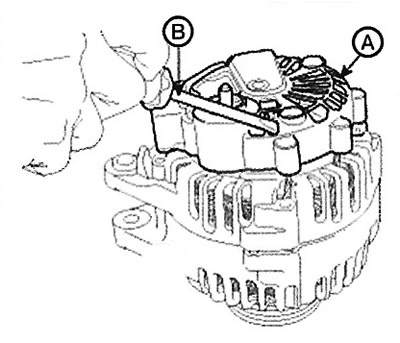
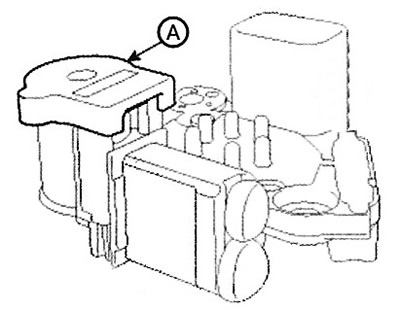
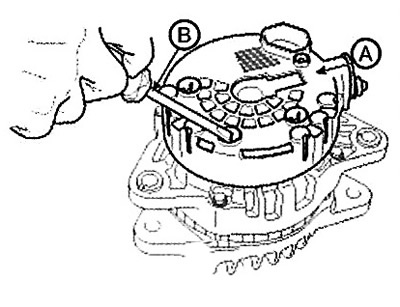
1. Remove the generator cover (A) using a screwdriver (B).
2. Loosen the mounting bolts (A) and detach the brush holder (B).

3. Remove the slip ring guide (A).
4. Loosen the nut and remove the pulley (A).

5. Loosen the four tie bolts (A).

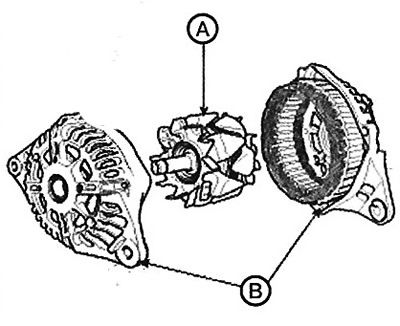
6. Remove the rotor (A) from the housing (B).
7. Assembly is carried out in the reverse order of disassembly.
Checking the technical condition of the rotor
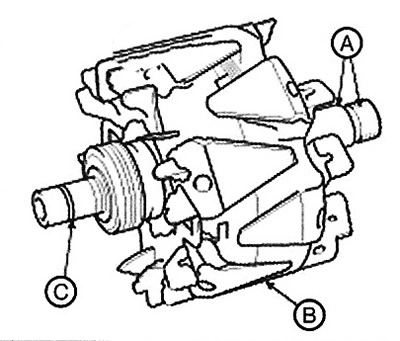
1. Ensure that there is continuity between the slip rings (A).
2. Check that there is no continuity between the slip rings and the rotor (B) or rotor shaft (C).
Checking the technical condition of the stator
1. Check for continuity between the wires (A) of each pair.
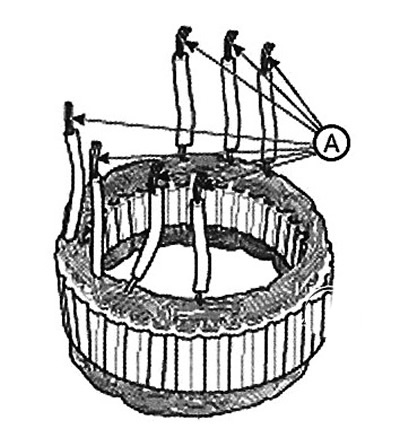
2. Check for continuity between each terminal and the coil core.
3. If any winding continuity test fails, replace the generator with a new one.
Diesel engines
1. Generator inertia pulley (GIP)
2. Front body
3. Rotor
4. Stator
5. Rear housing
6. Regulator assembly
7. Rectifier
8. Back cover
Removal and installation
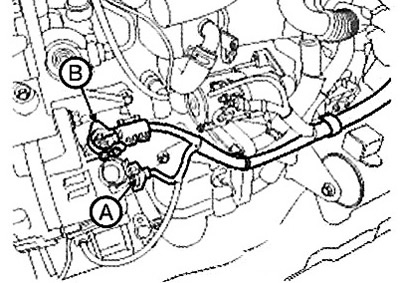
1. First disconnect the negative terminal (A) of the battery, then the positive terminal (B).
2. Remove the accessory drive belt (A) by turning the tensioner adjusting bolt counterclockwise with a socket wrench.
3. Disconnect the generator connector (A) and remove the cable (B) from the generator terminal "B".
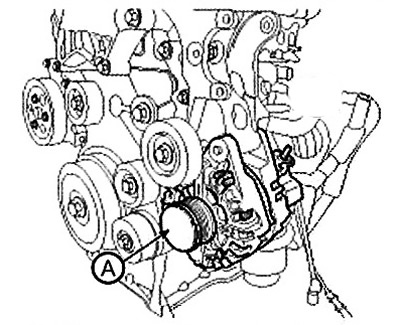
4. Remove the generator (A).
Note: Tightening torque: 49.0 - 63.7 Nm.
5. Installation is carried out in the reverse order of removal.
Disassembly and assembly
1. Remove the generator cover (A) using a screwdriver (B).
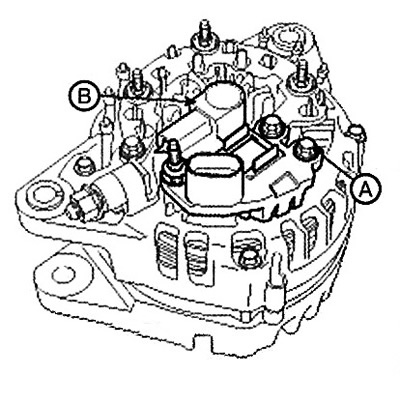
2. Loosen the mounting bolts (A) and remove the regulator (B).
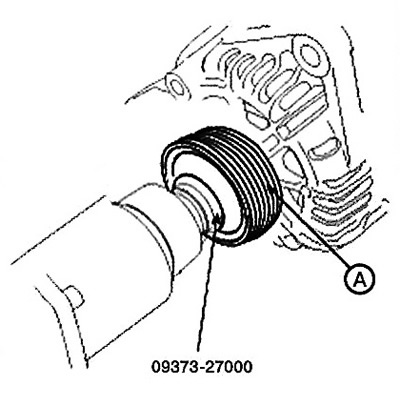
3. Remove the pulley (A) using a special tool.
The original can be found on the resource: HYUNDAIBOOK.ru
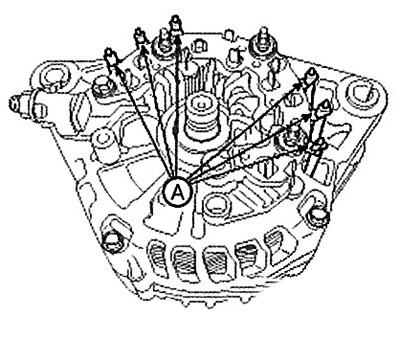
4. Unsolder the stator wires (A).
5. Loosen the tie bolts (A).

6. Remove the rotor (A) from the housing (B).
7. Assembly is carried out in the reverse order of disassembly.
Checking the technical condition of the rotor
The operations are similar to those carried out on gasoline engines.
Checking the technical condition of the stator
The operations are similar to those carried out on gasoline engines.