
Contents: Removal ⇓ Replacement ⇓ Checking the technical condition ⇓ Checking brake pads ⇓ Installation ⇓
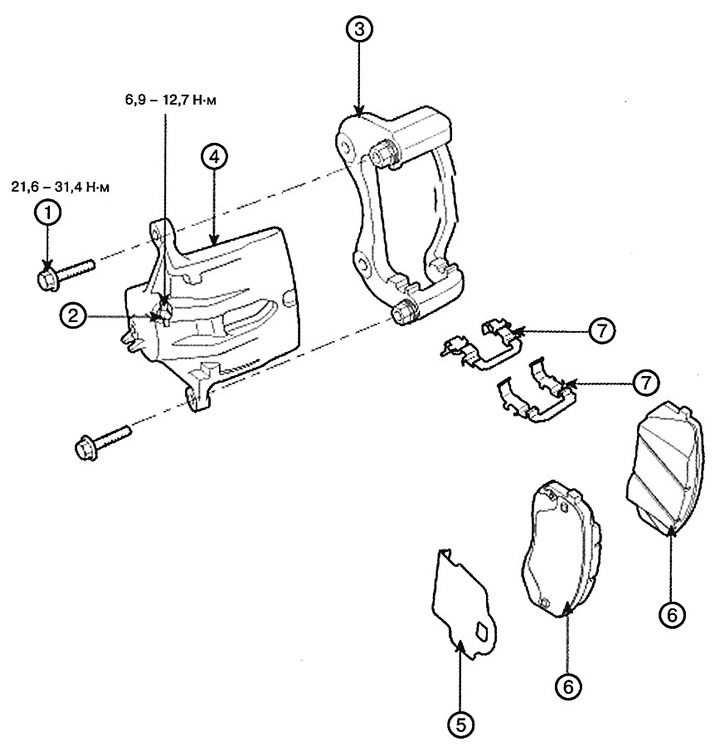
1. Guide rod bolt
2. Bleeding nipple
3. Caliper bracket
4. Support
5. Inner shoe gasket
6. Brake shoe
7. Holder
Removal
1. Remove the front wheel.
Note: Tightening torque: 88.3~107.9Nm.
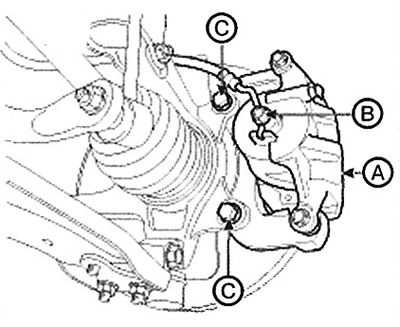
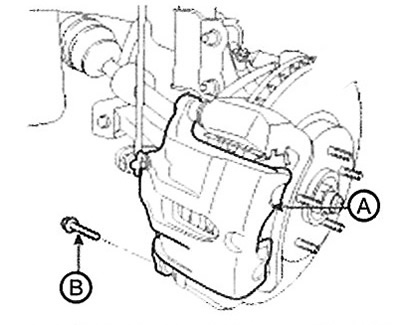
2. Remove the bolt (B) with the hole and the caliper mounting bolts (C), then remove the caliper (A) as an assembly.
Note: Tightening torque:
Brake hose to caliper (B): 24.5 - 29.4 Nm.
Caliper assembly to knuckle (C): 78.5-98.1 Nm.
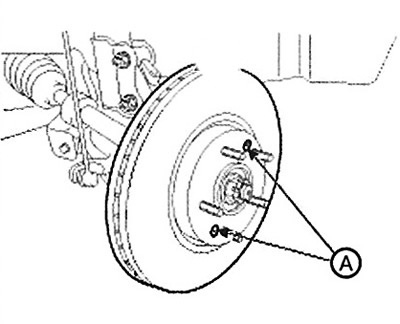
3. Loosen the screws (A) and remove the brake disc.
Replacement
Brake pads
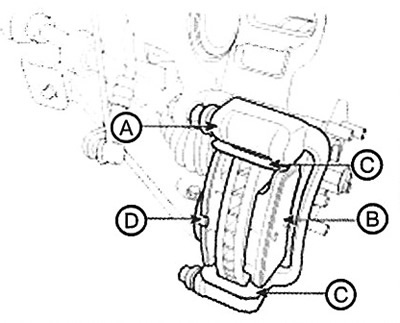
1. Loosen the bolt (A) securing the brake hose bracket.
The original material is located on the website www.hyundaibook.ru
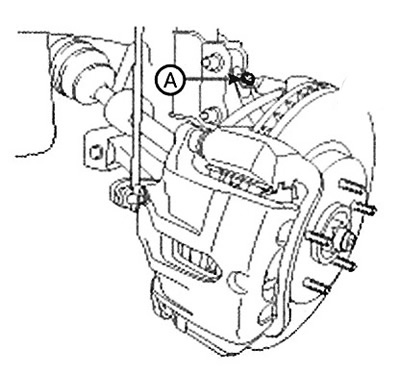
2. Loosen the guide rod bolt (B) and move the caliper (A) upward to the end.
Note: Tightening torque: 21.6 - 31.4 Nm.
3. Install the pad gasket (D), pad holders (C) and brake pads (B) onto the caliper bracket (A).
Checking the technical condition
Checking brake discs
1. Check the wear and condition of the brake pads.
2. Inspect the brake disc for cracks and other damage.
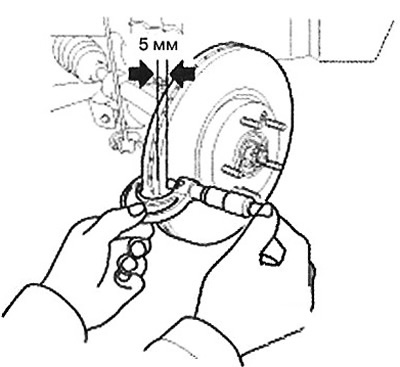
3. Clean the surface from rust and dirt and measure the thickness of the disc at least in eight points at the same distance (5 mm) from the outer circumference.
Note:
Brake disc thickness:
2WD:
- Standard value: 26 mm.
- Maximum permissible value: 24.4 mm.
4WD:
- Standard value: 28 mm.
- Maximum permissible value: 26.4 mm.
Deviation: less than 0.005 mm.
4. If the wear exceeds the limit, replace the discs and pads as a set on the left and right sides of the vehicle.
Checking brake pads
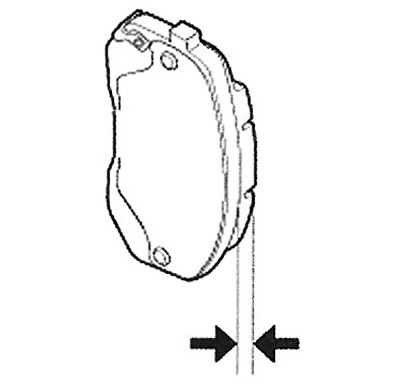
1. Check the brake pads for wear. Measure the pad thickness and replace it if the thickness is less than the specified value.
Note:
Brake pad thickness:
- Standard value: 11mm.
- Maximum permissible value: 2.0 mm.
2. Check for grease at the sliding contact points and check the brake pad, including its back side, for damage.
Checking the runout of brake discs
1. Place a dial indicator approximately 5 mm from the outer edge of the brake disc and measure the disc runout.
Note: Brake disc runout: Limit value: 0.025 mm or less (for new disc).
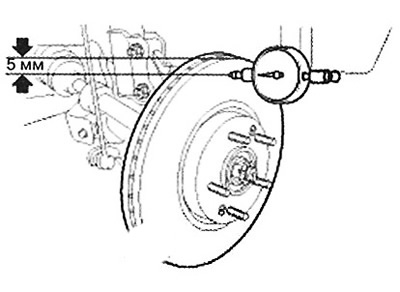
2. If the brake disc runout exceeds the specified limits, reinstall the disc and repeat the measurement.
3. If the runout does not exceed the specified limits, rotate the disc 180° and repeat the measurement.
4. If it is not possible to correct the runout by changing the position of the brake disc, replace the disc.
Installation
1. Installation is carried out in reverse order.
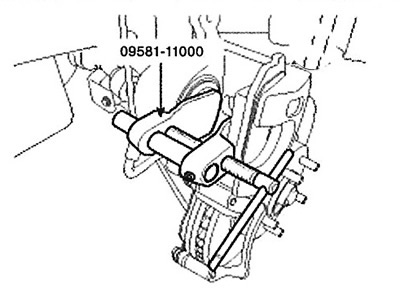
2. Use a special tool to install the caliper assembly (09581-11000).
3. After installation, bleed the brake system.