
Parking brake shoe (2WD)
1. Install the drive arm (E) assembled.
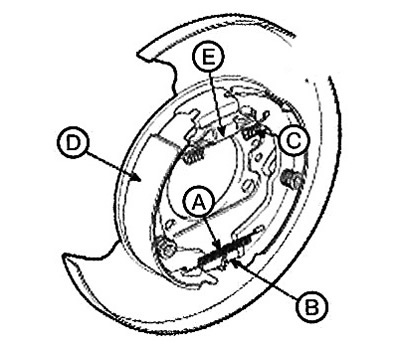
2. Install the top return spring (WITH) and brake pads (D).
3. Install the regulator (IN) assembly and lower return spring (A).
4. Install the clamp pin (A) pads and spring (IN) by squeezing and rotating the spring.

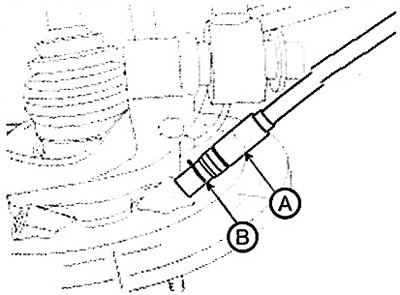
5. Install cable (IN) parking brake actuator and lock (A).
6. Install the brake disc and set the required pad clearance.
(1) Remove the drive blank.
(2) Rotate the governor gear with a screwdriver until the disc stops moving. Then turn the gear 4 teeth in the opposite direction.
7. Install the caliper assembly.
8. Install the plug on the disc and then install the wheel on the car.
9. In the case of replacing the parking brake pad or brake disc with new parts, it is necessary to grind the pad.
(1) Foot type parking brake - depressing the brake pedal with a force of 68.6 N, drive 500 m at a speed of 30 km / h.
Hand-type parking brake - while moving the parking brake lever with a force of 147 N, drive 500 m at a speed of 30 km/h.
(2) Repeat the above steps more than three times.
(3) The vehicle must be kept on a 20% hill.
Attention.
After adjusting the parking brake, check the following.
1. The parking brake must function properly when the parking brake pedal is depressed with a force of 686.5 N and the parking brake lever is pulled with a force of 196 N.
2. Make sure all parts move smoothly.
3. The parking brake indicator should come on when the parking brake is applied and go out when the parking brake is released.
Parking brake shoe (4WD)
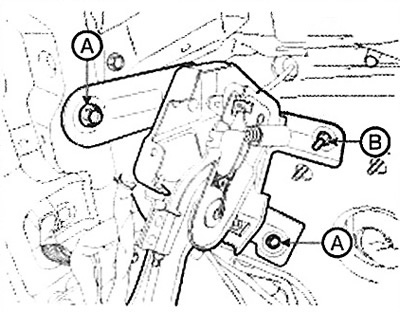
1. Install the brake shoe (A) on the base plate (IN).
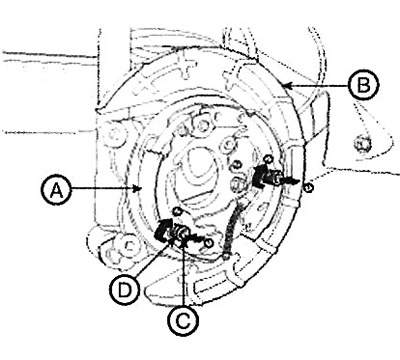
2. Install clamp pin (WITH) with retaining spring (D), squeezing the springs and rotating the pins.
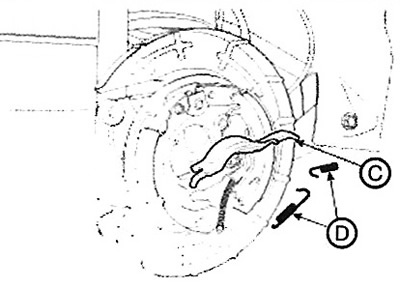
3. Install spacer (A) and upper return spring (IN), then the controller (WITH) assembly and lower return spring (D).
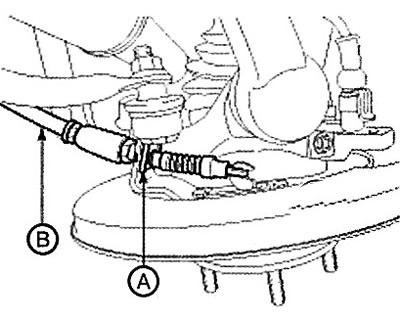
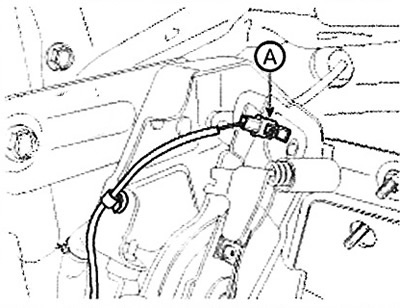
4. Install the cable (A) parking brake actuator and its stopper (IN).
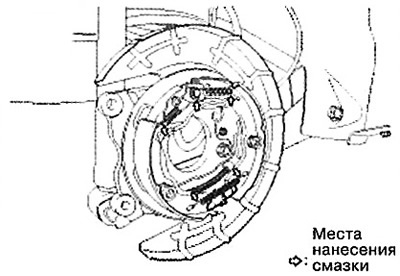
5. Apply recommended lubricant to all parking brake sliding parts (see picture).
Note: Recommended lubricant: SAE J310 Multipurpose Grease, NLGIM2.
6. Install the brake disc and adjust the pad clearance to the required value.
(1) Remove the drive blank.
(2) Rotate the governor gear with a screwdriver until the disc stops moving. Then turn the gear 4 teeth in the opposite direction.
7. Install the brake caliper.
8. Install the wheel.
9. In the case of replacing the parking brake pad or brake disc with new parts, it is necessary to grind the pad. (See Operations for 2WD).
Attention. After adjusting the parking brake, check the following.
1. The parking brake must function properly when the parking brake pedal is depressed with a force of 686.5 N and the parking brake lever is pulled with a force of 196 N.
2. Make sure all parts move smoothly.
3. The parking brake indicator should come on when the parking brake is applied and go out when the parking brake is released.
Parking brake lever (manual type)
1. Install the parking brake lever assembly and tighten the bolts (A) mounts.
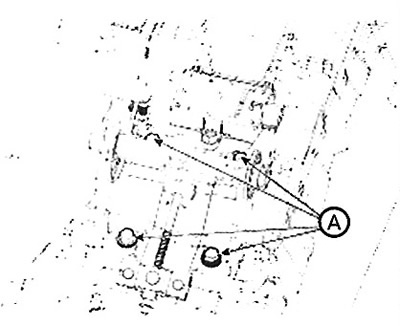
2. Apply recommended lubricant to all sliding parts (A) ratchet and doggie.
Note: Recommended lubrication: SAE J310 Multipurpose Grease, NLGI No. 2.

3. Install the parking brake cable adjuster and adjust the lever travel.
4. Fully release the parking brake lever and make sure that the parking brakes do not rub against the spinning rear wheels. Adjust again if necessary.
5. When the lever is fully extended, the parking brake should be applied to the maximum.
6. Connect the parking brake switch connector.
Note:
Check the parking brake switch for continuity.
With the lever pulled out: the circuit is closed.
Lever released: circuit open.
7. Install the floor console.
Parking brake pedal (foot type)
1. Install the parking brake cable.
2. Fix the parking brake cable and install the retaining clip (IN) and adjusting nut (A) cable.
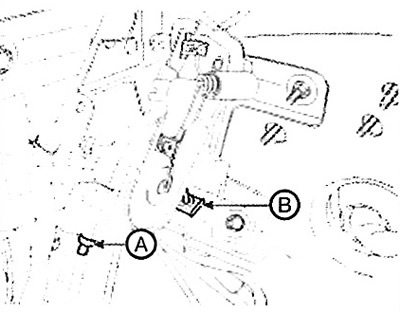
3. Install the parking brake pedal and tighten its bolts (A) and a nut (IN).
4. Adjust the travel of the parking brake pedal by turning the adjusting nut (A).
5. Connect the connector (A) parking brake switch.
6. Install the distribution block.
7. Install the bottom of the dashboard.