
Removal
1. Disconnect the pressure hose from the pump.
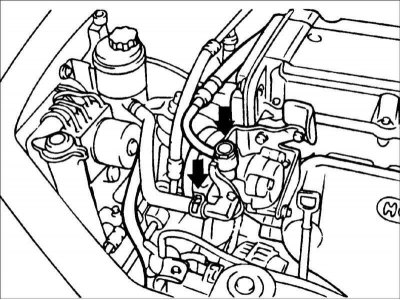
2. Disconnect the suction filter from the suction connector and drain the liquid into a container.
3. Loosen the pump mounting bolts and remove the drive belt.
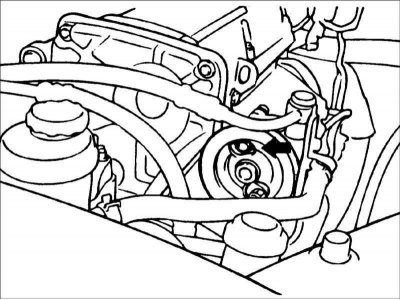
4. Remove the belt tension adjustment bolt.
5. Remove the drive belt from the power steering pump pulley.
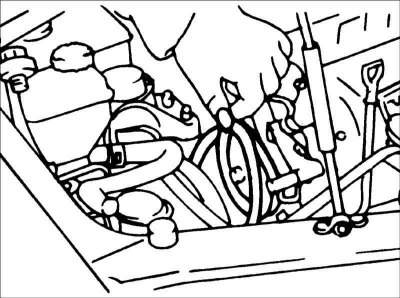
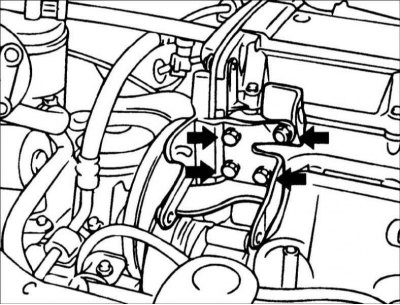
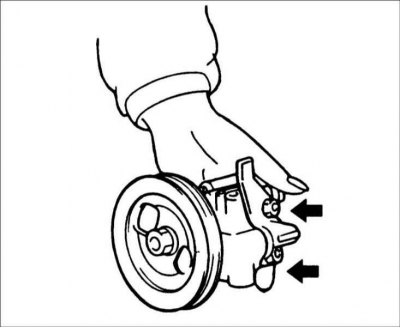
6. Remove the pump mounting bolts and the belt tension adjustment bolt.
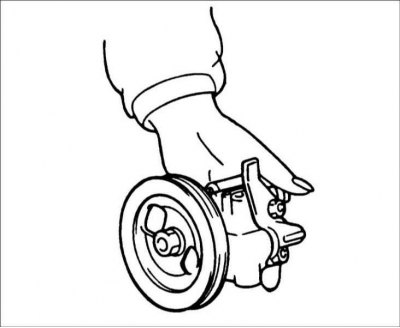
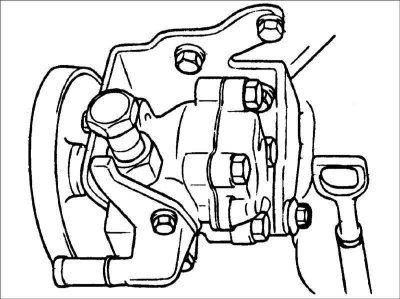
7. Remove the power steering pump.
Caution: Be careful as liquid will leak from the pump.
8. Remove the power steering pump bracket.
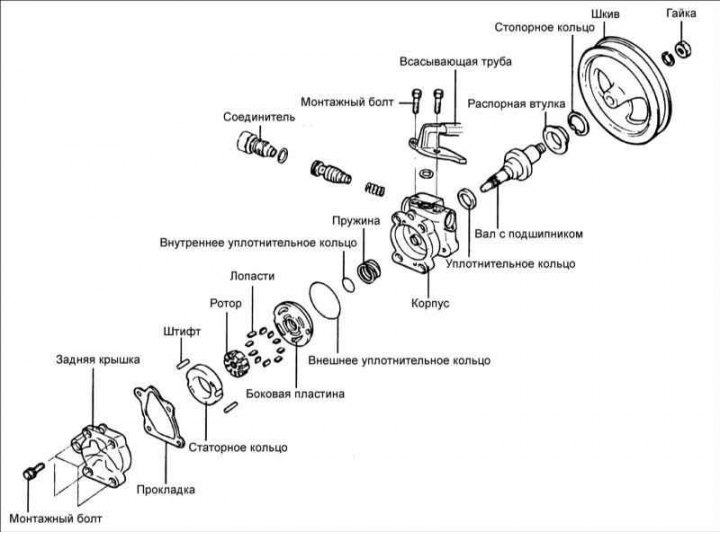
Disassembly
1. Remove the suction pipe and sealing ring from the pump.
2. Remove the four bolts and remove the back cover with the gasket and pins.
3. Remove the stator ring.
4. Remove the rotor and blades.
5. Remove the front side plate.
6. Remove the inner and outer sealing rings.
7. Remove the spring.
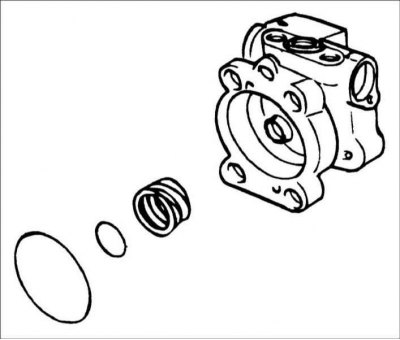
Caution! When assembling, it is necessary to use a new gasket and sealing ring.
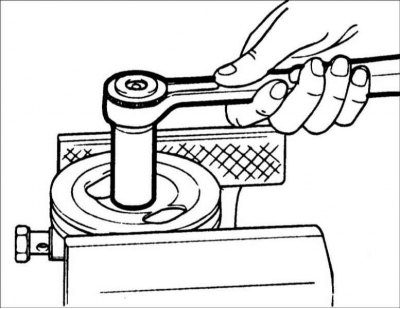
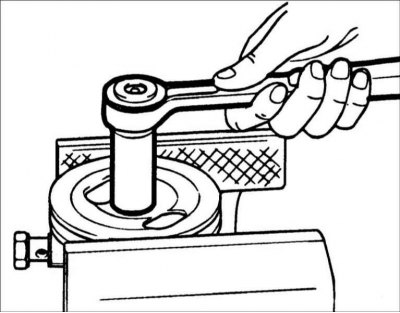
8. Secure the pulley in a vice, unscrew the pulley mounting nut and remove the spring washer.
9. Remove the pulley and woodruff key.
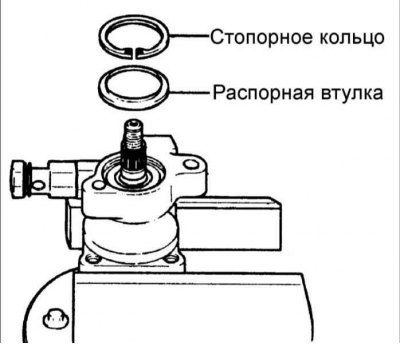
10. Using special pliers, remove the retaining ring and spacer sleeve.
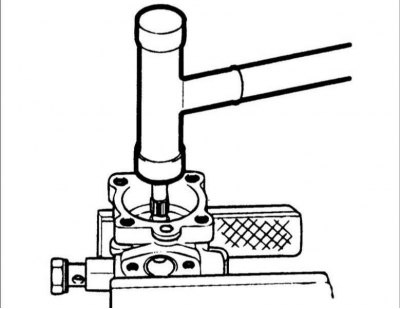
11. Press out the pulley shaft with the bearing. Use a nylon hammer if necessary.
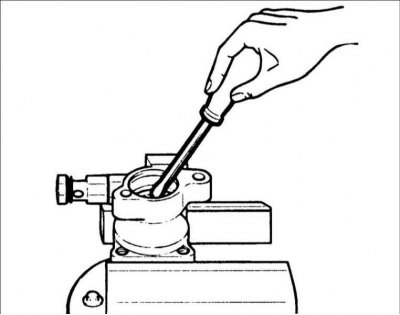
12. Remove the sealing ring from the pump body.
Caution: A new sealing ring must be used during assembly.
13. Disconnect the connector from the oil pump housing and remove the valve and spring.
14. Remove the sealing ring from the connector.
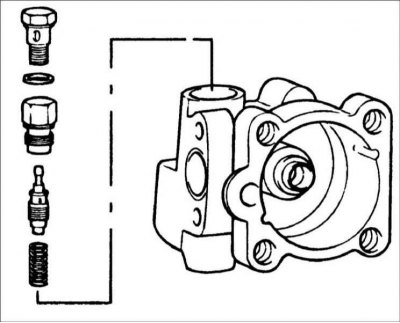
Warning! Do not disassemble the check valve.
Examination
1. Measure the length of the check valve spring in its free state. Free spring length: 36.5 mm.
2. Make sure the check valve is not bent.
3. Check the shaft for wear and damage.
4. Check the drive belt for wear and loss of properties.
5. Check the rotor grooves and blades for wear.
6. Check the contact surface of the stator ring and blades for wear.
7. Check the blades for damage.
8. Check the side plate and the contact surface of the shaft and pump cover for wear.
Assembly
1. Install the check valve spring, valve and connector into the pump body.
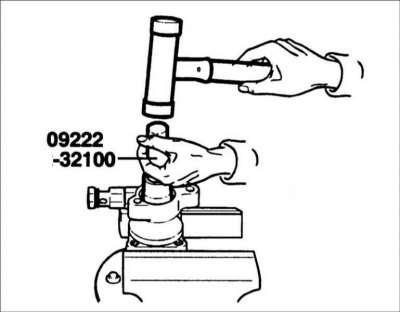
2. Using special tool 09222–32100, install the oil seal into the pump body.
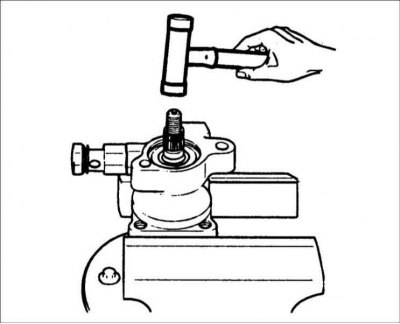
3. Gently insert the shaft assembly and install the spacer sleeve and snap ring.
 |
 |
4. Install the pump pulley with the woodruff key.
5. Install the spring and inner sealing ring.
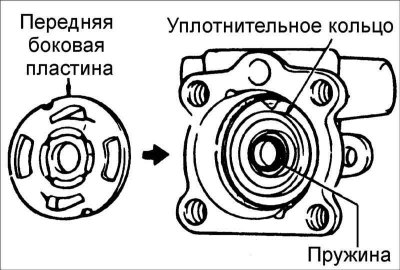
6. Install the outer seal ring into the side plate and install the front side plate.
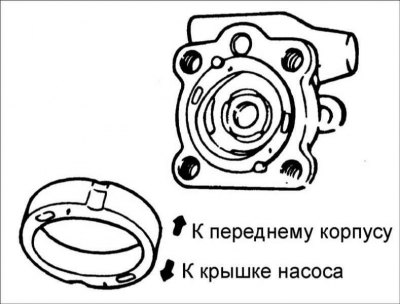
7. Insert the pins into the recesses of the front housing, then install the stator ring, paying attention to the direction of its installation.
8. Install the rotor so that the marks on the rotor are located on the side opposite the front of the housing.
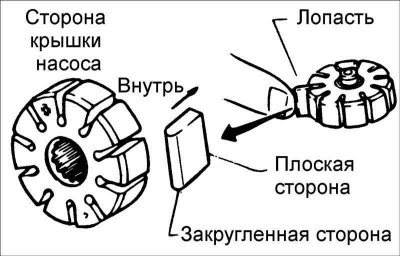
9. Install the blades with the rounded parts facing outward.
10. Install the gasket and pump cover.
11. Install the suction pipe and sealing ring.
Installation
1. Install the pump on the bracket, place the drive belt on the pulleys and tighten the belt tension adjustment bolt. Tightening torque: 3.5–10 Nm.
2. Install the suction filter.
3. Connect the pressure hose to the pump.
Caution: Install the pressure hose so that it is not kinked or comes into contact with any other parts.
4. Pour in the liquid. Recommended fluid: PSF–3.
5. Bleed the power steering hydraulic drive.
6. Check the pressure generated by the pump.