
Place the cylinder head on a workbench with two pieces of wood underneath.
Clean all valves from carbon deposits.
Apply coarse carborundum paste to the valve seat chamfer.
With the valve clamped in the tool, press the valve head against the seat, occasionally lifting the valve to redistribute the paste.
Install the valve into the guide bushing and press the valve disc against the seat.
Measure the dimension from the seating surface of the valve spring seat (plate) to the end of the valve stem. If the measured value exceeds the required value, replace the valve seat. To do this:
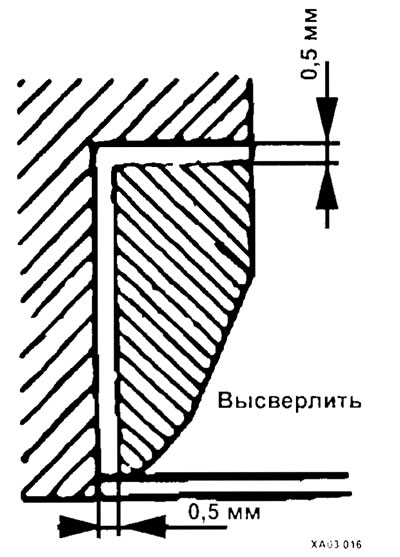
Drill out the valve seat, leaving the seat walls 0.5-1 mm thick.
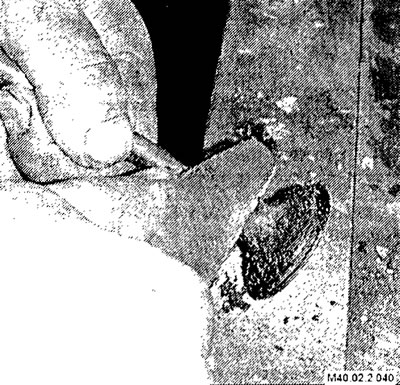
Press out the valve seat.
Drill out the socket to install a repair size seat (D+0.3 mm), where D is the diameter of the hole in the old seat.
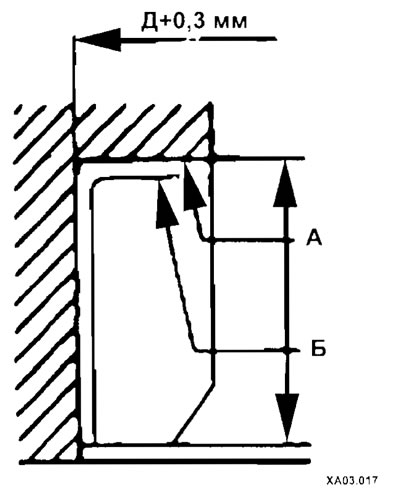
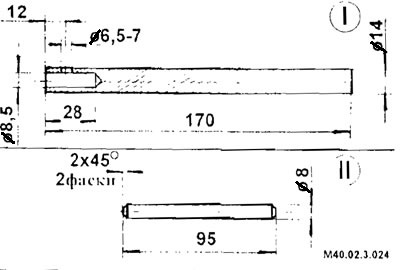
A - surface of the new hole;
B - surface of the old hole.
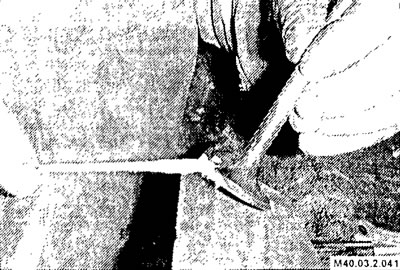
After heating the cylinder head to 250°C or cooling the seats, press the seats into the cylinder head.
Adjust the valve seat dimensions to the required size.
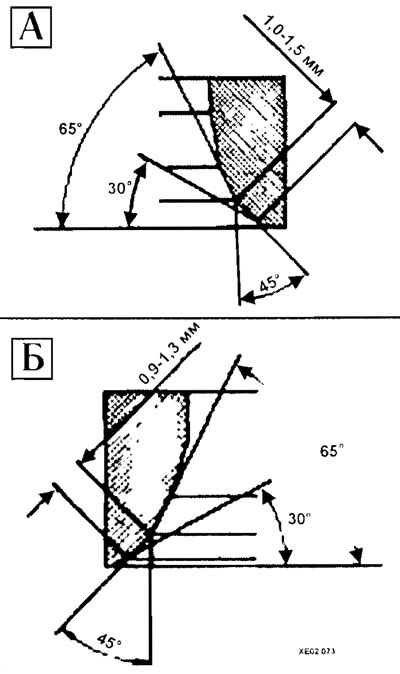
Dimensions of seats (A) - exhaust and (B) - intake valves
Valve lapping tool with collet clamp
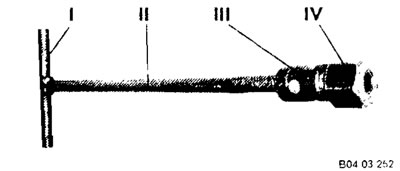
General view of the device
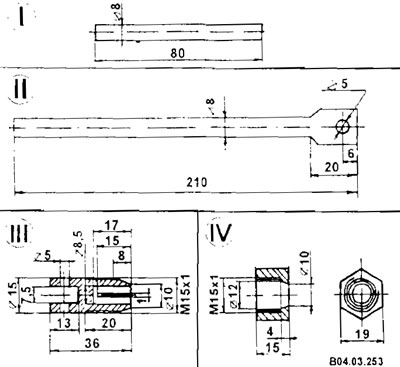
Detailing of the device
A valve lapping device that you can make yourself
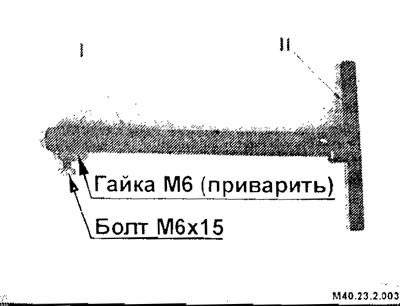
General view of the device
Detailing of the device
When a matte strip appears on the valve and seat, wash off the remaining paste and repeat the same procedure with fine carborundum paste.
When a continuous light grey matte ring 1.1-1.4 mm wide appears on the valve and seat, lapping is complete.
A grinding machine can be used to grind the working chamfers of the valves. To do this, it is necessary to install a valve on the grinding machine and fix the movable support so as to obtain the required chamfer angle.
Carefully clean off all traces of abrasive, being especially careful not to get any into the valve guides. Wipe the valves and valve seats with a rag soaked in kerosene, then with a clean rag, and finally, if possible, blow with compressed air.
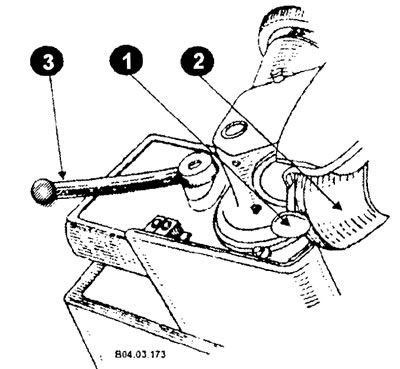
1 - valve;
2 - grinding wheel;
3 - lever.