
Contents: Examination ⇓ Replacing engine mounts ⇓
Engine mounts rarely require attention, however, broken or damaged mounts should be replaced immediately, otherwise the increased stress placed on engine components may cause rapid wear or damage.
Examination
During the inspection, the engine should be raised slightly to remove the weight from the brackets.
Raise the vehicle and support it securely on jack stands, then place a jack under the engine crankcase. Place a large block of wood between the crankcase and the jack, then raise the engine slightly to take the weight off the brackets.
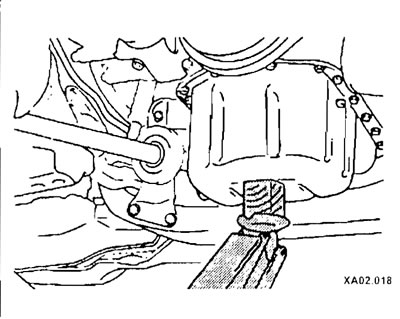
Caution: Do not stand under the engine when its weight is supported only by the jack!
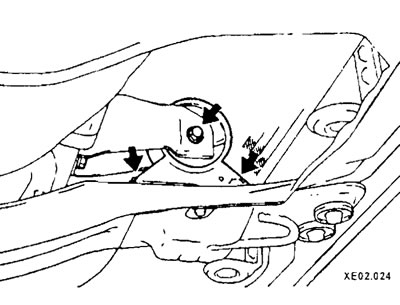
Check the rubber bracket supports to see if the rubber is cracked, hardened, or separating from the metal parts. Sometimes the rubber breaks right down the center.
Check for relative movement between the bracket plates and the engine or frame (use a large screwdriver or pry bar to try to move the brackets). If movement is detected, lower the engine and tighten the bracket bolts.
A protective compound should be applied to the rubber bearings to prevent the rubber from deteriorating.
Replacing engine mounts
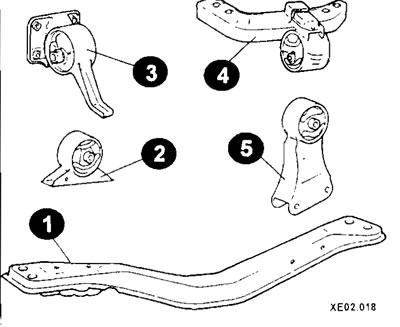
Engine mounts
1 - central beam;
2 - front support;
3 - rear support;
4 - right support;
5 - left support.
Disconnect the negative battery cable, then jack up the vehicle and support it securely on jack stands (if it hasn't been done yet).
Unscrew the bolts and nuts, detach the bracket from the central beam.
Raise the engine slightly with a jack or winch. Loosen the bolts between the supports and the engine, remove the supports.
Installation is carried out by performing the above steps in reverse order. Use a special hardening compound on the threads of the bracket bolts and tighten these bolts securely.
(This publication is based on information from the portal: «HYUNDAIBOOK»)
Remember that the front and rear hubs are different shapes.
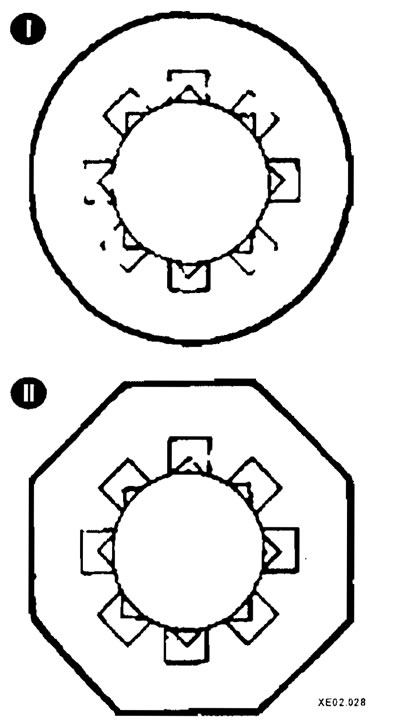
I - front hub;
II - rear hub.