
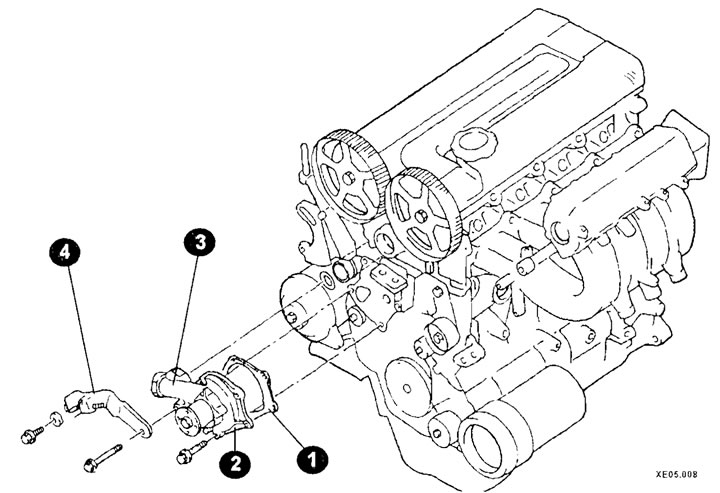
Mounting elements of the coolant pump for 1.6 l and 1.8 l engines
1 - gasket;
2 - coolant pump;
3 - branch pipe with seal;
4 - bracket.
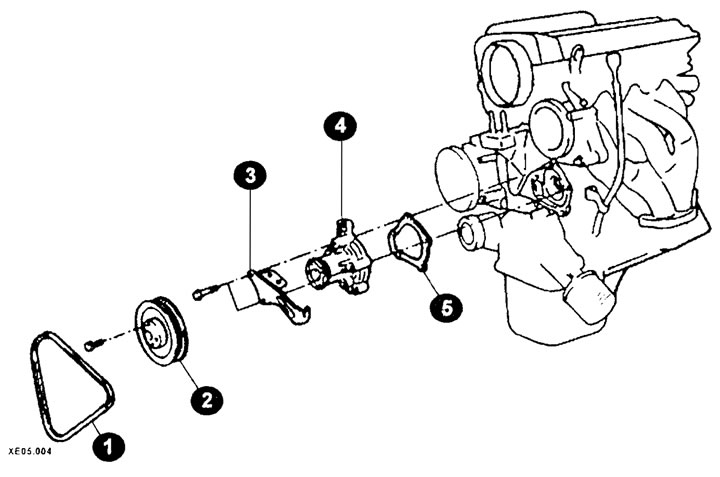
Mounting elements of the coolant pump for 1.8 l and 2.0 l engines (since 2002)
1 - coolant pump drive belt;
2 - pulley;
3 - generator plate;
4 - coolant pump;
5 - gasket.
Removal
Place the vehicle on a lift or overpass or use an inspection pit.
Drain the coolant into a special container.
Remove the front timing belt cover.
Remove the alternator drive belt, as well as the power steering and air conditioning compressor drive belts.
Remove the crankshaft pulley after unscrewing the mounting bolt.
Set the gearshift lever to neutral position.
Turn the crankshaft clockwise until the timing marks on the timing belt are aligned (see the relevant section).
After loosening the tension roller axle nut, remove the camshaft drive toothed belt,
Holding the gear wheel from turning and unscrewing the mounting bolts, remove the camshaft gear wheels (if necessary).
"Unload" the engine by jacking it up and removing the front engine mounting brackets.
Release the jack and lower the engine as low as possible.
Loosen the bolts securing the rear timing belt cover.
After unscrewing the mounting bolts, remove the generator and power steering brackets (if necessary).
After unscrewing the mounting bolts, remove the coolant pump from the cylinder block.
Examination
Clean all parts and check them carefully for damage or signs of wear. If necessary, replace the pump parts or the entire pump with a new one.
Check the coolant pump impeller/bearing axial play. The clearance should not exceed 0.15 mm.
If the clearance value exceeds the permissible value, replace the pump with a new one.
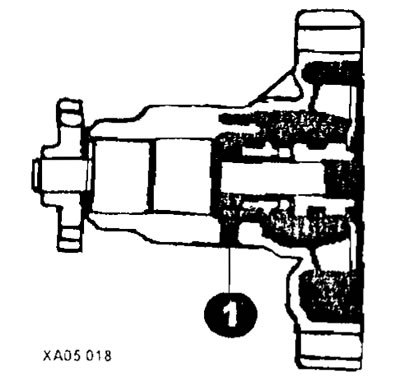
Check for moisture in the hole (1).
Installation
Place the sealing gasket or seal on the pump body (if provided) cover with a thin layer of sealant.
Install the coolant pump into the engine block in the reverse order of removal.