
Contents: Removal ⇓ Installation ⇓
Removing the capacitor is not particularly difficult, although some of the bolts are difficult to access. After installing the condenser in place, sometimes problems with the normal operation of the air conditioner arise. To avoid such problems you should:
Get rid of dirt and moisture. The disconnected line must be immediately plugged and sealed with sealant.
Handle tubes and hoses with extreme care. Any bend or kinking will reduce the performance of the system. Do not attempt to straighten a bent tube. It needs to be replaced.
If the pipe fitting has two ends for keys, hold one end while you loosen the nut on the other end. The tubes are made of lightweight material and are easy to bend.
If the system is depressurized, fittings should be loosened carefully and attention should be paid to the presence of residual pressure. Slowly release the pressure and then remove the tubes or hoses.
Most connections or fittings include small O-ring seals. Before connecting the line, this ring must be replaced. Check the sealing ring for scratches or nicks.
The fittings must be reinstalled very carefully and tightened to the appropriate torque. Tightening too tightly will damage the threads, while tightening too loosely will result in leaks.
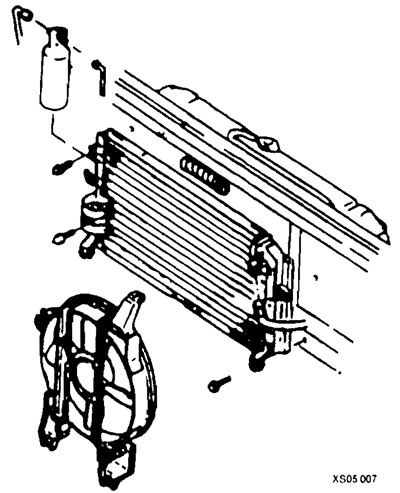
Condenser mounting elements
Removal
Disconnect and remove the battery cable.
Carefully release pressure from the air conditioner.
If the condenser fan is installed in front of the condenser, remove the fan. When removing the fan, be aware of any other tubes, hoses or brackets that are attached to the fan housing. They can be loosened or rearranged as needed.
Label and disconnect both lines going to the capacitor. If it is necessary to remove the line, disconnect the other end of the tube and remove the line. Do not bend the tube to provide access to the work area.
Loosen the capacitor mounting bolts.
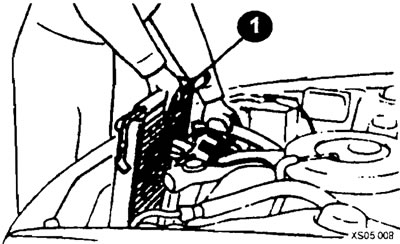
Carefully remove the capacitor (1) from the vehicle.
Installation
Installation is carried out in reverse order.