


Contents: Disassembly ⇓ Assembly ⇓
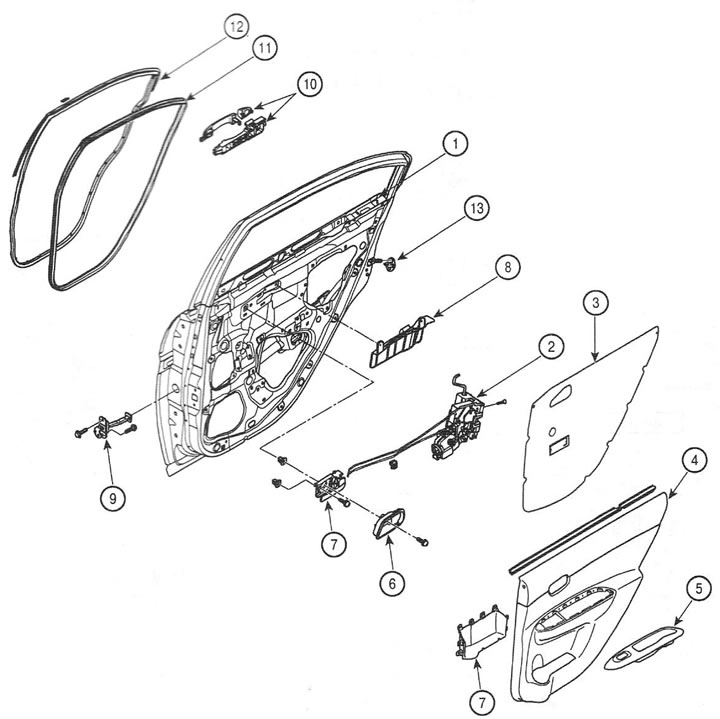
1. Back door; 2. Castle; 3. Waterproof film; 4. Door trim; 5. Armrest; 6. Inner handle body; 7. Inner handle; 8. Lock rod cover; 9. Door stop; 10. External handle; 11. Door opening seal; 12. Door seal; 13. Lock retainer
Note: The rear door adjustment is the same as the front door adjustment.
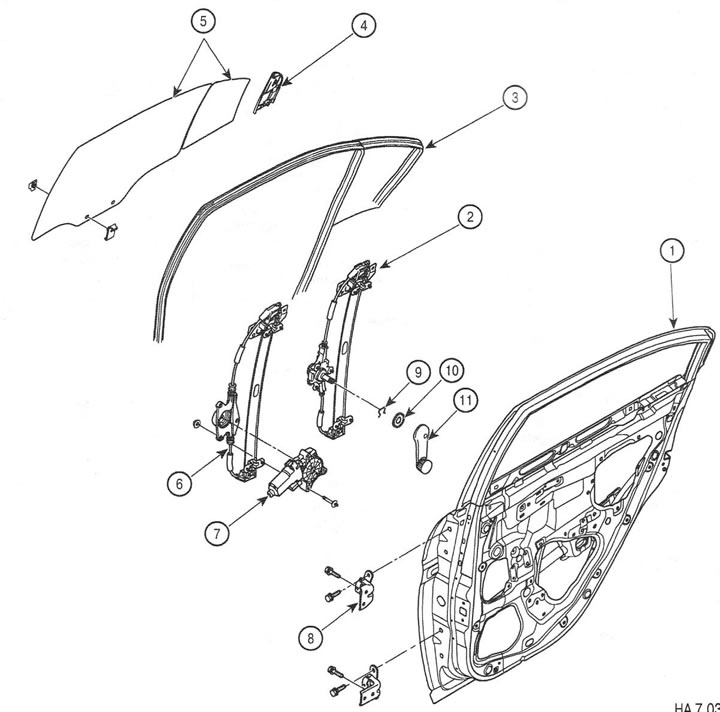
1. Door; 2. Mechanical window lifter; 3. Glass molding; 4. Side cover; 5. Glass; 6. Electric window lift; 7. Electric motor; 8. Loop; 9. Retainer; 10. Bushing; 11. Window lifter handle
Disassembly
1. Removing the door trim.
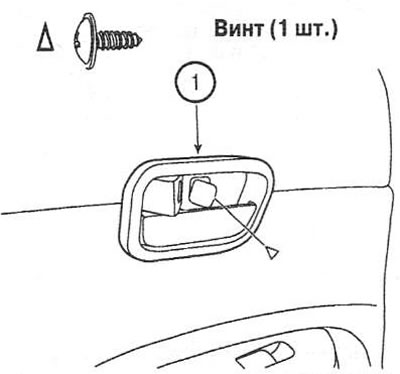
- Remove the screw and remove the inner door handle trim (1).
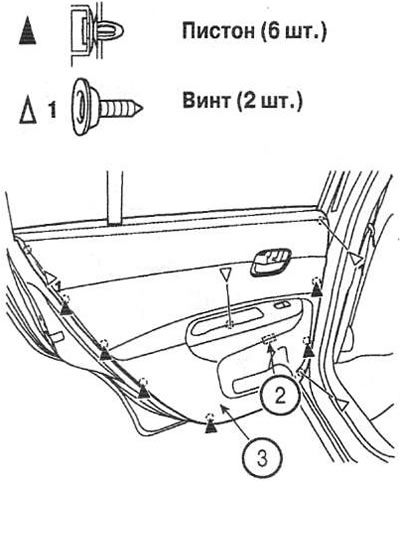
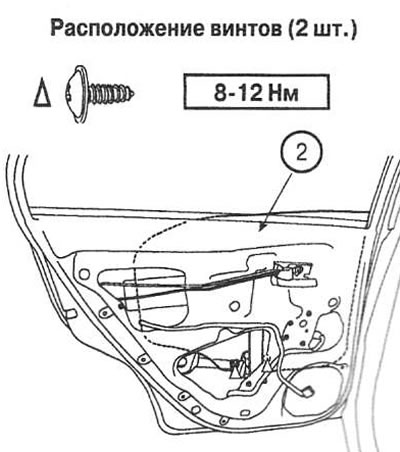
- Remove the screws and the door trim pins. Disconnect the window lift switch connector (2).
 |
 |
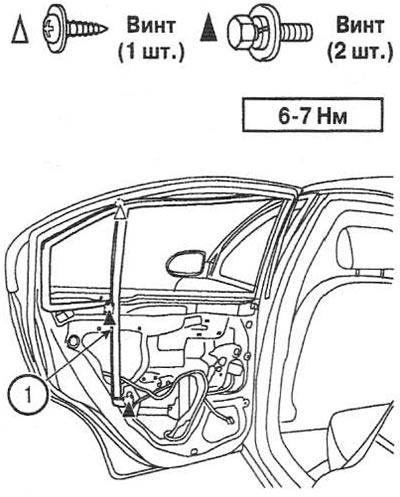
2. Removing the door glass.
- Remove the door trim (3).
- Remove the waterproof film.
- Unscrew the screws and remove the stationary glass (1).
- Carefully lower the glass (2) until the screws become visible. Unscrew the screws, separate the glass from the guide and carefully remove it.
 |
 |
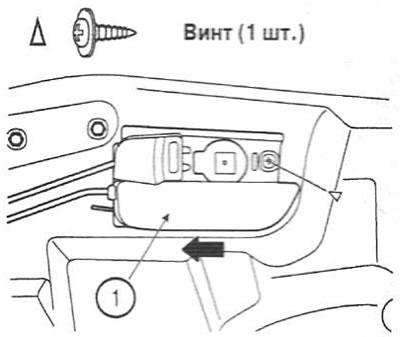
3. Removing the inner handle
- Remove the door trim. Unscrew the screw.
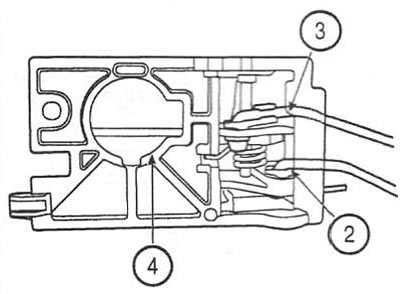
- Press the inner Handle (1) back to separate it from the trim.
- Disconnect the release (2) and lock (3) rods and remove the inner door handle (4)
 |
 |
4. Removing the window regulator.
- Remove the door trim.
- Remove the waterproof film.
- Remove the door glass.
- Disconnect the connector (1), unscrew the nuts and remove the window lifter with the electric motor (2).
- Unscrew the nuts and remove the window lift motor (3).
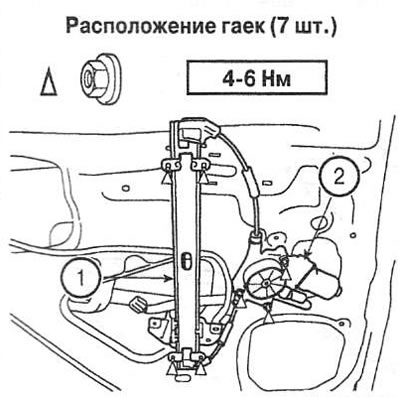 |
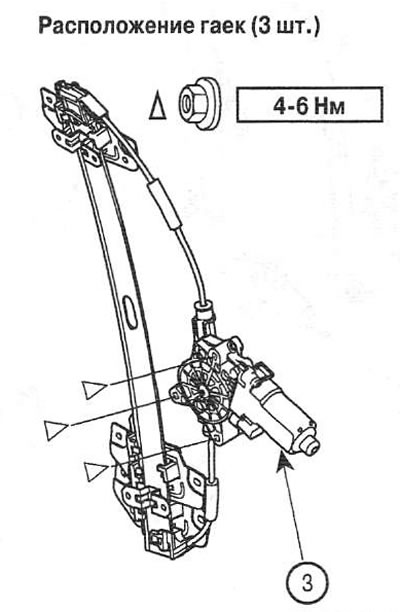 |
5. Removing the outer handle.
- Unscrew the nuts and remove the window lift motor (3).
- Remove the door trim.
- Remove the waterproof film.
- Remove the screws and remove the locking rod cover (1).
- Disconnect the locking rod (2) and unscrew the screw.
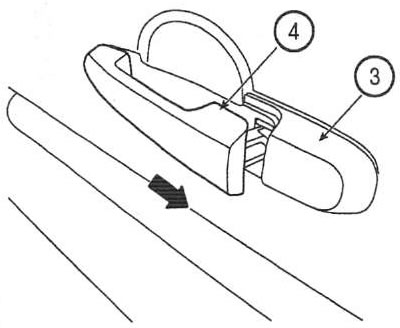
- Move the base (3) forward and remove the outer door handle (4).
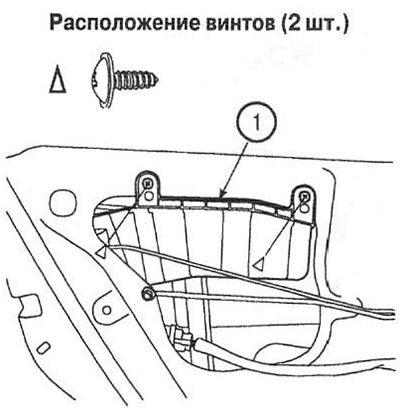 |
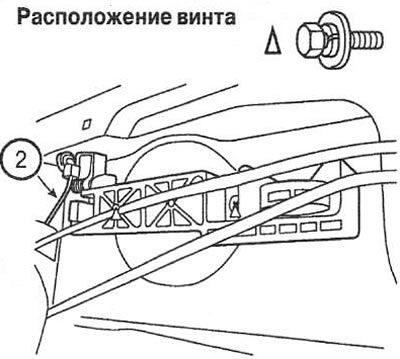 |
6. Removing the door lock.
- Remove the inside door handle and the locking rod cover.
- Remove the glass guide.
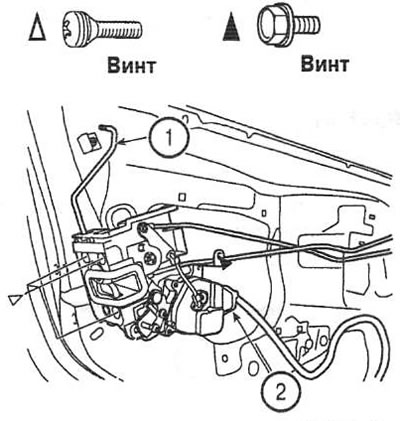
- Disconnect the connector (1), unscrew the screws and remove the rear door lock (2).
Assembly
7. Assembly is performed in the reverse order of disassembly.