Contents: Removal and installation ⇓ Adjusting the door position ⇓ Adjusting the door lock retainer ⇓ Adjusting the glass position ⇓
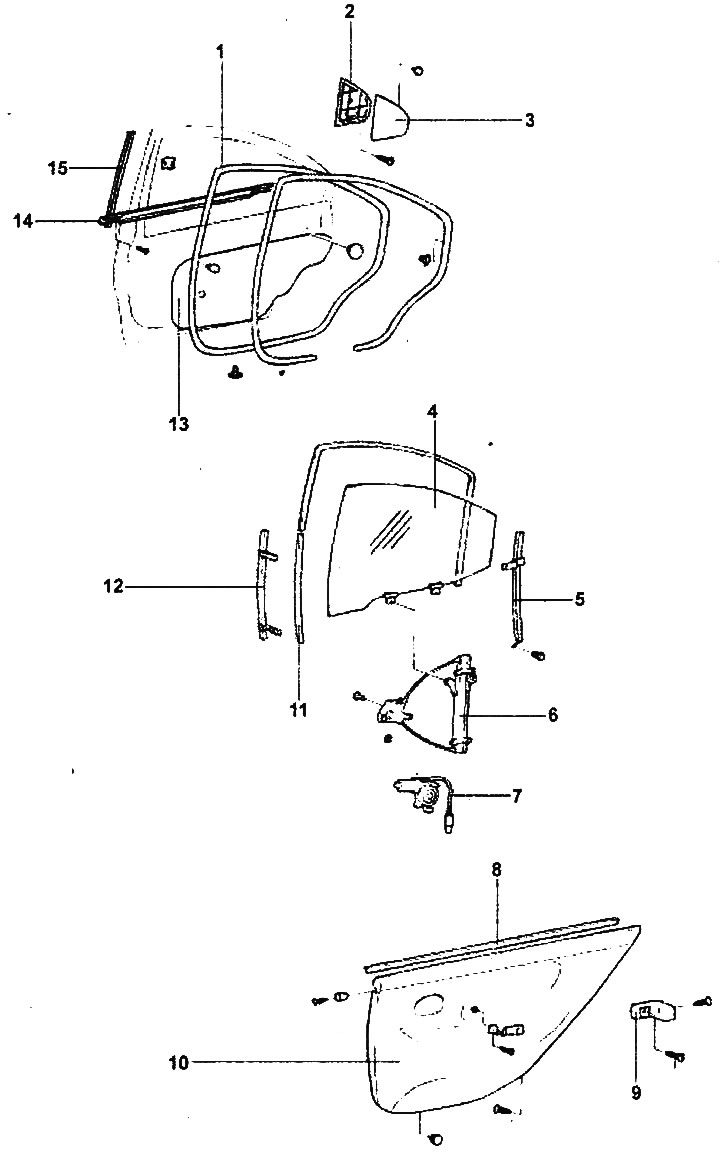
Rear side door.
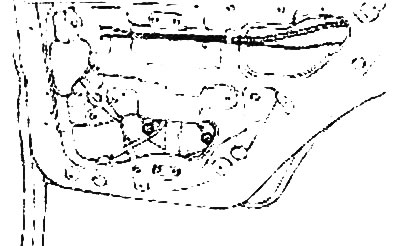
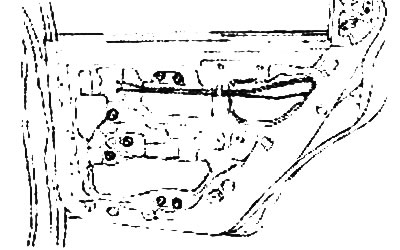
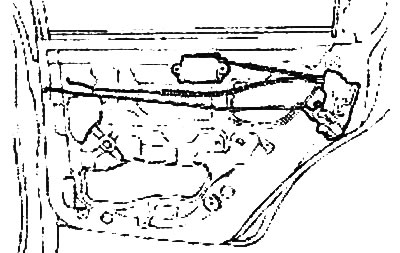
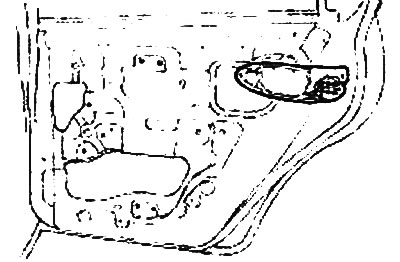
1 - inner door opening seal, 2 - outer decorative cover, 3 - inner door decorative cover, 4 - door glass, 5 - rear glass guide, 6 - window lift mechanism, 7 - window lift motor, 8 - door window molding, 9 - door trim panel fastening, 10 - door trim panel, 11 - door glass seal, 12 - front glass guide, 13 - technological opening cover, 14 - door decorative molding, 15 - door opening seal molding.
Removal and installation
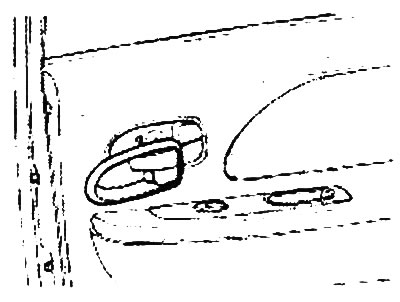
1. Remove the decorative trim from the inside door handle.
2. Loosen the screws securing the door trim panel.
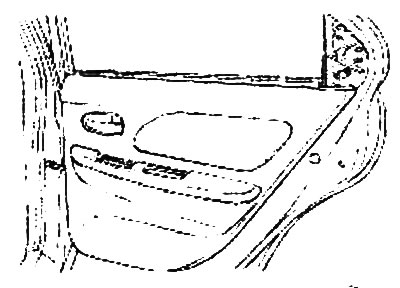
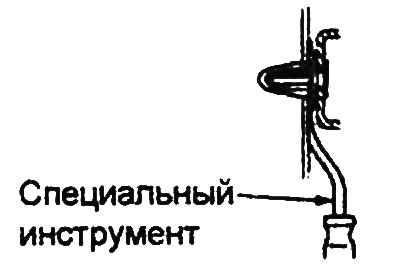
3. Insert a trim removal tool between the trim retainer and the door trim panel, then pry the retainer up and off. Disconnect the wiring connectors from the rear side door.
4. Remove the door closing handle and the inner door opening handle.
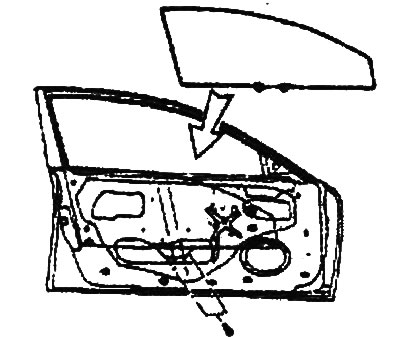
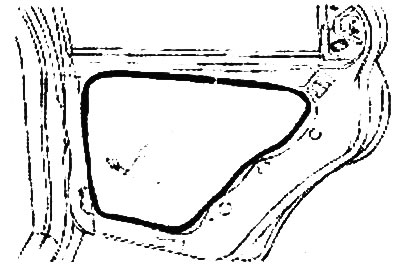
5. Remove the waterproof film from the door.
6. Lower the door glass completely to the down position, then remove the glass guide and the decorative cover of the rear side door.
- Tightening torque of decorative cover mounting bolts: 8-12 Nm
7. Unscrew the bolts securing the glass to the window regulator and remove the glass.
- Tightening torque: 8-12 Nm
8. Loosen the window lift mechanism mounting bolts and remove the window lift mechanism assembly.
- Tightening torque: 4-6 Nm
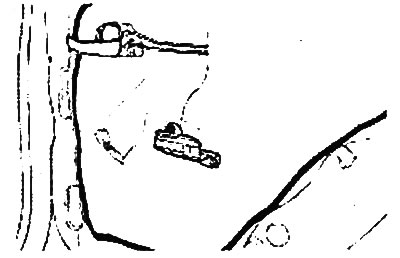
9. Disconnect the door lock rod, unscrew the screws and remove the door lock assembly.
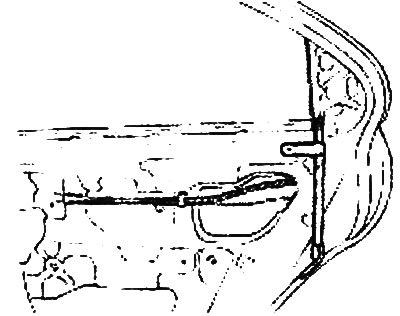
10. Loosen the bolts and remove the outer door opening handle.
11. Remove the decorative door molding.
12. Installation is carried out in the reverse order of removal.
Note: When installing the waterproof film, do not cover the rear side door trim retainer holes with butyl rubber tape.
Adjusting the door position
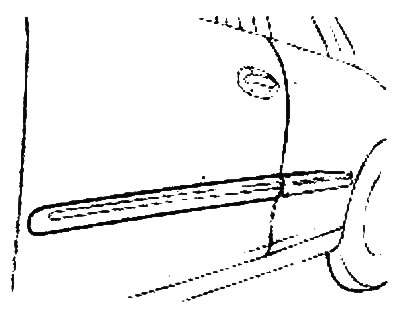
Check that the door surface is flush with the body surface, then check for the same gap between the door and the body along the entire perimeter of the door (upper and lower, left and right edges of the door). The edge of the door and the edge of the body should be parallel to each other.
Note: Apply masking tape to the surface of the vehicle fender edge around the door hinge installation location.
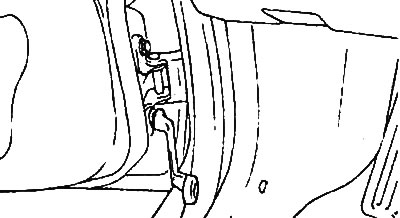
Adjusting the door lock retainer
Check that the door is not loose (closed tightly), then check that the door closes securely without the lock slamming.
If necessary, adjust the door as follows:
- a) Draw a line around the perimeter of the lock retainer plate (reference mark for adjustment).
- b) Loosen the retainer mounting screws and, by moving the retainer left and right (outside and inside the car), make the door locking tighter or looser. By moving the retainer up and down, align it with the corresponding hole in the lock. Lightly tighten the retainer mounting screws, then repeat the check.

Note: While holding the outside door handle in the open position, push the door toward the body and check that the lock catch allows the door to close flush with the body surface.
Adjusting the glass position
If the glass in the raised position does not completely cover the door window opening, adjust the position of the window regulator guide and the position of the glass on the window regulator slider.