
Contents: Removal ⇓ Disassembly ⇓ Assembly and installation ⇓ Checking the operation of the hatch…⇓ Adjustment ⇓
Dismantling the roof hatch.
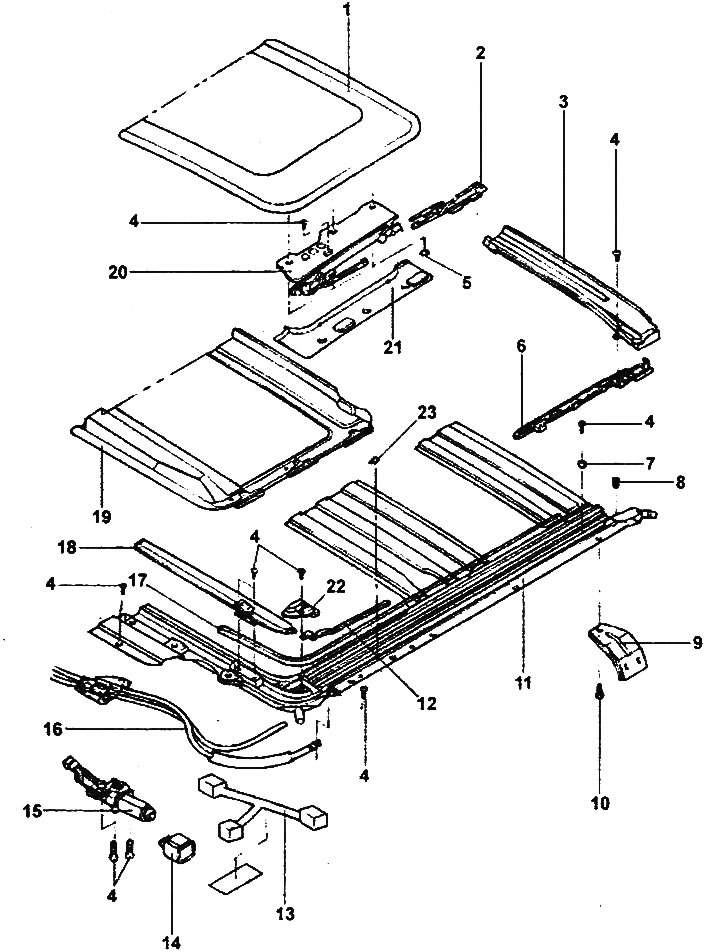
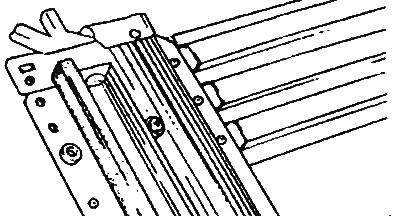
1 - sunroof glass, 2 - runner assembly, 3 - water drainage channel assembly, 4 - screw, 5 - nut, 6 - sunroof guide trim, 7 - stopper, 8 - clamp, 9 - bracket, 10 - bolt, 11 - sunroof guide, 12 - deflector rod, 13 - wire harness, 14 - relay, 15 - sunroof drive motor assembly, 16 - sunroof drive cable assembly, 17 - seal, 18 - deflector assembly, 19 - sunroof curtain assembly, 20 - sunroof upper guide assembly, 21 - decorative cover, 22 - guide cover, 23 - holder.
Removal
1. To remove the sunroof, you must first remove the following parts:
- a) Central roof console and interior light.
- b) Sun visor and interior rear view mirror.
- c) Finishing of racks.
- d) Auxiliary ceiling handle.
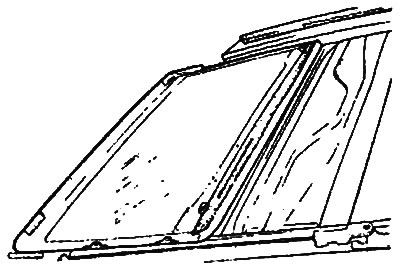
2. Remove the decorative cover and the sunroof glass.
- Tightening torque of the sunroof glass mounting nut: 4-6 Nm
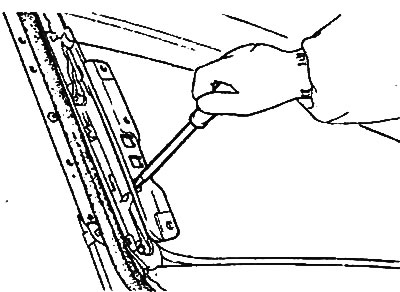
3. Disconnect the drain hose.
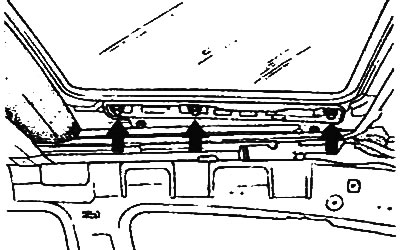
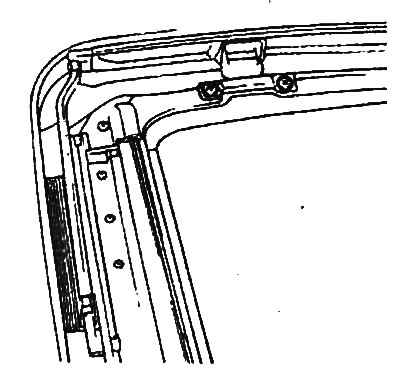
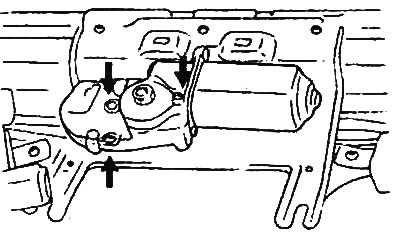
4. Loosen the roof hatch mounting bolts and nuts and remove the roof hatch assembly.
Tightening torques:
- Sunroof mounting bolts: 7-11 Nm
- Sunroof mounting nuts: 4-6 Nm
Note: Be careful when removing the sunroof assembly, pull it out carefully so as not to damage other parts of the vehicle.

Disassembly
1. Remove the water drain gutter assembly.
2. Remove the stopper.
3. Remove the sunroof curtain.
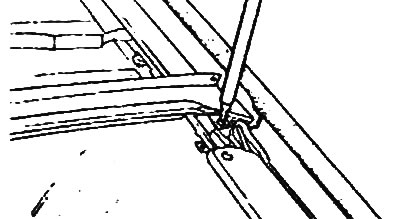
4. Remove the guide assembly.
5. Remove the deflector.
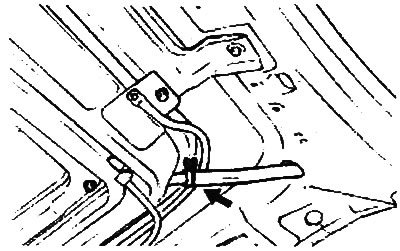
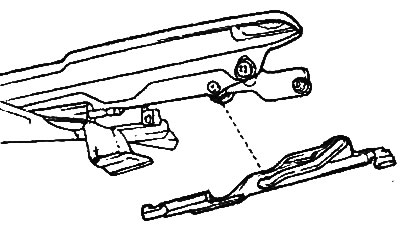
6. Remove the sunroof drive motor assembly.
Caution: When removing the electric motor, the sunroof slide assembly must be in the fully closed position. If the fully closed positions of the sunroof glass and the synchronizing ring of the electric motor do not match, this will lead to a malfunction of the sunroof drive.
Assembly and installation
Installation of parts is carried out in the reverse order of removal.
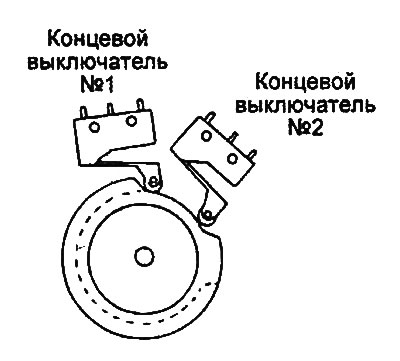
Note: Make sure that the motor limit switches #1 and #2 (LS1 and LS2) are in the closed position. Align the center of the guide roller with the alignment marks on the slide with the limit switches in the fully closed position (i.e. with the hatch fully closed).
 |
 |
Checking the operation of the hatch after installation
If the sunroof glass moves slowly, check and adjust accordingly.
- a) Make sure the battery is fully charged.
- b) Make sure there is no contamination (abrasive particles) in the hatch slide assembly.
- c) Make sure that the sunroof cover does not jam against the roof panel when opening the sunroof glass. If the sunroof cover rests against the roof panel, fully open the sunroof glass and move the stopper forward.
Note: If the stopper is installed too far forward, it may cause malfunctions and water leakage into the passenger compartment. Make sure that the gap between the sunroof glass and the roof panel does not exceed 0.3 mm.
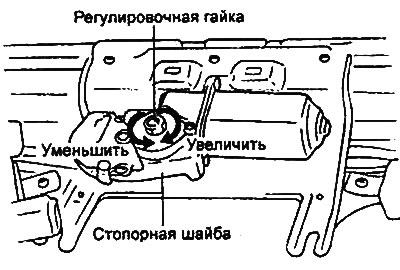
- d) Using a spring dynamometer, measure the force at which the friction clutch of the electric motor begins to slip, and adjust it to a value of 150 - 250 N by turning the adjusting nut of the electric motor.
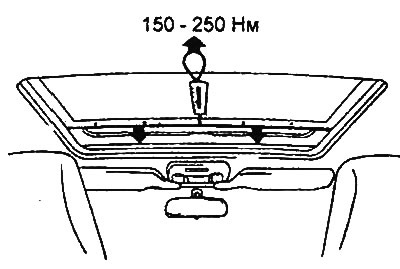
- d) After adjustment, make sure to secure the adjusting nut with the lock washer.
Adjustment
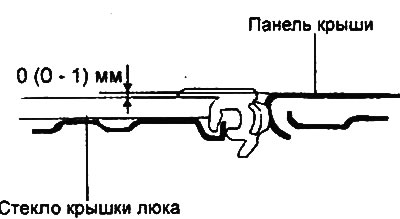
1. Adjust the installation height of the sunroof glass relative to the roof panel.
- Leading edge: 0 (-1-0) mm
- Trailing edge: 0 (0-1) mm
2. If the installation height of the sunroof glass relative to the roof panel does not correspond to the nominal value, adjust it as follows.
- a) Loosen the front and rear screws. Adjust the installation height of the sunroof glass relative to the roof panel
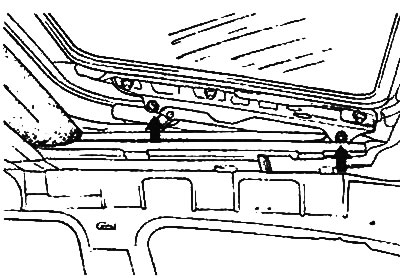
- b) Loosen the sunroof glass mounting nuts and adjust the gap between the sunroof glass and the roof panel.
