
Contents: Removal the hatch frame ⇓ Removal the deflector ⇓ Removal the guide ⇓ Removal the sunshade ⇓
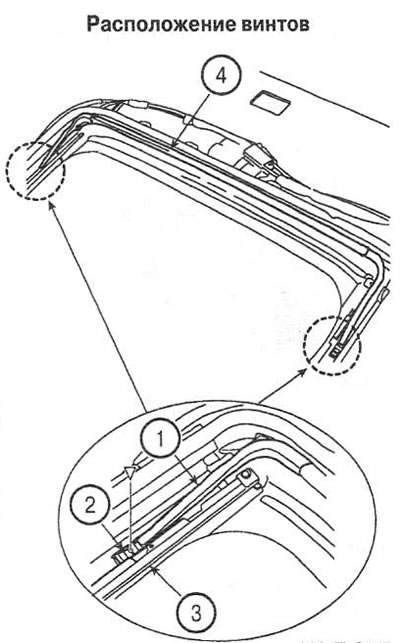
1. Guide; 2. Glass panel; 3. Connecting link; 4. Guide; 5. Drainage gutter; 6. Drainage hose; 7. Drainage hose; 8. Bracket; 9. Hatch frame; 10. Deflector rod; 11. Electric motor; 12. Drive mechanism; 13. Deflector; 14. Sunshade; 15. Decorative cladding
Removal the hatch frame
Removal
1. Remove the ceiling trim.
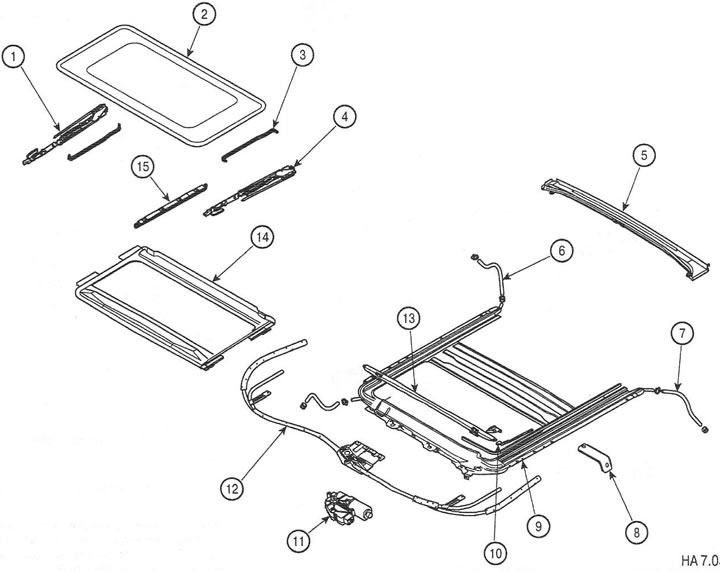
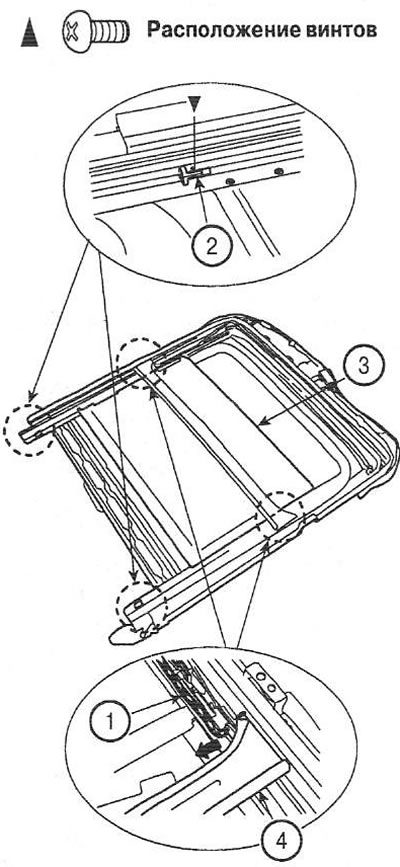
2. Remove the decorative trim (1) from both sides.
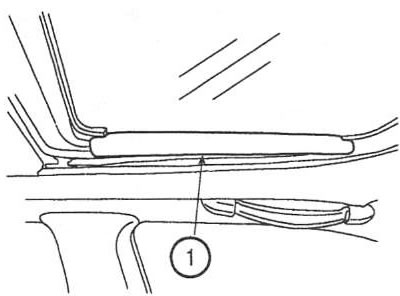
3. Remove the screws and lift the glass panel (2) upwards.
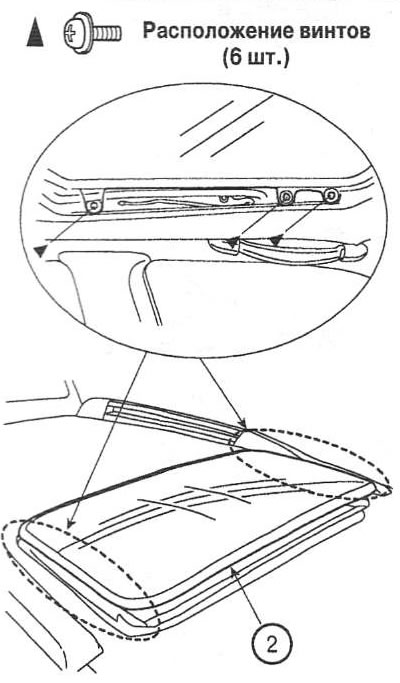
4. Disconnect the drain hoses (3). Unscrew the screws and nuts, remove the pins and remove the roof hatch.
Installation
5. Installation is carried out in the reverse order of removal.
Removal the deflector
Removal
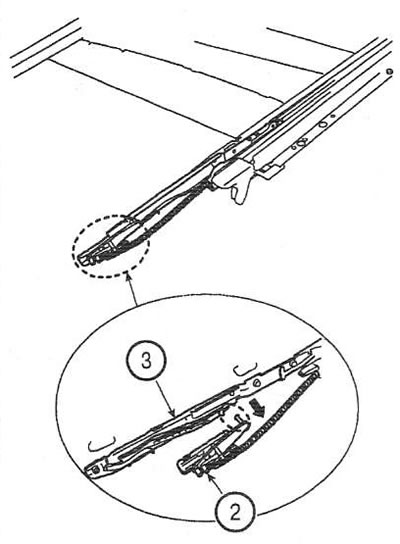
1. Open the sunroof glass completely.
2. Unscrew the screws, disconnect the rod (1) from the frame (2) and remove the deflector (3).
Installation
3. Installation is performed in the reverse order of removal.
Removal the guide
Removal
1. Remove the hatch assembly.
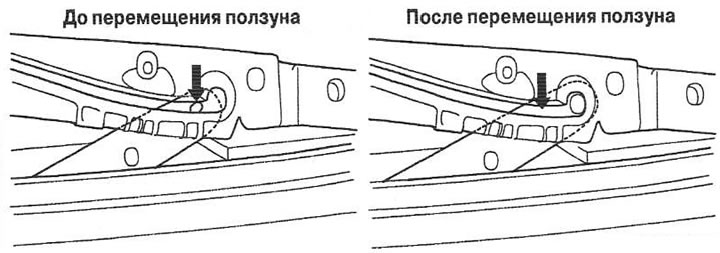
2. Pull the slide back, lower the rear part of the guide (1) and disconnect it.
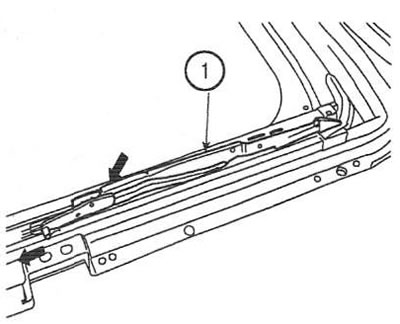
3. Remove the guide (2) together with the slider (3).
Installation
4. Installation is carried out in the reverse order of removal.
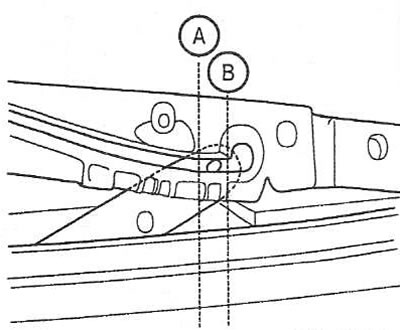
Note: When installing, position the slider in the middle between the marks (A and B). Initialize the hatch drive.
Initializing the hatch drive
5. Press and hold the "UP" switch. After 15 seconds, the slider will move forward 5 mm.
6. After the slider moves forward, release the switch.
7. Press and hold the "UP" switch again. The hatch will then open and close once. When the hatch is completely closed, release the switch.
Removal the sunshade
Removal
1. Remove the hatch frame.
2. Remove the connecting link (1) and the limiter (2) by unscrewing the screws. Remove the sunshade (3) and the drainage channel (4).
Installation
3. Installation is performed in the reverse order of removal.