


Contents: Removal ⇓ Installation ⇓
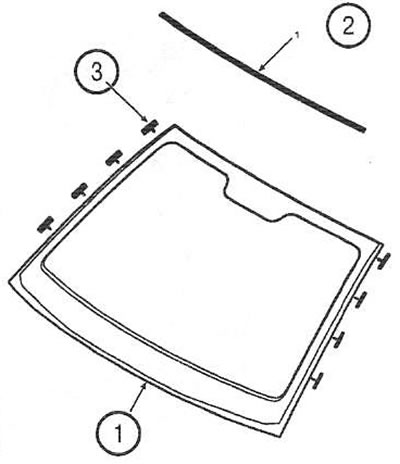
1. Molding; 2. Windshield; 3. Fixators
Removal
1. Remove the following items:
- front pillar trim;
- interior rear view mirror;
- windshield wiper arms;
- air intake panel.
2. Remove the moldings (1) from the edge of the windshield. If necessary, cut the molding with a knife.
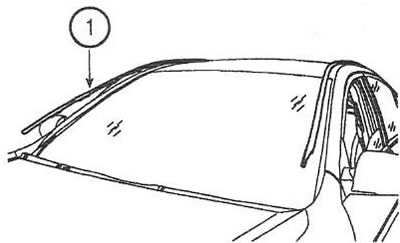
3. Remove the inserts.
4. Pull down the front part of the ceiling trim. Do not bend the trim too much, so as not to break it.
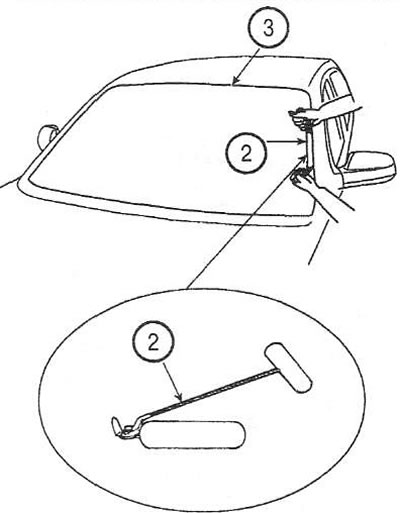
5. Using a suitable tool (2), cut the sealant around the entire perimeter of the glass (3).
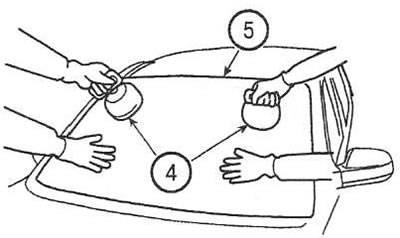
6. Using the vacuum suction cups (4), remove the windshield (5).
Installation
7. Using a knife, cut away the old sealant to a thickness of approximately 2 mm around the entire glass opening. Remove the molding and fasteners.
Caution: Do not cut the sealant down to the paint coating, as this will impair the adhesive properties of the sealant.
8. Degrease the windshield opening flange using a sponge and technical alcohol.
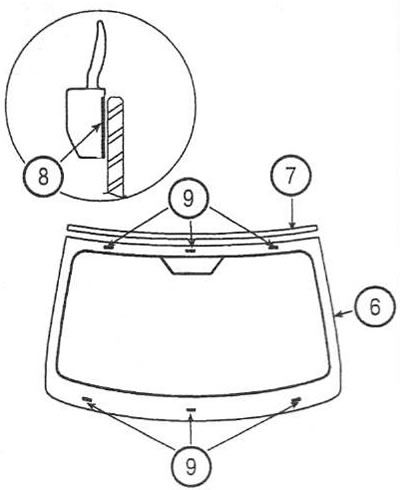
9. Apply glass primer (6) to the side surface of the glass and stick double-sided adhesive tape (7) to the inner surface of the molding (8). Glue the molding to the top of the glass and install the clips (9) in the indicated places.
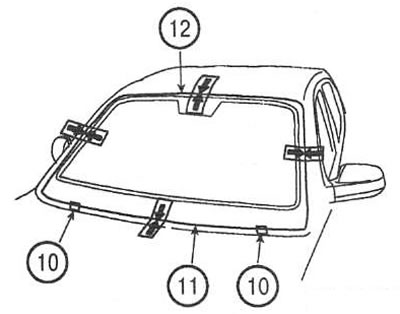
10. Install the inserts (10). Temporarily install the windshield (11) in the center of the body opening and apply installation marks (12).
11. Apply a thin coat of glass primer to the outer surface of the clips.
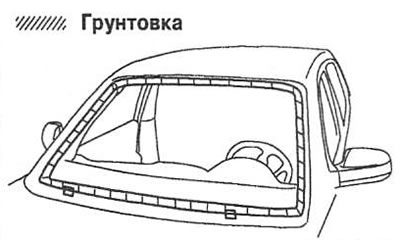
Note: Do not touch primed surfaces with your hands as this may cause the seals to become unsealed after the glass has been installed.
12. Using a sponge, apply a thin layer of body primer to the remaining sealant on the body. Wait at least 10 minutes for the primer to dry completely.
Note: Do not apply glass primer to the body or mix different types of primers.
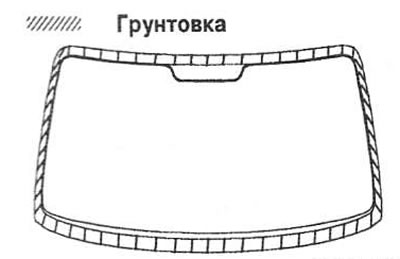
Note: Apply sealant within 30 minutes of applying glass primer.
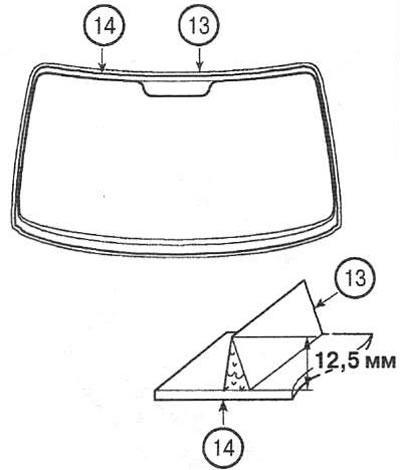
13. Apply a bead of sealant (13) as shown along the edge of the windshield (14) between the clips and the molding. Apply a slightly wider bead of sealant at the corners of the windshield.
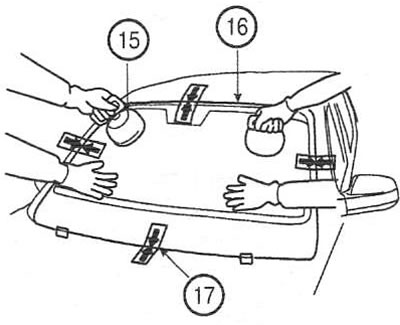
14. Using the vacuum suction cups (15), install the windshield (16) into the opening, aligning the previously made marks (17). Lightly press the windshield to the body along the entire perimeter to completely glue the glass.
Caution: Do not open the doors until the sealant has completely hardened.
15. Carefully remove excess sealant from the body and glass using a scraper, rag and technical alcohol.
16. Wait until the sealant hardens (at least an hour) and check the tightness of the joints by spraying water on the glass surface.
17. Avoid driving for the first 4 hours after installing the windshield.
18. Install the previously removed parts.