
Contents: Fuel level indicator ⇓ Coolant temperature gauge ⇓ Speedometer ⇓ Tachometer ⇓ Summing distance counter/daily…⇓ Odometer (trip meter) ⇓ On-board computer ⇓
Fuel level indicator
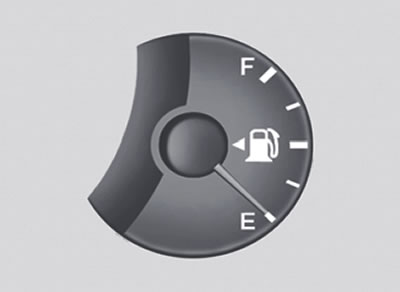
Without trip computer |
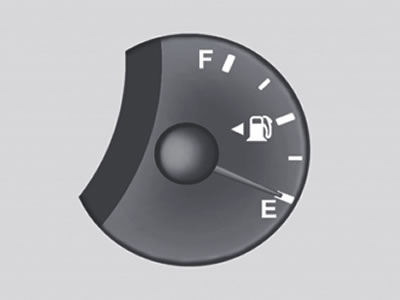
With trip computer |
The indicator arrow shows the approximate fuel level in the tank. The fuel tank capacity is indicated in section 8.
Coolant temperature gauge
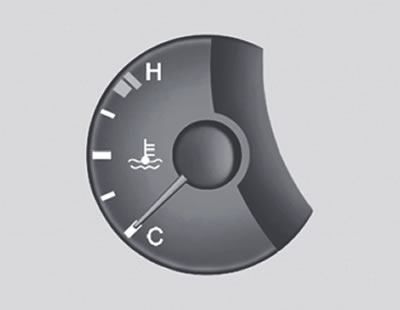
Without trip computer |
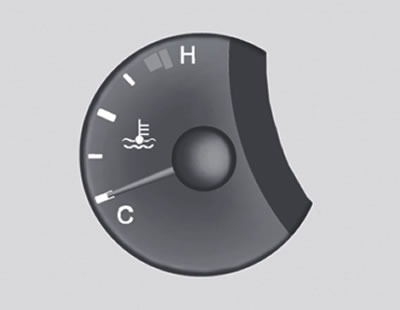
With trip computer |
Warning: Never open the radiator cap when the engine is hot. This could cause pressurized coolant to be released, causing severe burns. Wait until the engine has cooled down before removing the radiator cap.
The pointer arrow should not go beyond the normal operating temperature range. If it enters the "H" (Hot) zone, stop driving and turn off the engine as soon as possible. Open the hood and check the coolant level in the expansion tank and the condition of the water pump drive belt. If you suspect a problem with the cooling system, have the system checked by a Hyundai dealer as soon as possible.
Speedometer
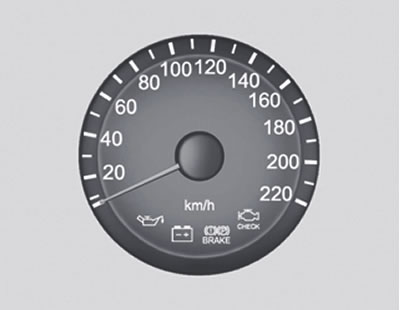
Without trip computer |
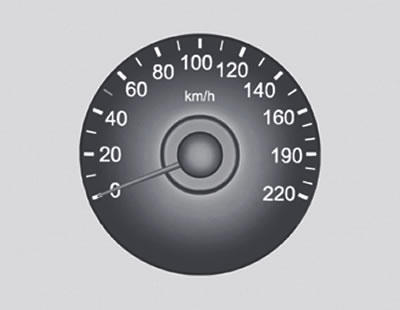
With trip computer |
The speedometer of your Hyundai vehicle displays the vehicle's speed in kilometers per hour (km/h) or miles per hour.
Tachometer
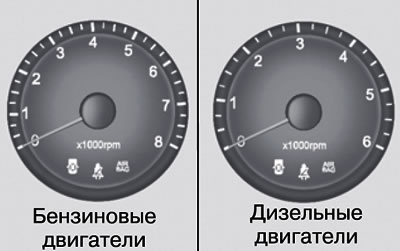
Without trip computer |

With trip computer |
The tachometer shows the engine crankshaft speed in revolutions per minute (rpm).
Caution: Do not allow the engine to run at excessively high speeds, at which the tachometer needle enters the red zone. This may cause serious damage to the engine and may void the manufacturer's warranty.
Summing distance counter/daily distance counter
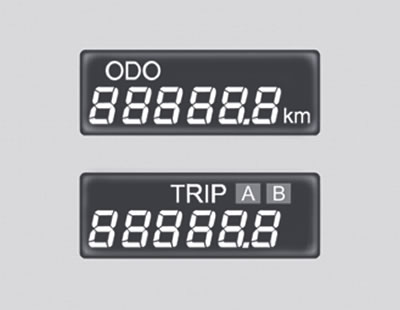
The counter shows the total mileage of the vehicle in kilometers or miles and is also used to maintain established service intervals. The odometer of a new car usually shows a mileage of less than 50 km.
Note: Any change in the readings of the totalizer may void the manufacturer's warranty.
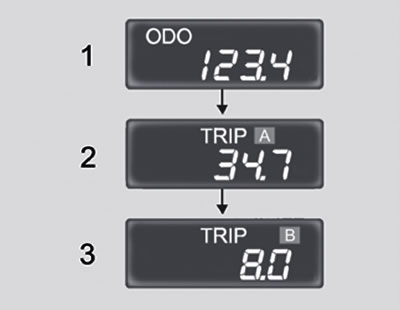
Digital odometer function of the "daily" mileage counter
Pressing the reset button with the ignition key in the "ON" position changes the display in the following order:
 |
 |
1. Odometer (trip meter). The odometer shows the total distance in kilometers or miles traveled by the vehicle.
2, 3. Daily trip meter. The daily trip meter shows the distance in miles or kilometers traveled over two trips.
- TRIP A (Mileage A): Mileage from the start of the trip to the intermediate point.
- TRIP B (Mileage B): The mileage from the stopover to the end of the trip.
Pressing the reset button changes TRIP A to TRIP B. To reset the counter, press the reset button for one second.
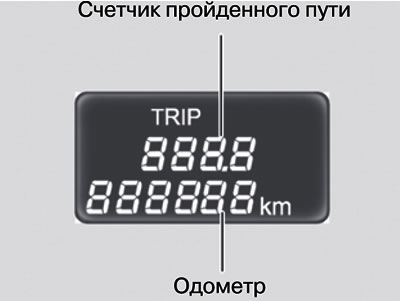
Odometer (trip meter)
The odometer shows the total distance traveled by the vehicle in kilometers or miles and is very useful for monitoring the intervals for periodic maintenance.
Note: Any changes to the odometer readings may void your warranty coverage.
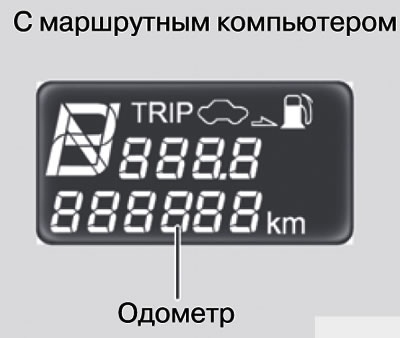
On-board computer
An on-board computer is a microcomputer-controlled information system that displays information necessary for driving a vehicle on a liquid crystal display, including fuel range, average fuel consumption and distance traveled.
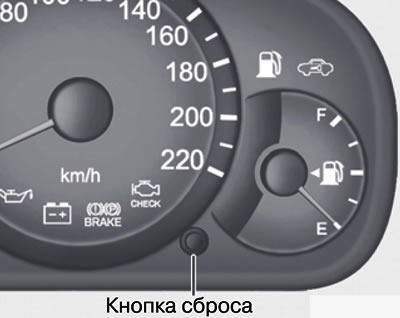
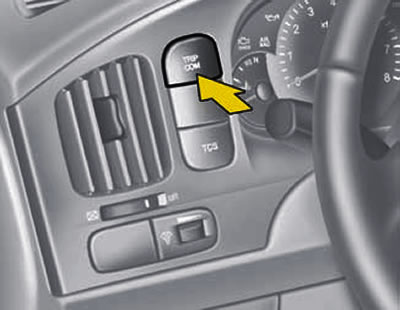
Reset button
- The reset button resets the multifunction display to zero.
- By successively pressing the reset button located on the left, the readings are displayed on the display in the following order:
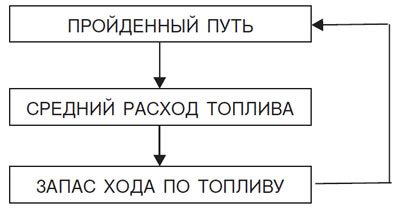
1. Indications of the distance traveled
[Material was obtained from an official resource HyundaiBook.ru]
This mode displays the distance traveled since the last reset of the daily counter. When the battery is disconnected, the readings of the totalizer are also reset.
To reset the daily counter readings, press and hold the reset button for more than 1 second while the readings are displayed.
The daily counter readings are displayed within the range from 0 to 999.9 km.
2. Average fuel consumption
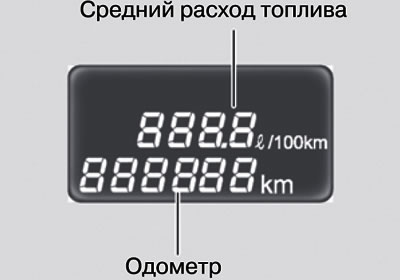
This mode displays the average fuel consumption readings, calculated based on the total amount of fuel consumed and the distance traveled since the last reset of the average consumption readings.
Total fuel consumption is calculated based on fuel consumption information.
The exact calculation result is given after the car has traveled 500 m from the moment it started moving.
Average fuel consumption readings are displayed within the range from 0 to 99.9 l/100 km.
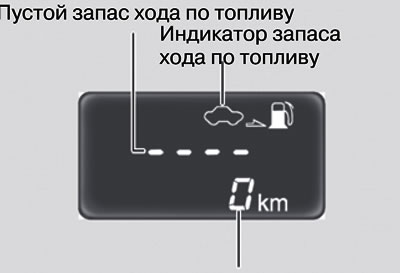
3. Fuel range
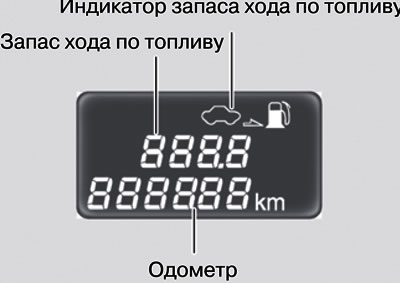
In this mode, the value of the power reserve is displayed with the amount of fuel available in the tank until the fuel reserve indicator lamp lights up.
Adding more than 8 liters of fuel is recognized by the computer as refueling.
The exact range readings are displayed after the vehicle has travelled 500 m from the start.
In all cases when the fuel reserve is less than 50 km, the fuel reserve indicator lamp lights up, and at the same time the display shows a flashing "---" icon, which goes out after refueling.
Note:
- Fuel range readings may differ from trip meter readings depending on driving conditions.
- The fuel range may vary depending on the conditions, mode and speed of movement.