
HyundaiBook.ru
Repair Chevrolet Repair Honda Repair Toyota Repair Land Rover Repair VAZ Repair Renault Repair Nissan
English Русский
Български
Беларускі
Український
Српски
Hrvatski
Română
Polski
Slovenský
Magyar
ArticlesSitemapContacts  


  Accent   Elantra   Getz   Grandeur   Sonata   Santa Fe   Tucson   Others
Elantra 1 (1990-1995, petrol) Elantra 2 (1995-2000, petrol) Elantra 3 (2000-2006)
  • Main
  • Elantra
  • XD (2000-2006)
  • Body
  • Exterior (external elements)
  • Rear door — removal and installation

Rear door — removal and installation (Hyundai Elantra XD)

0
Contents: Removal and installation ⇓ Adjusting the door position ⇓
Removal and installation


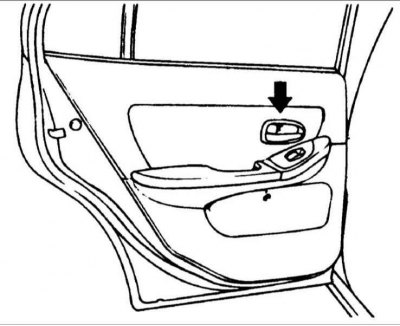
1. Remove the screw securing the inner handle and remove it from the door trim.

1. Remove the screw securing the inner handle and remove it from the door trim.

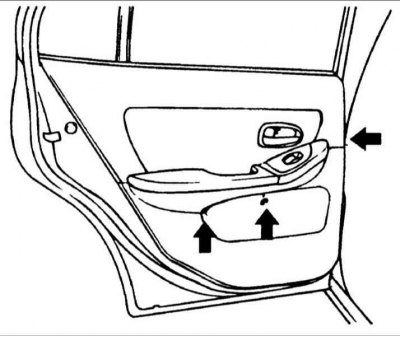
2. Remove the screws securing the door trim.

2. Remove the screws securing the door trim.

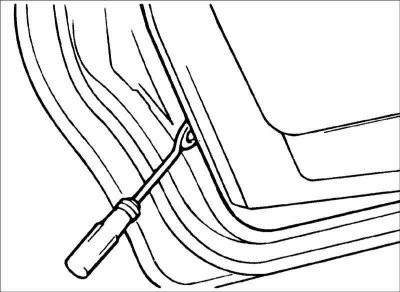
3. Insert the door trim remover between the door trim and the door and release…


3. Insert the door trim remover between the door trim and the door and release the clips. Disconnect the electrical connectors.
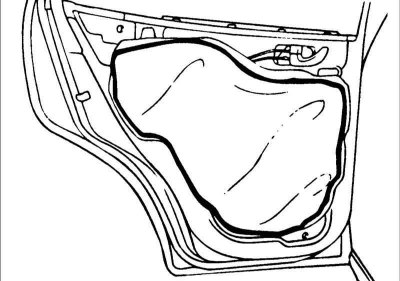


4. Remove the moisture-proof film from the front door.
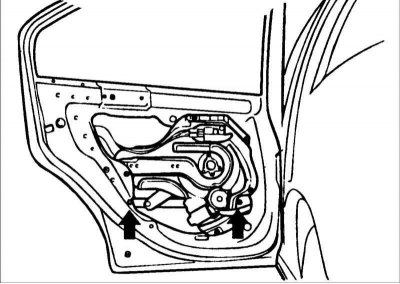

4. Remove the moisture-proof film from the front door.

5. Lower the door glass down and remove the glass mounting screws.
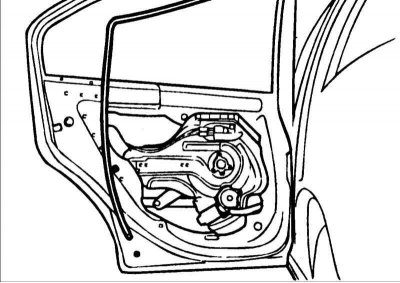

5. Lower the door glass down and remove the glass mounting screws.

6. Remove the controlled glass from the rear door.
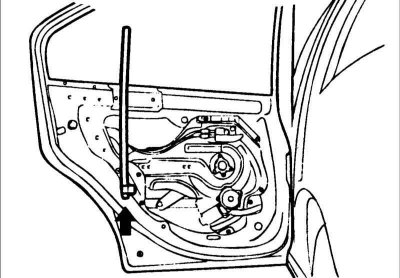

6. Remove the controlled glass from the rear door.

7. Remove the partition channel from the rear door, then remove the rear door…


7. Remove the partition channel from the rear door, then remove the rear door glass.
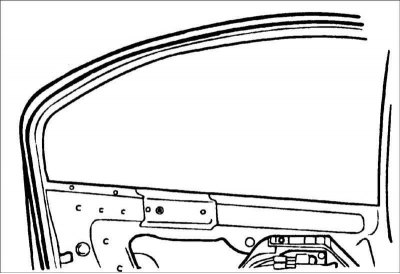


8. Remove the fixed glass from the rear door.
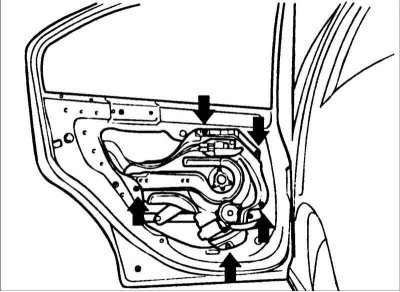

8. Remove the fixed glass from the rear door.

9. Disconnect the rod from the outside door handle. Remove the bolts securing…


9. Disconnect the rod from the outside door handle. Remove the bolts securing the lock and the lock drive.
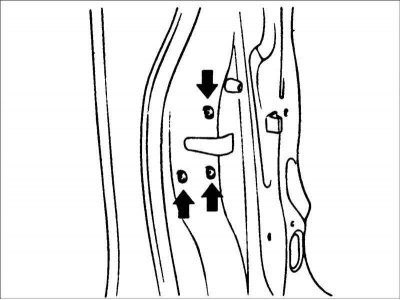
10. Remove the control unit from the rear door.
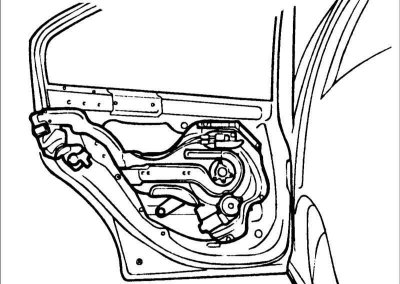

10. Remove the control unit from the rear door.

11. Installation is carried out in the reverse order of removal. When…


11. Installation is carried out in the reverse order of removal. When installing the moisture-proof film, the holes for the door trim fasteners must not be covered.


Adjusting the door position


Check that the door closes easily and properly, then check that the gaps between the front and back, top and bottom of the door and the body are uniform. The doors and body edges must be parallel.

Door strike plate


Check that the door closes easily and properly. If necessary, adjust the door as follows.

1. If the door lock is installed on the strike plate with difficulty, unscrew the strike plate mounting screws and, by moving it in horizontal and vertical planes, achieve normal door closing.
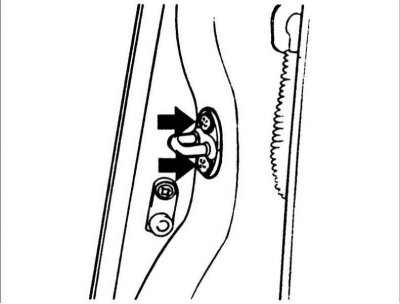
2. Adjust the position of the door relative to adjacent surfaces by moving the…


2. Adjust the position of the door relative to adjacent surfaces by moving the strike plate in the vertical plane.

Caution! To check the smoothness of the impact plate fit, pull the outer door handle outward and in this position press the door to the closing position.
This article is available at russian, bulgarian, belarusian, ukrainian, serbian, croatian, romanian, polish, slovak, hungarian
This article has been reviewed by: Konstantin Smirnov
Add to social network:

Previous
Elantra 3: Exterior (external elements)
Next

Front door — removal and installation
Luggage compartment door
Trunk lid — removal and installation
Adjusting the bonnet hinges
Technical data of the body
Moldings — removal and installation
Sunroof — Removal and Installation
Front bumper — removal and installation
Rear bumper — removal and installation
Troubleshooting the bodywork
We recommend other articles on the topic of Hyundai manuals:

Rear door — device Hyundai Accent 1 (1994-1999)
Rear door locking (child protection) Hyundai Getz (2002-2011)
Rear side door Hyundai Sonata 4 (2001-2012, petrol)
Adjusting the position of the rear door Hyundai Santa Fe 2 (2007-2012, petrol)
Rear door — device Hyundai Tucson 1 (2005-2010)
Removal and installation the rear door glass Hyundai Matrix (2001-2010, petrol)

Link in different formats to this article

Visitor comments
No comments yet


How much will 34 + 18 ?


Elantra 3 (2000-2006) 
  • User manual
  • Control devices
  • Audio system
  • Starting the engine and driving
  • Faults en route
  • Maintenance and care
  • Technical information
  • Power unit
  • Gasoline engines
  • Diesel engines
  • Lubrication system
  • Cooling system
  • Fuel system (gasoline)
  • Fuel system (diesel)
  • Decreased toxicity
  • Ignition system
  • Transmission
  • Clutch
  • Mechanical gearbox
  • Automatic gearbox
  • Drive shafts and axles
  • Chassis
  • Car suspension
  • Steering
  • Brake system
  • Body
  • Exterior (external elements)
  • Interior (internal elements)
  • Air conditioning system
  • Electrical equipment
  • Equipment and devices
  • Headlights and lighting
  • Power devices
  • Electrical circuits
Elantra 2 (1995-2000, petrol) 
  • General information
  • Maintenance
  • Power unit
  • Engine repair
  • Cooling system
  • Intake and exhaust system
  • Fuel system
  • Transmission
  • Clutch
  • Manual gearbox
  • Automatic gearbox
  • Drive shafts and axles
  • Chassis
  • Front suspension
  • Rear suspension
  • Steering
  • Brake system
  • Body
  • Body elements
  • Electrical equipment
  • Equipment and devices
  • Electrical diagrams
Elantra 1 (1990-1995, petrol) 
  • General information
  • Introduction to the guide
  • Maintenance
  • Power unit
  • Minor engine repair
  • Engine overhaul
  • Lubrication system
  • Cooling system
  • Fuel injection system
  • Ignition system
  • Exhaust system
  • Transmission
  • Clutch
  • Manual gearbox
  • Automatic gearbox
  • Drive shafts
  • Chassis
  • Front suspension
  • Rear suspension
  • Steering
  • Wheels and tires
  • Troubleshooting
  • Brake system
  • Body
  • Body elements
  • Electrical equipment
  • Equipment and devices
  • Power devices
  • Heating and air conditioning
  • Electrical circuits
HyundaiBook.ru © 2018-2026 · Mobile version · Sitemap: EN BG BY UA RS HR RO PL SK HU · Administration · Site search · Hyundai owners Accent 1 · Accent 2 · Accent 3 · Elantra 1 · Elantra 2 · Elantra 3 · Getz · Sonata 3 · Sonata 4 · Santa Fe 2 · Tucson 1 · Tucson 2 · Matrix ·
This site uses cookies to optimize its functionality. By continuing, you agree to our terms.