
Contents: 5-speed manual transmission ⇓ Removal ⇓ Installation ⇓ Checking the technical condition ⇓ 6-speed manual transmission ⇓
5-speed manual transmission
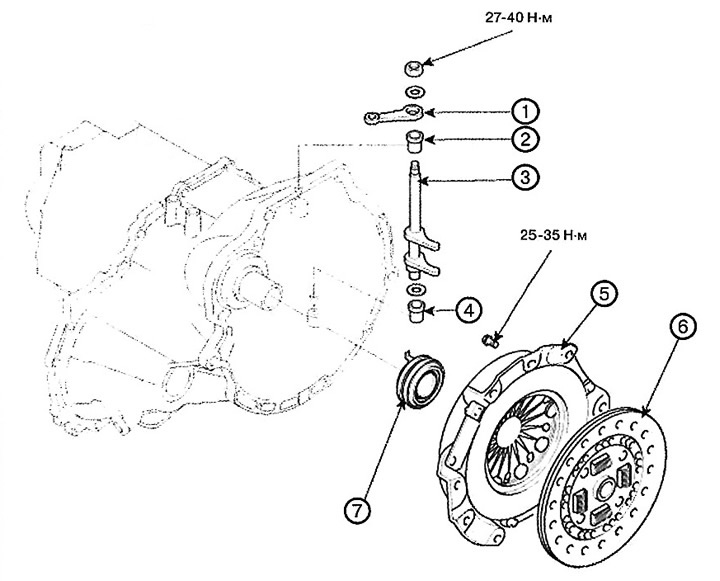
1. Clutch release lever
2. Bushing
3. Clutch release fork
4. Bushing
5. Clutch basket
6. Clutch disc
7. Release bearing
Removal
1. Remove the gearbox assembly.
2. Remove the release bearing.
3. Remove the clutch basket and clutch disc from the engine.
Note:
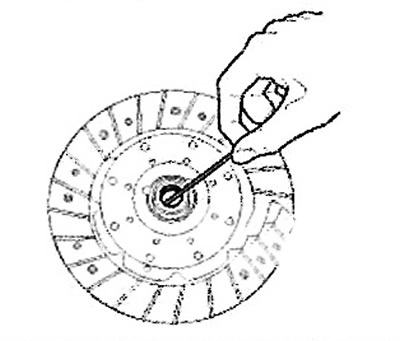
Insert the special device (09411-11000) into the splined hole to prevent the disc from shifting.
Do not clean the clutch disc or release bearing with cleaning solvents.
4. Remove the sleeve and clutch release fork assembly.
Installation
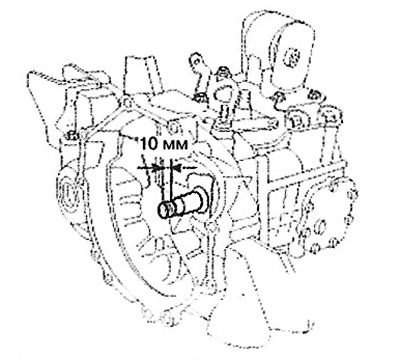
1. Before installing the clutch basket and clutch disc assembly, apply grease at a distance of 10 mm from the end of the gearbox input shaft.
Note: Recommended lubricant: CASMOLY L9508.
2. Fix the clutch disc on the flywheel using a special device (09411-11000).
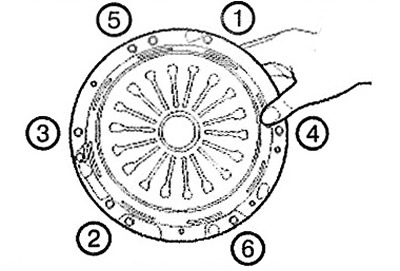
3. Install the clutch basket assembly onto the flywheel and temporarily tighten the bolts three turns at a time in a crisscross pattern.
Note: Tightening torque: 25-36 Nm.
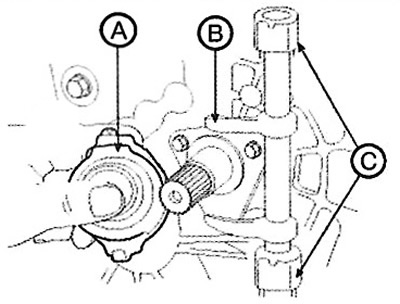
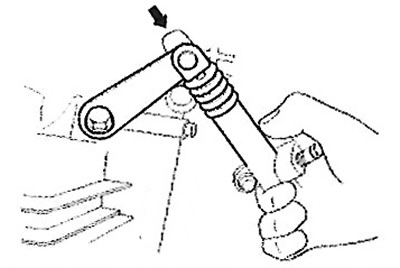
4. Align the bearing (A) with the clutch release fork (B), then install it into the housing bushing.
Caution: Apply a multi-purpose grease (CASMOLY L9508) on the bearing sleeve, the contact point of the clutch release fork (B) and the inner surface of the sleeve (C).
Note:
- Bearing bushing groove: 0.5 - 1.0 g.
- Clutch release fork contact surface: 0.3 - 0.5 g.
- Sleeve neck: 0.8 - 1.2 g.
5. Install the lever onto the clutch release fork.
6. Install the gearbox onto the engine.
Caution: If the gearbox is installed on the engine without following this step, the release bearing may separate due to the rotation of the clutch release fork.
Checking the technical condition
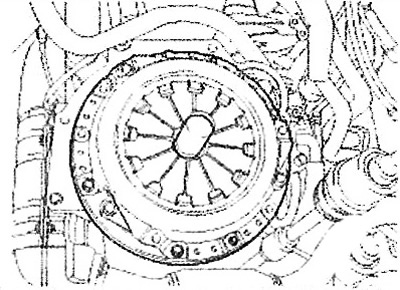
Clutch basket assembly
1. Check the disc spring petals for wear and uneven height.
2. Check the surface of the pressure plate for wear, cracks and discoloration.
3. Check the rivets for secure fixation and replace the clutch basket assembly if necessary.
Clutch disc
1. Check the clutch disc surface for loose rivets, uneven contact, deterioration due to sticking, oil or grease build-up; replace the clutch disc if it is not in good condition.
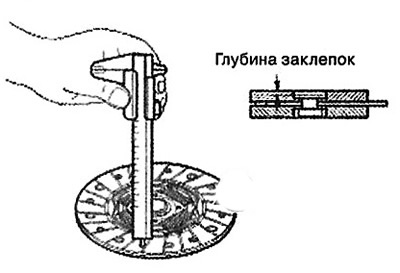
2. Measure the thickness of the clutch disc in a free state.
Note: Maximum permissible value: 0.3 mm.
3. Check the free travel of the damper springs; if they are faulty, replace the clutch disc.
4. Clean the input shaft splines and install the clutch disc.
If the disc does not move smoothly along the splines or there is increased play, replace the clutch disc and/or the gearbox input shaft.
Clutch release bearing
Caution: The clutch release bearing is lubricated. Do not use solvents or oil to clean it.
1. Check the bearing for wear, damage or abnormal noise. Check the contact areas of the bearing with the diaphragm spring for wear.
2. Replace the bearing with a new one if the contact surface of the release fork has abnormal wear.
Clutch release fork
If there is abnormal wear on the contact surface of the release fork with the bearing, replace the release fork with a new one.
6-speed manual transmission
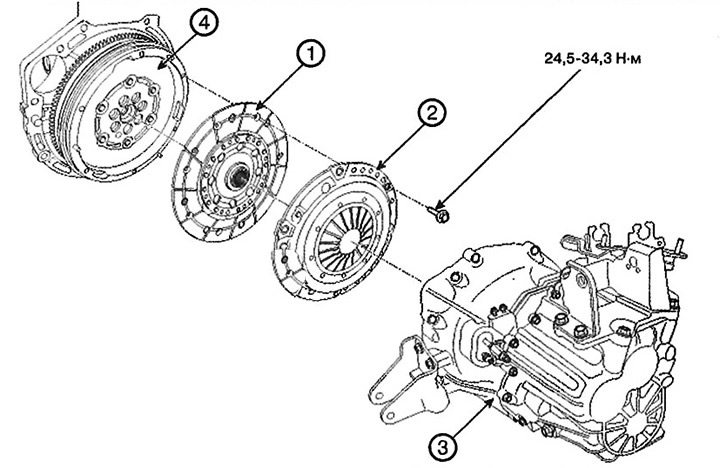
1. Clutch disc
2. Clutch basket
3. Gearbox
4. Flywheel
Removal
1. Remove the gearbox assembly.
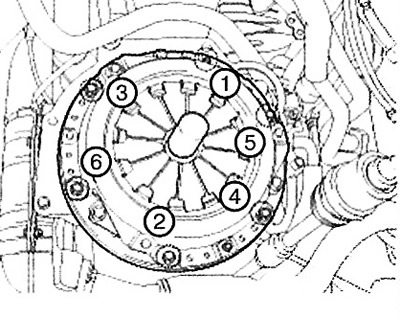
2. Unscrew the bolts from the clutch basket. To avoid bending the bolts, loosen them in a crisscross pattern.
Installation
Caution: When installing a previously used clutch basket, install it with the clutch disc assembly.
1. The clutch basket and disc should be replaced as a set.
Note:
If only the disc is replaced, the clutch slippage problem may occur due to the loss of the initial clamping force due to the abnormal operation of the adjusting ring.
In addition, replacing only the clutch disc may cause problems with power transmission interruption, since the disc thickness cannot be guaranteed to meet regulatory requirements.
2. Apply the required amount of grease to the splined parts of the clutch disc and the gearbox input shaft.
Note:
Possible malfunctions associated with incorrect amount of lubrication:
Lack of lubrication: increased wear of splines and poor clutch performance.
Too much lubrication: lubricant splashing due to centrifugal forces and, as a result, clutch slippage due to oiling of the clutch disc and loss of friction forces.
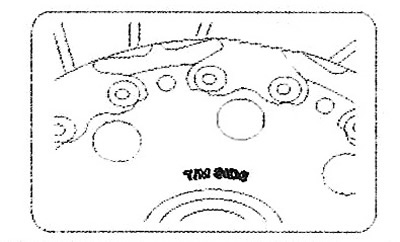
3. The clutch disc should be installed with the side marked "T/M SIDE" (gearbox side) facing outward (towards you).
Note:
Possible malfunctions associated with installing the disk upside down:
The concentric working cylinder on the gearbox side rubs against the flywheel surface.
Due to improper clutch disengagement, gear shifting may occur incorrectly or be accompanied by unusual noise.
Concentric working cylinder failure. In this case, the concentric working cylinder should be replaced with a new one.
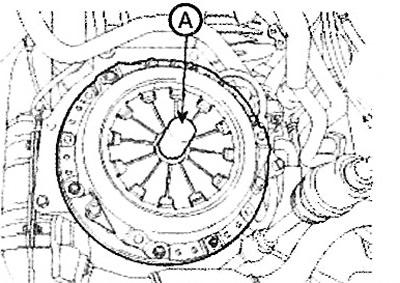
4. When installing the clutch disc and basket, use a special tool (A).
5. Tighten the clutch basket bolts. To avoid bending the bolts, tighten them in a crisscross pattern.
Note: Tightening torque: 24.5 - 35.3 Nm.
Attention.
- Do not tighten the bolts to the specified torque at once. This may cause the basket to bend and vibrate, and the pressure plate to not separate properly.
- Tighten the mounting bolts to the specified torque. Failure to do so may result in improper torque transmission or loosening of the mounting bolts.
6. Install the gearbox assembly.
7. Remove air from the concentric working cylinder.