
Contents: Turbocharger ⇓ Intercooler - removal and…⇓
Turbocharger
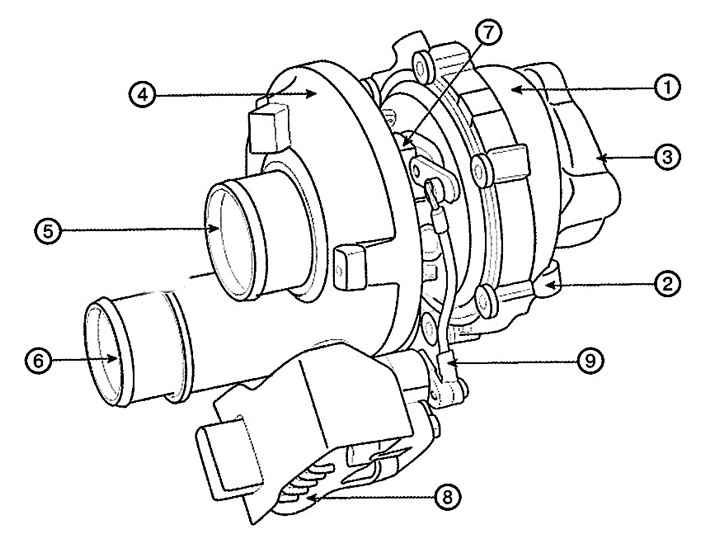
1. Turbine wheel housing
2. Turbine wheel inlet
3. Turbine wheel outlet
4. Compressor housing
5. Compressor inlet
6. Compressor outlet
7. Central building
8. Drive
9. Drive rod
Intercooler - removal and installation
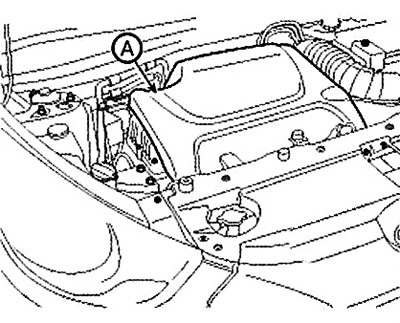
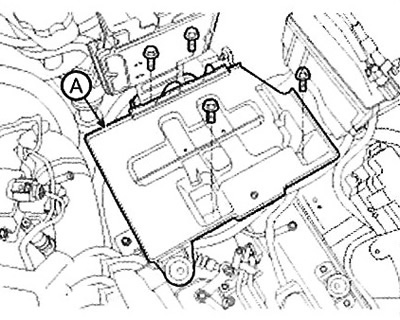
1. Remove the engine cover (A).
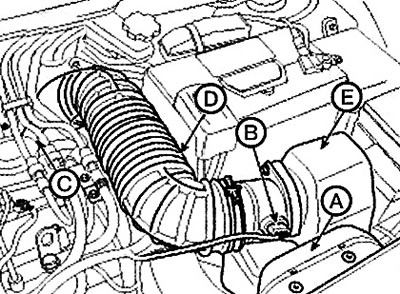
2. Remove the air filter assembly.
(1) Remove the air duct (A).
(2) Disconnect the mass air flow sensor (AFS) connector (B).
(3) Disconnect the breather hose (C).
(4) Disconnect the air intake hose (D) and remove the air cleaner (E) assembly.
Note: Tightening torque: Clamps: 2.9-4.9 Nm. Bolts: 7.8-9.8 Nm.
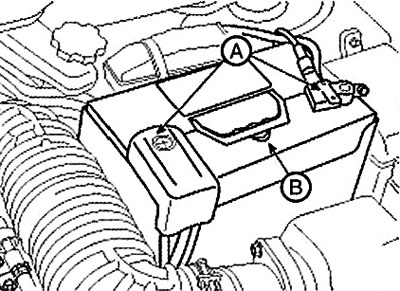
3. Disconnect the battery terminals (A) and remove the battery (B).
Note: Tightening torque:
- (-) output: 4.0-6.0 Nm.
- (+) output: 7.8-11.8 Nm.
- Bracket bolt: 9.8-11.8 Nm.
4. Remove the battery tray (A).
Note: Tightening torque: 9.8 - 11.8 Nm.
5. Disconnect the intake air temperature sensor connector (A) and disconnect the inlet (B) and outlet (C) pipes and the intercooler hose.
Note: Tightening torque: Clamps: 4.9 - 6.9 Nm. Bolt: 9.8 - 11.8 Nm.
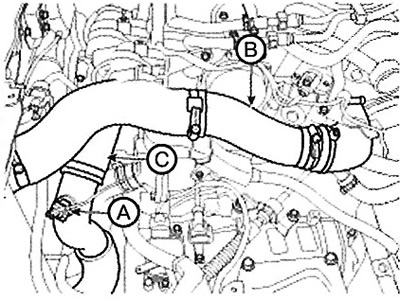
Standard power
Disconnect the boost pressure sensor (BPS) connector (A) and disconnect the inlet (B) and outlet (C) pipes and the intercooler hose.
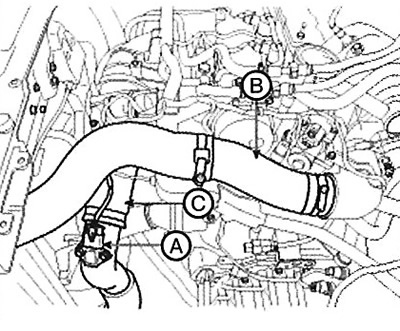
Reduced power
6. Remove the front bumper.
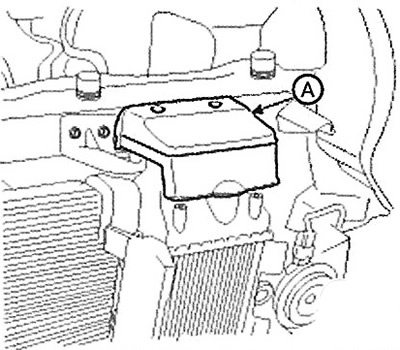
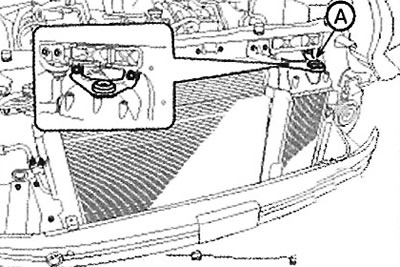
7. Remove the top cover (A).
8. Remove the upper bracket (A), then remove the intercooler assembly.
Note: Tightening torque: 9.8 - 11.8 Nm.
[The original can be found on the resource: hyundaibook]
9. Install in the reverse order of removal.