
2. Drain the refrigerant using a special installation.
3. With the engine cold, drain the coolant from the radiator.
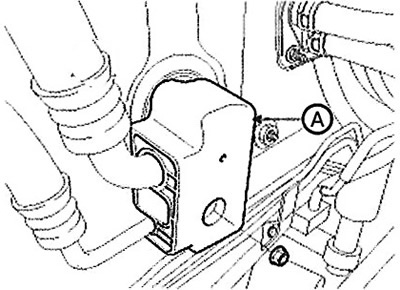
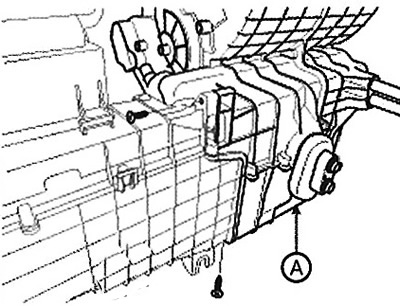
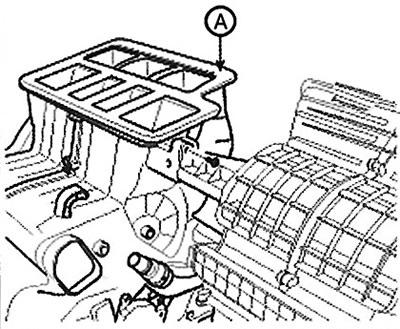
4. Remove the expansion valve cover (A).
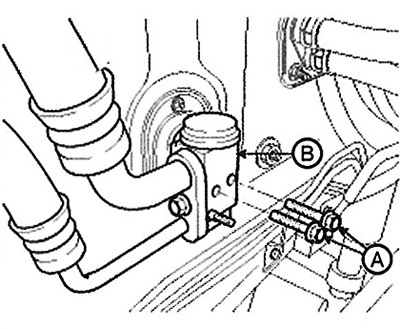
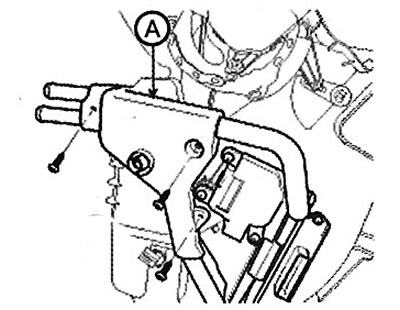
5. Loosen the screws (A) and remove the expansion valve (B) from the evaporator core.
Immediately plug or cap lines after disconnecting them to prevent moisture and dirt from entering them.
Note: Tightening torque: 7.8 - 11.7 Nm.
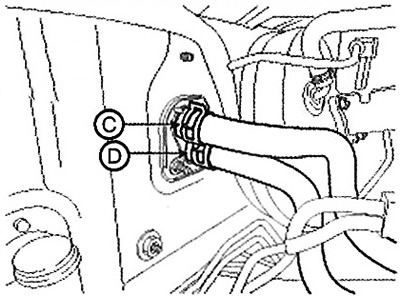
6. Disconnect the inlet (C) and outlet (D) hoses from the heater unit.
Caution: Coolant will leak out after disconnecting the hoses, collect it in a clean container. Do not allow coolant to come into contact with electrical parts or paintwork. If it does, wash it off immediately.
7. Remove the instrument panel.
8. Disconnect the connectors of the temperature control actuator, mode select actuator and evaporator temperature sensor.
9. Remove the hood cross member assembly.
10. Unscrew the three mounting bolts and remove the heater and fan unit.
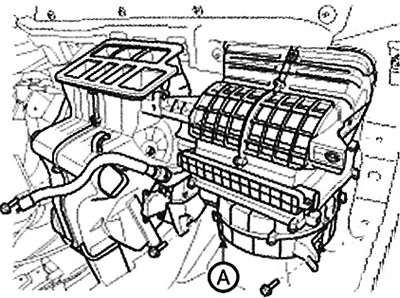
11. Remove the three screws and remove the fan assembly (B) from the heater unit.
 |
 |
12. Loosen the fastening screw and remove the cover (A) of the heater core.
13. Remove the lower part (A) of the heater housing by unscrewing the screw.
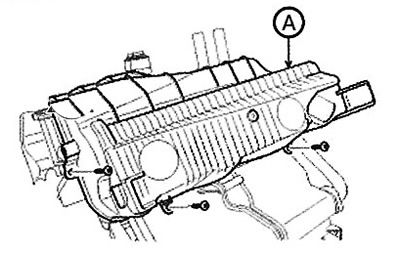
14. Remove the evaporator core (A).
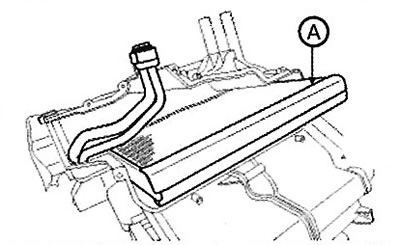
15. Remove the heater core, being careful not to bend the inlet and outlet pipes.
16. Install in the reverse order of removal.
17. Please note the following points:
A. When installing a new evaporator, add compressor oil (ND-OIL8).
B. Replace the O-rings with new ones on each fitting; apply a thin film of oil to them before installing. Be sure to use O-rings designed for R-134a refrigerant to prevent leaks.
C. Immediately after using the oil, place the lid on the container and tighten it tightly to prevent moisture from entering.
D. Do not allow compressor oil to come into contact with the vehicle as it may damage the paintwork. If it does, wash it off immediately.
E. Apply sealant to the seals.
F. Make sure there are no air leaks.
G. Prime the system and check its performance.
H. Do not confuse the heater inlet and outlet hoses, securely fasten the clamps.
I. Add coolant.