HyundaiBook.ru
Repair Chevrolet Repair Honda Repair Toyota Repair Land Rover Repair VAZ Repair Renault Repair Nissan
English Русский
Български
Беларускі
Український
Српски
Hrvatski
Română
Polski
Slovenský
Magyar
ArticlesSitemapContacts  


  Accent   Elantra   Getz   Grandeur   Sonata   Santa Fe   Tucson   Others
Elantra 1 (1990-1995, petrol) Elantra 2 (1995-2000, petrol) Elantra 3 (2000-2006)
  • Main
  • Elantra
  • XD (2000-2006)
  • Electrical equipment
  • Power devices
  • Gasoline Engine Generator

Gasoline Engine Generator (Hyundai Elantra XD)

0
Contents: Removal ⇓ Disassembly ⇓ Assembly ⇓ Examination ⇓ Installation ⇓
Gasoline Engine Generator


Removal


Removal


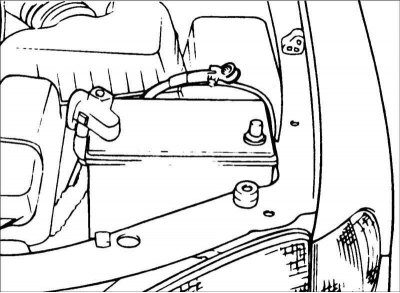
1. Disconnect the cable from the negative terminal of the battery.
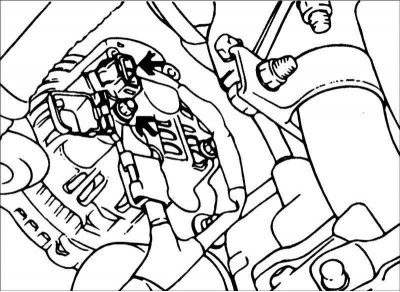

1. Disconnect the cable from the negative terminal of the battery.

2. Disconnect the connector from the generator and the wire from the «B»…


2. Disconnect the connector from the generator and the wire from the "B" terminal of the generator.
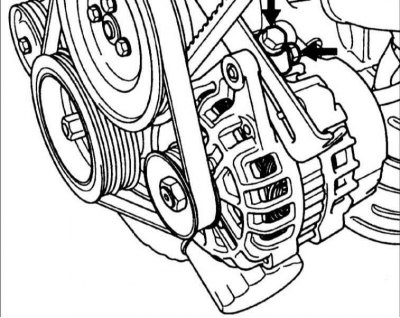


3. Loosen the belt tension adjusting bolt and remove the generator mounting…


3. Loosen the belt tension adjusting bolt and remove the generator mounting bolt.
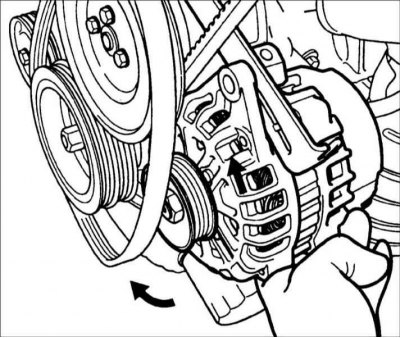
4. By pressing the generator towards the engine, remove the generator drive…


4. By pressing the generator towards the engine, remove the generator drive belt.
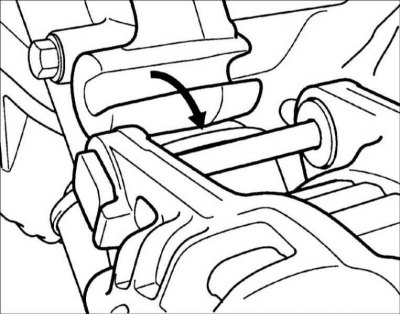
5. Remove the bolt and nuts and remove the generator from the vehicle.


[The material was obtained from a web resource HyundaiBook.ru]

5. Remove the bolt and nuts and remove the generator from the vehicle.

Disassembly
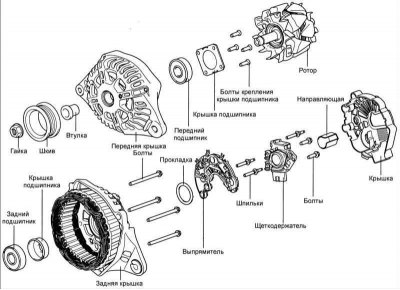


1. Remove the screws and generator cover.
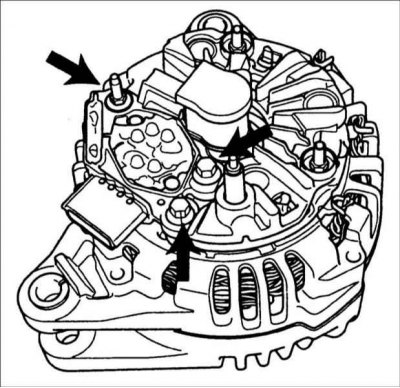

1. Remove the screws and generator cover.


2. Loosen the screws and remove the brush holder.
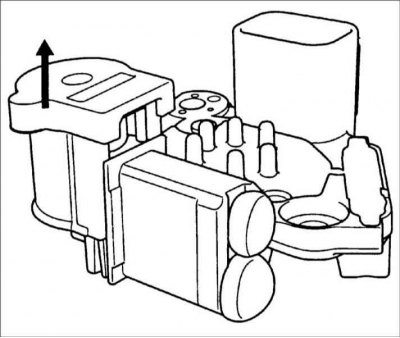

2. Loosen the screws and remove the brush holder.

3. Remove the contact ring guide.

3. Remove the contact ring guide.

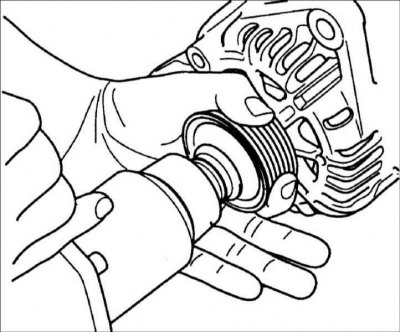
4. Remove the pulley mounting nut, then remove the spring washer, pulley and…


4. Remove the pulley mounting nut, then remove the spring washer, pulley and spacer sleeve.
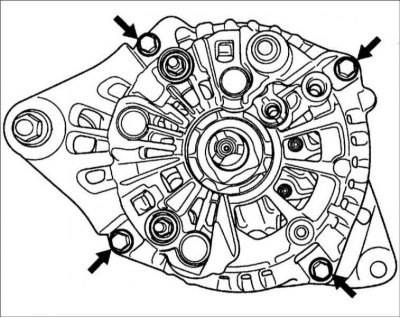
5. Remove the four tie bolts.
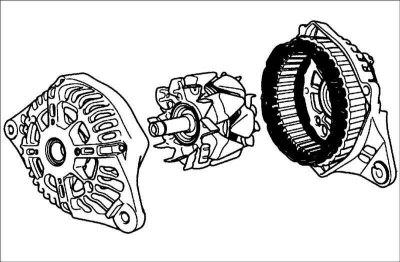

5. Remove the four tie bolts.


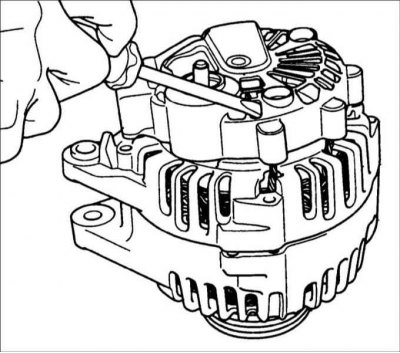
6. Insert the blade of two flat-head screwdrivers between the front cover and…


6. Insert the blade of two flat-head screwdrivers between the front cover and the stator magnetic core and remove the cover.

Assembly


The generator is assembled in the reverse order of disassembly.

Examination


Rotor
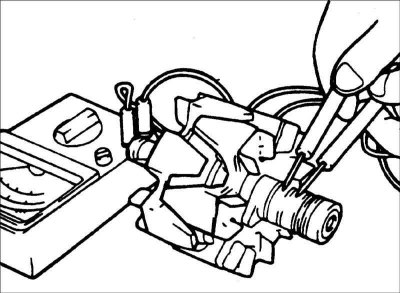


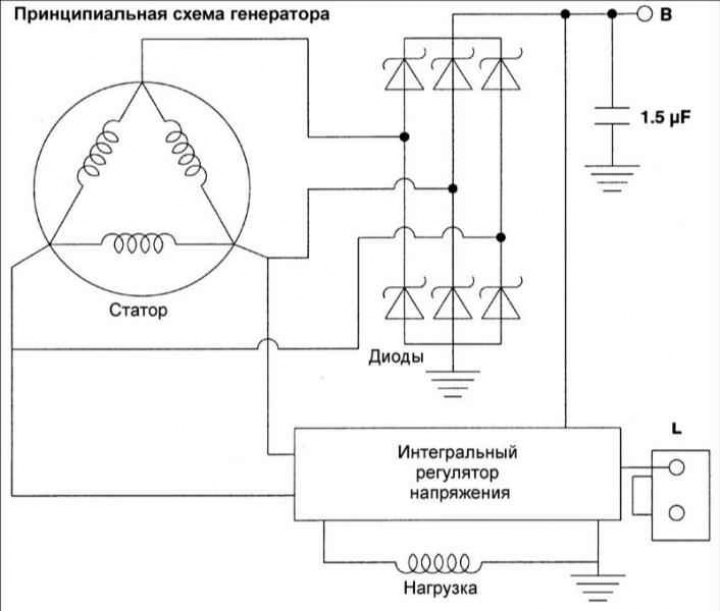
1. Use an ohmmeter to measure the resistance between the contact rings. If the…


1. Use an ohmmeter to measure the resistance between the contact rings. If the resistance is extremely low, there is a short circuit in the rotor winding. If there is no conductivity, then there is a break in the rotor winding, and the rotor must be replaced. Resistance: 3.1 Ohm.
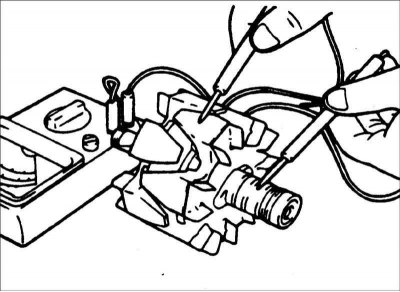
2. Use an ohmmeter to check the conductivity between the slip ring and the…


2. Use an ohmmeter to check the conductivity between the slip ring and the rotor armature. If there is continuity, replace the rotor.


Stator
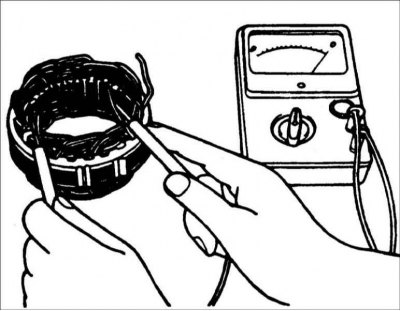


1. Use an ohmmeter to check the conductivity between the stator coil wires. If…


1. Use an ohmmeter to check the conductivity between the stator coil wires. If there is no conductivity, replace the stator.
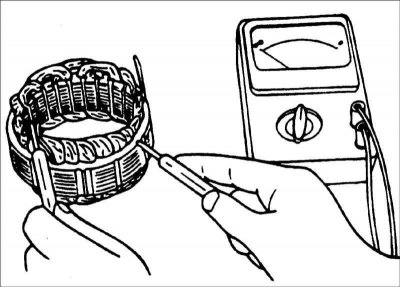
2. Use an ohmmeter to check the conductivity between the stator coils and the…


2. Use an ohmmeter to check the conductivity between the stator coils and the stator. If there is continuity, replace the stator.

Replacing brushes
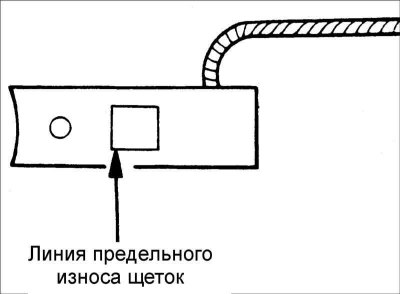


If the brushes are worn to the limit line, replace them.


If the brushes are worn to the limit line, replace them.


1. Unsolder the braided wire and remove the spring and brush.

2. Install the brush spring and new brush into the brush holder.

3. Insert the brush so that there is a distance of 2–3 mm between the wear limit line and the end of the brush holder.

4. Solder the braided wire to the brush holder.

Installation


Installation is carried out in the reverse order of removal.
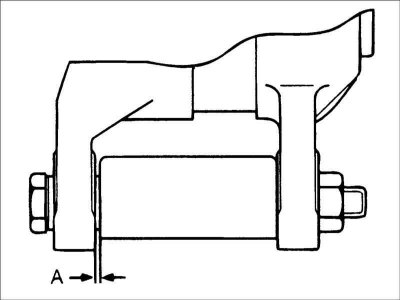
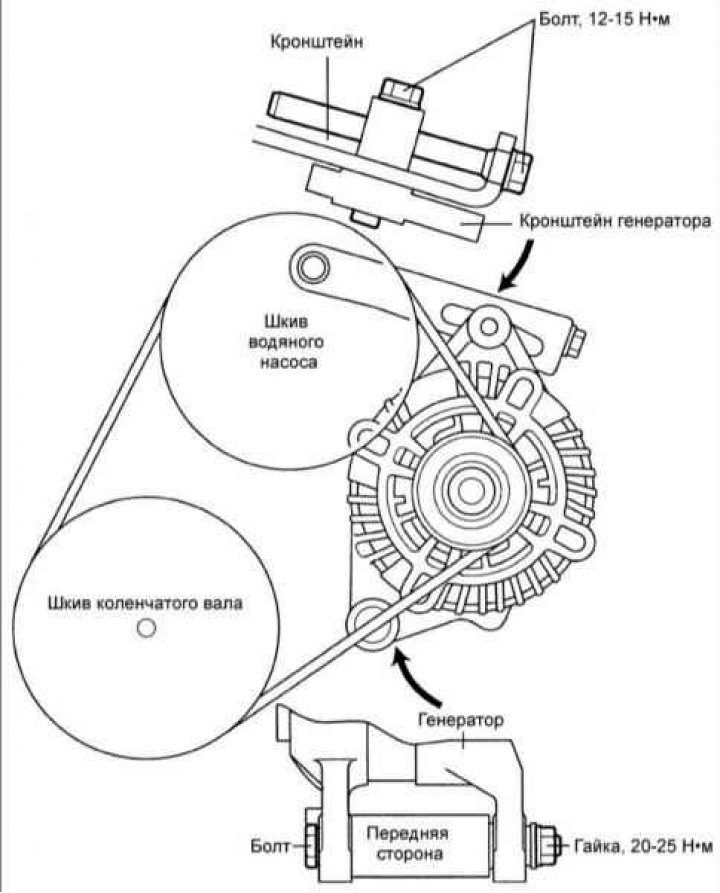
1. Install the generator on the engine. Insert the center generator mounting…


1. Install the generator on the engine. Insert the center generator mounting bolt, but do not screw the nut onto it.

2. Move the generator to one side along the generator center mounting bolt and measure the distance between the generator support and the bracket. Select a set of spacer washers that matches the measured distance.

3. Insert spacer washers and screw the nut onto the central generator mounting bolt.
This article is available at russian, bulgarian, belarusian, ukrainian, serbian, croatian, romanian, polish, slovak, hungarian
This article has been reviewed by: Konstantin Smirnov
Add to social network:

Previous
Elantra 3: Power devices
Next

Checking the generated voltage
Checking the current generated by the generator
Checking the voltage drop on the wire connecting the battery to the generator
Generator — General Description
Charging system
Diesel Engine Generator
Rechargeable battery
Launch system
Starter for gasoline engines
Diesel engine starter
We recommend other articles on the topic of Hyundai manuals:

Engine Identification Number Hyundai Accent 1 (1994-1999)
Electronic immobilizer (anti-theft engine start blocking system) Hyundai Getz (2002-2011)
Checking the engine oil level Hyundai Sonata 3 (1993-1998)
Before starting the engine Hyundai Santa Fe 2 (2007-2012, petrol)
Gasoline engine intake air temperature sensor Hyundai Tucson 2 (2009-2015)
Table 1.6. Coolant concentration for gasoline engine Hyundai Matrix (2001-2010, petrol)

Link in different formats to this article

Visitor comments
No comments yet


How much will 35 + 16 ?


Elantra 3 (2000-2006) 
  • User manual
  • Control devices
  • Audio system
  • Starting the engine and driving
  • Faults en route
  • Maintenance and care
  • Technical information
  • Power unit
  • Gasoline engines
  • Diesel engines
  • Lubrication system
  • Cooling system
  • Fuel system (gasoline)
  • Fuel system (diesel)
  • Decreased toxicity
  • Ignition system
  • Transmission
  • Clutch
  • Mechanical gearbox
  • Automatic gearbox
  • Drive shafts and axles
  • Chassis
  • Car suspension
  • Steering
  • Brake system
  • Body
  • Exterior (external elements)
  • Interior (internal elements)
  • Air conditioning system
  • Electrical equipment
  • Equipment and devices
  • Headlights and lighting
  • Power devices
  • Electrical circuits
Elantra 2 (1995-2000, petrol) 
  • General information
  • Maintenance
  • Power unit
  • Engine repair
  • Cooling system
  • Intake and exhaust system
  • Fuel system
  • Transmission
  • Clutch
  • Manual gearbox
  • Automatic gearbox
  • Drive shafts and axles
  • Chassis
  • Front suspension
  • Rear suspension
  • Steering
  • Brake system
  • Body
  • Body elements
  • Electrical equipment
  • Equipment and devices
  • Electrical diagrams
Elantra 1 (1990-1995, petrol) 
  • General information
  • Introduction to the guide
  • Maintenance
  • Power unit
  • Minor engine repair
  • Engine overhaul
  • Lubrication system
  • Cooling system
  • Fuel injection system
  • Ignition system
  • Exhaust system
  • Transmission
  • Clutch
  • Manual gearbox
  • Automatic gearbox
  • Drive shafts
  • Chassis
  • Front suspension
  • Rear suspension
  • Steering
  • Wheels and tires
  • Troubleshooting
  • Brake system
  • Body
  • Body elements
  • Electrical equipment
  • Equipment and devices
  • Power devices
  • Heating and air conditioning
  • Electrical circuits
HyundaiBook.ru © 2018-2026 · Mobile version · Sitemap: EN BG BY UA RS HR RO PL SK HU · Administration · Site search · Hyundai owners Accent 1 · Accent 2 · Accent 3 · Elantra 1 · Elantra 2 · Elantra 3 · Getz · Sonata 3 · Sonata 4 · Santa Fe 2 · Tucson 1 · Tucson 2 · Matrix ·
This site uses cookies to optimize its functionality. By continuing, you agree to our terms.