


Contents: Speedometer ⇓ Tachometer ⇓ Fuel level indicator ⇓ Fuel level sensor ⇓ Coolant temperature gauge ⇓
Speedometer
1. Check tire pressure and adjust if necessary.
2. Place the front wheels of the vehicle on the running drums. Be sure to place wheel chocks (A) under the rear wheels.
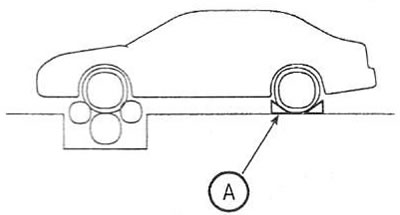
3. Check the speedometer readings and compare them with the acceptable values.
Note: Do not increase/decrease engine speed or disengage the clutch suddenly.

Tachometer
4. Connect the tester to the diagnostic connector or install a tachometer.
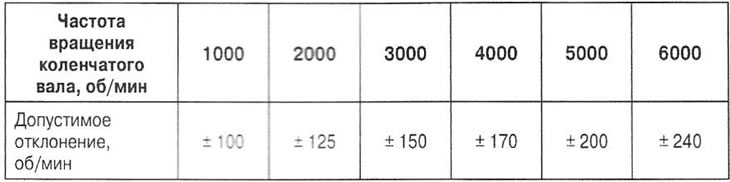
5 Start the engine and check the tachometer readings. Compare them with the permissible values.
Fuel level indicator
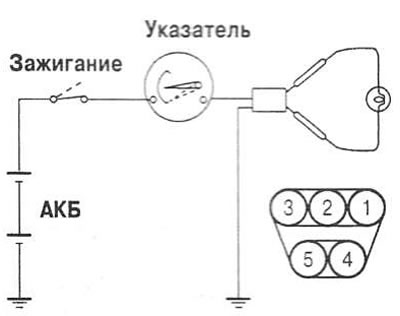
6. Disconnect the connector from the fuel level indicator sensor.
7. Connect the test lamp (3W, 12V) to pins 1 and 3 of the wire part of the connector.
8. Turn on the ignition and make sure that the lamp lights up and the indicator arrow moves towards the "full tank" side.
Fuel level sensor
9. Using an ohmmeter, measure the resistance between contacts 1 and 3 of the sensor (A) at the corresponding float positions. Also make sure that when moving the float from position "E" to "F", the resistance changes smoothly, without jumps.
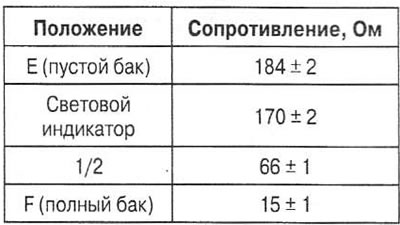
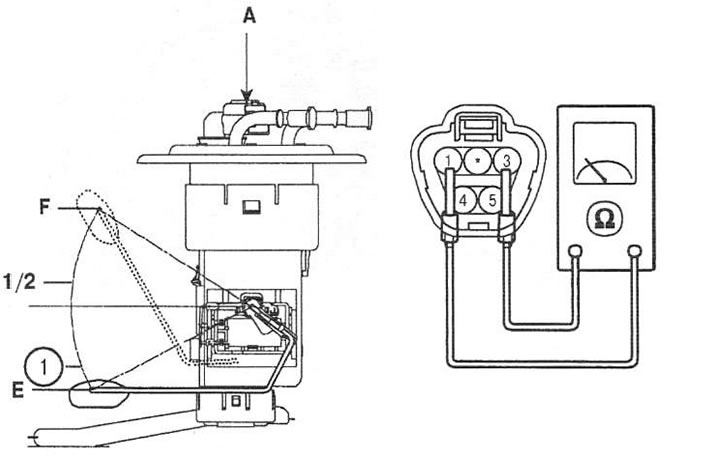
1. Indicator light
Coolant temperature gauge
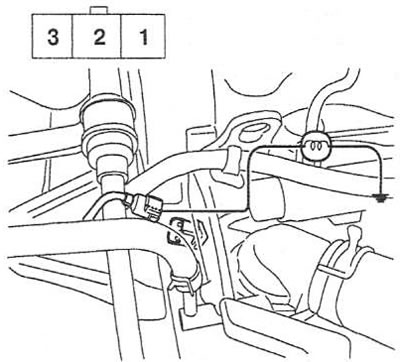
10. Disconnect the coolant temperature sensor connector in the engine compartment.
11. Turn on the ignition and make sure that the indicator shows "cold coolant". Turn off the ignition.
12. Connect a test lamp (3W, 12V) to the terminal 2 wired part of the connector and "mass".
13. Turn on the ignition and make sure that the lamp flashes and the pointer moves to the side "hot coolant".
(The material was obtained from a web resource HyundaiBook)