
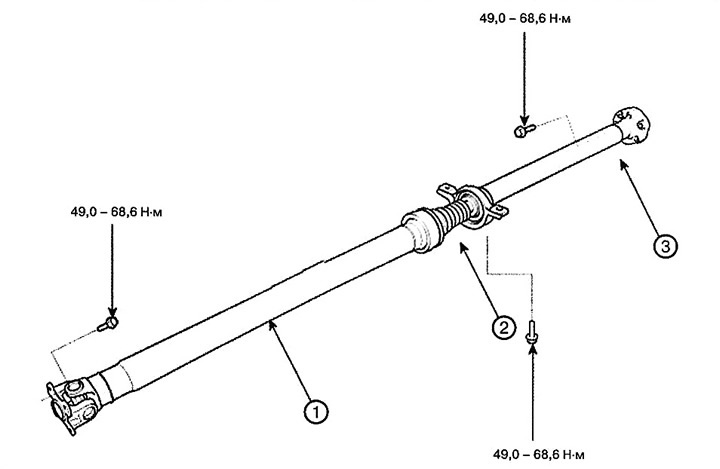
1. Front part of the propeller shaft
2. Support bearing bracket
3. Rear part of the propeller shaft
Checking the technical condition
CV joints and dust boots
1. Shift into neutral.
2. Raise the vehicle and place it on supports in the designated places.
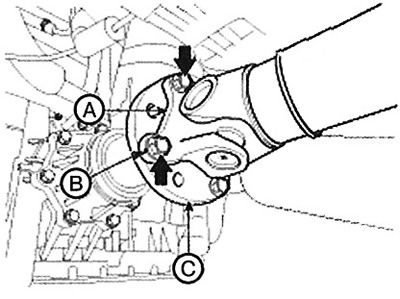
3. Check the central support bearing (B) for excessive play or knocking when rotating, and the rubber support for breaks. If any, replace the driveshaft assembly.
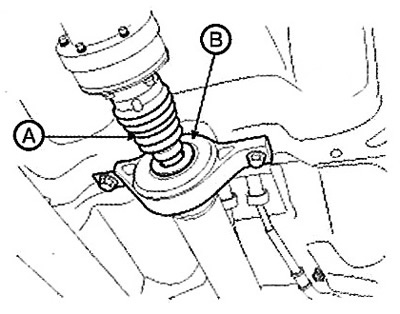
4. Check the CV joint boots (A) for damage and signs of wear. If any, replace the propeller shaft assembly.
5. Check the CV joints for excessive play or knocking when rotating. If present, replace the driveshaft assembly.
Cardan shaft runout
1. Install a dial indicator at the center point of the front or rear of the propeller shaft.
2. Measure the runout by slowly rotating the other part of the driveshaft. Repeat this procedure for the other part of the driveshaft.
Note: Front propeller shaft runout: 0.3mm.
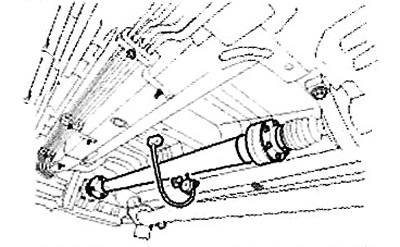
Note: Runout of rear part of propeller shaft: 0.3 mm.
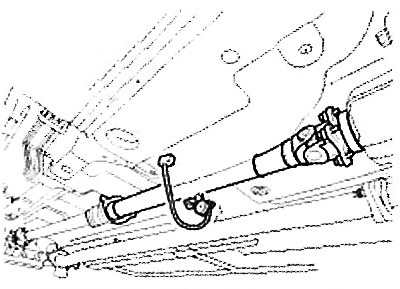
3. If the runout of any part of the propeller shaft exceeds the service limit, replace the propeller shaft assembly.
Replacement
1. Place a mark (B) on the flange yoke (A) and the coupling flange (C) of the gearbox, then remove the propeller shaft mounting bolts.
Note: Tightening torque: 49.0 - 68.6 Nm.
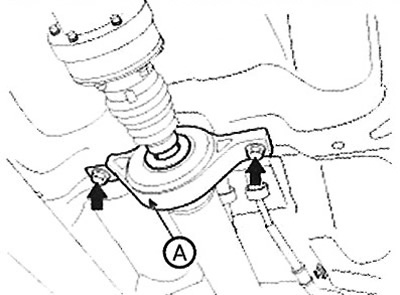
2. Loosen the bolts (A) securing the central bearing bracket.
Note: Tightening torque: 49.0 - 68.6 Nm.
3. Place a mark (C) on the flange yoke (A) and the coupling flange (B) of the gearbox, then remove the propeller shaft mounting bolts.
Note: Tightening torque: 49.0 - 68.6 Nm.
Caution: Use a socket wrench to avoid damaging the bolt heads when removing.

4. Installation is carried out in the reverse order of removal.