
Contents: Adjusting the glass position ⇓ Adjusting the position of the door…⇓ Adjusting the door position ⇓
Adjusting the glass position
Note: Inspect the glass guides for damage or wear and replace if necessary.
1. Remove the door trim.
2. Remove the door gasket.
3. Carefully move the glass (A) until the bolts holding it become visible, then loosen them.
[The text is taken from an online source HyundaiBook.ru]
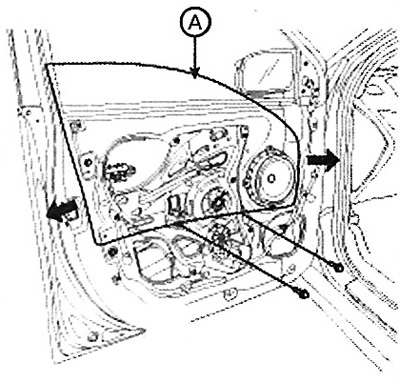
4. Make sure the glass moves smoothly.
Adjusting the position of the door lock hinge
Make sure that the door locks securely without additional force. If necessary, adjust the position of the hinge (A). The hinge nuts are fixed. The hinge can be adjusted in the up-down and in-out directions.
1. Loosen the screws (B) slightly to allow the hinge to move.
Note: Tightening torque: 8.8-13.7 Nm
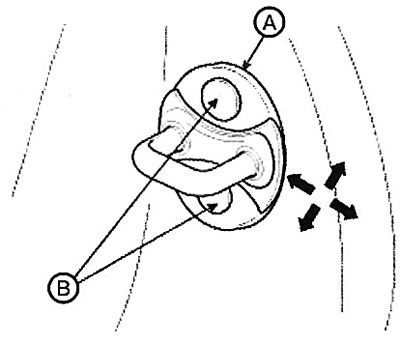
2. Adjust the position of the hinge by lightly tapping it with a plastic hammer. Only a small amount of movement of the hinge is possible.
3. Pull the outside handle outward and place the door against the body to ensure that the lock hinge allows the door to sit flush against the body. If the door locks properly, tighten the screws and check again.
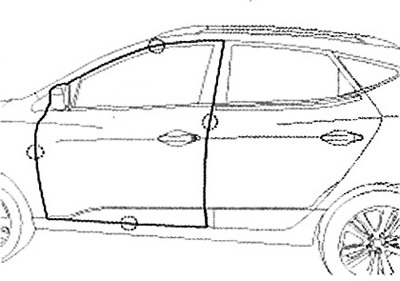
Adjusting the door position
Note: After installing the door, make sure it is flush with the body surface, then check the uniformity of the gaps between the door edges and the body along the entire perimeter of the door. Check the parallelism of the door edges and the body. Replace the mounting bolts before adjusting.
1. Place the vehicle on a level, horizontal surface when adjusting the door position.
2. Check the parallelism of the door and body edges.
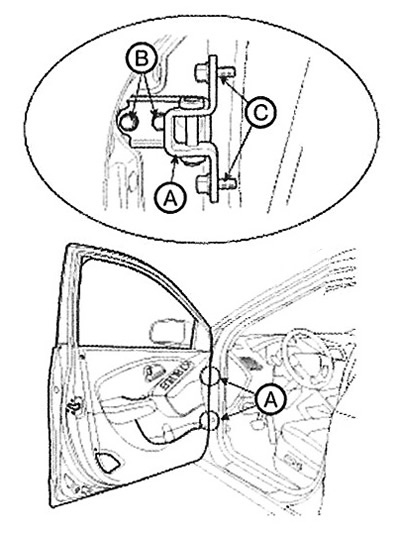
3. Adjust the hinges (A):
A. Loosen the door mounting bolts slightly and move the door in and out until it is flush with the body.
B. Loosen the hinge bolts slightly and move the door back and forth and up and down until the gaps on both sides are equal.
C. To avoid damaging the door during adjustment, place a cleaning cloth on the jack.
Note: Tightening torque:
(B): 34.3 - 41.2 Nm.
(C): 9.8 - 19.6 Nm.
4. Lubricate the rubbing parts of the hinges in the indicated places.
5. Check the door for water leaks.