Contents: Replacement ⇓ Adjustment ⇓
Replacement
Replacing the hood assembly
Note:
Removal and installation of the hood is carried out with the help of an assistant.
Try not to damage the hood and body.
When removing the fasteners, use a special tool.
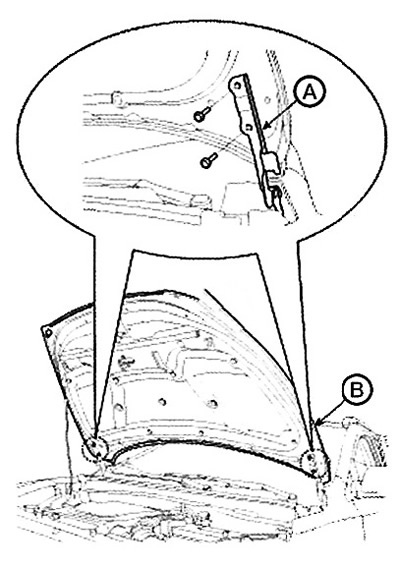
1. Loosen the bolts (A) securing the hood hinges and remove the hood (B).
Note: Tightening torque: 21.6 - 26.5 Nm.
2. Installation is carried out in reverse order.
Note: Make sure the hood locks/unlocks and opens/closes correctly. Align the hood.
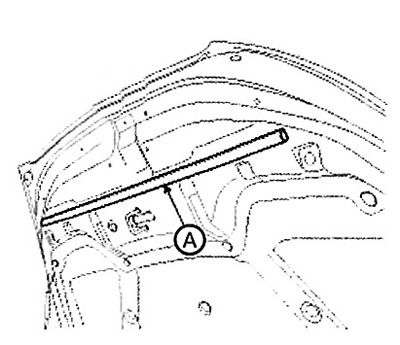
Replacing the hood insulation
Caution: Be careful not to damage the hood panel.
1. Remove the clamps using a special tool
2. Remove the hood insulation (A).
3. Installation is carried out in reverse order.
Note: Replace any damaged fasteners.
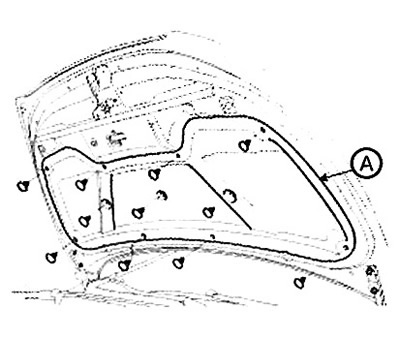
Replacing the hood seal
1. Disconnect the clips and remove the hood seal(A).
Note: Be careful not to scratch the hood seal.
2. Installation is carried out in reverse order.
Note: Replace any damaged fasteners.
Replacing the hood seal
1. Remove the hood seal (A).
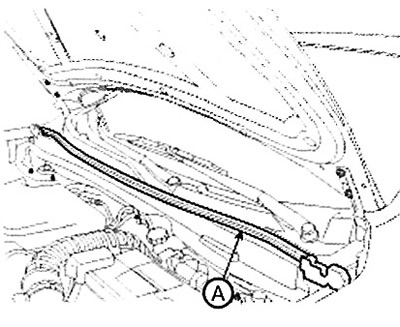
2. Installation is carried out in reverse order.
Replacing the hood release handle
1. Remove the hood release handle (A).
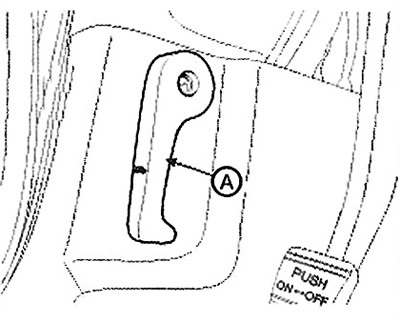
2. Installation is carried out in reverse order.
Note:
Make sure the hood release cable is installed correctly.
Make sure the hood locks/unlocks and opens/closes correctly.
Replacing the hood lock
1. Loosen the bolts (A) securing the hood lock.
2. Disconnect the hood lock cable (B) and the release cable (C).
Note: Tightening torque: 7.8 - 11.8 Nm.

3. Installation is carried out in reverse order.
Note:
Make sure the hood release cable is installed correctly.
Make sure the hood locks/unlocks and opens/closes correctly.
Adjust the lock.
Adjustment
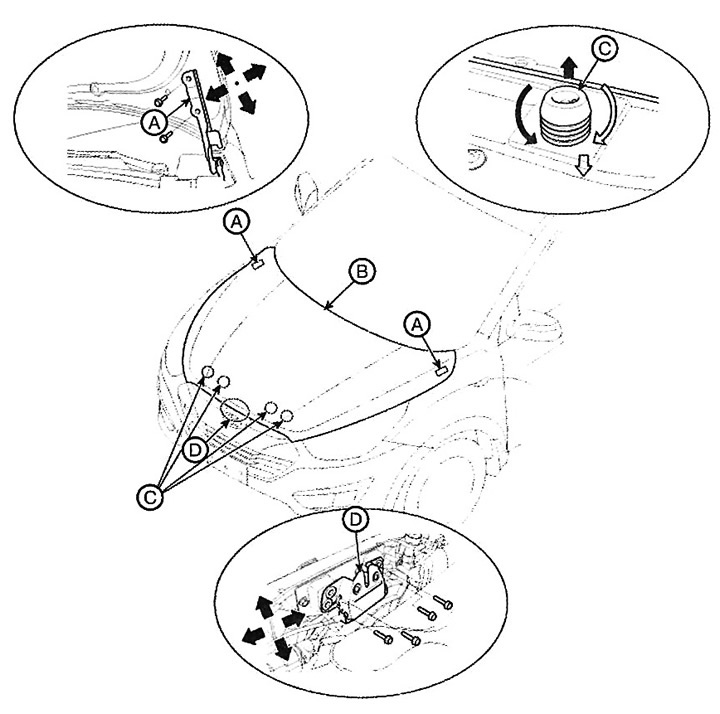
Adjusting the hood
1. Loosen the hinge mounting bolt (A) and adjust the position of the hood (B) by moving it up and down or right and left.
2. Adjust the height of the hood by turning the stops (C).
3. Loosen the hood lock (D) mounting bolts and adjust its position by moving it up and down or right and left.