Contents: Replacing the door trim ⇓ Replacing the door lock ⇓ Replacing the door lifting mechanism ⇓ Replacing the door seal ⇓ Adjustment ⇓
Replacing the door trim
Note:
To avoid damaging the lining when using a flat-head screwdriver as a lever, wrap the screwdriver with insulating tape. Also tape the adjacent parts that require protection.
To protect your hands from injury, wear gloves.
Make sure the tailgate locks/unlocks and opens/closes correctly.
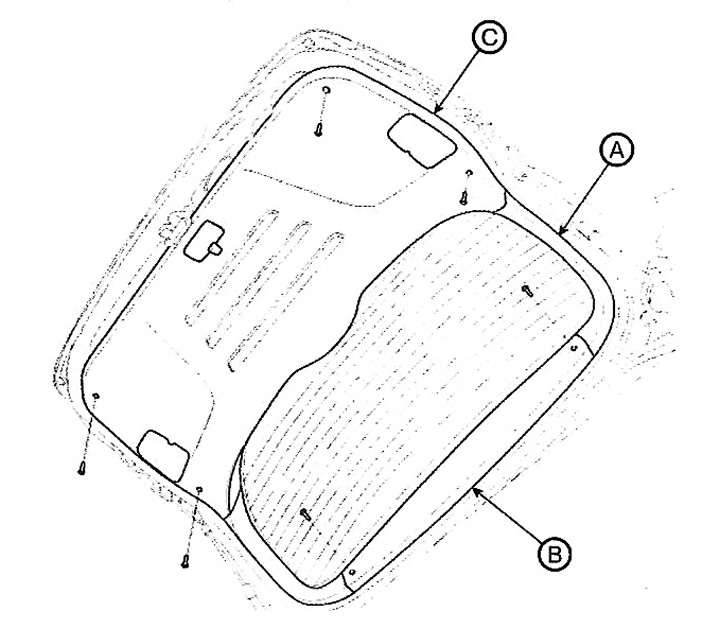
1. Remove the top panel (B).
2. Loosen the mounting screws and remove the tailgate trim (C) and side trim (A).
3. Installation is carried out in reverse order.
Note: Replace any damaged fasteners.
Make sure it opens correctly.
Replacing the door lock
1. Remove the door trim.
2. Loosen the mounting bolts and remove the lock (A).
Note: Tightening torque: 6.9 - 10.8 Nm.

3. Installation is carried out in the reverse order of removal.
Note: Make sure the tailgate opens correctly.
Replacing the door lifting mechanism
The material was obtained from a web resource: HyundaiBook
Note: Avoid closing the tailgate when removing the lift mechanism.
1. Using a screwdriver (A), slightly lift the lock (B) at both ends of the lifting mechanism (D), then remove the lifting mechanism from the bracket (C).
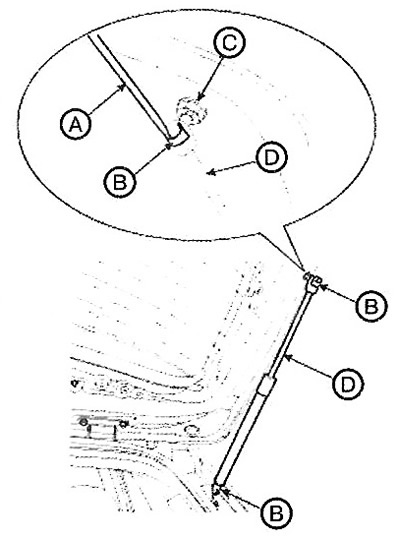
2. To install, insert the connecting elements on the lifting mechanism into the bracket.
Note: Make sure the trunk is locked/unlocked and opened/closed correctly.
Replacing the door seal
Caution: Do not apply sealant to the body.
1. Remove the door seal (A).
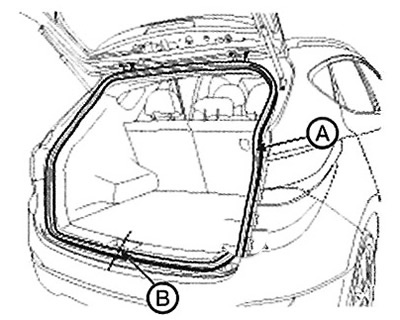
2. Installation is carried out in reverse order.
Note: Install the seal evenly around the center line (B).
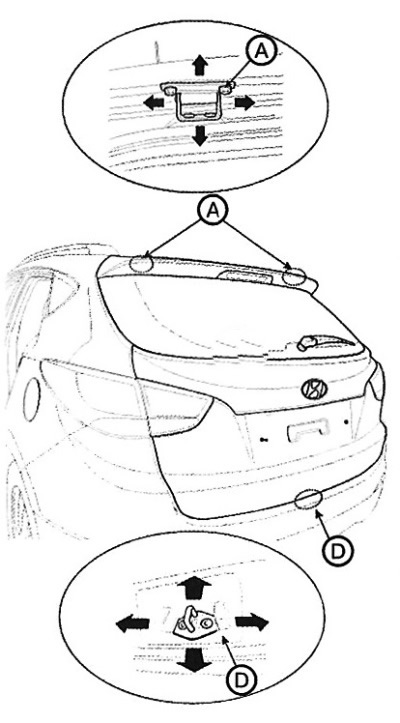
Adjustment
1. Check the parallelism of the door and body edges.
2. Loosen the door hinge mounting bolt (A) and adjust the door position by moving it up and down or right and left.
3. Adjust the stop (D) by moving it up and down or right and left.
4. Make sure that the tailgate opens/closes and locks/unlocks correctly.