
Contents: Roof Rack Replacement ⇓ Roof Molding Replacement ⇓ Replacement of decorative trim of…⇓ Replacing the rear spoiler ⇓ Replacing the side decorative door…⇓ Replacing the decorative threshold…⇓
Note:
To avoid damaging the lining when using a flat-blade screwdriver as a lever, wrap the screwdriver with insulating tape. Also tape the adjacent parts that require protection.
To protect your hands from injury, wear gloves.
Be careful to avoid scratching the body surface.
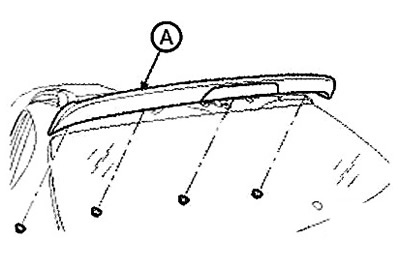
Roof Rack Replacement
1. Remove the roof rack cover (A) using a screwdriver or a special puller.
2. Loosen the mounting nuts and remove the roof rack (B).
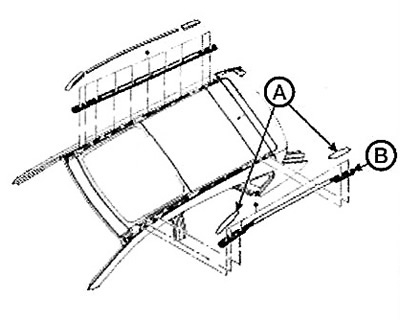
3. Installation is carried out in reverse order.
Roof Molding Replacement
1. Remove the roof rack.
2. Remove the roof molding (A) using a screwdriver or a special puller.
(The material is reprinted from another resource: HyundaiBook.ru)
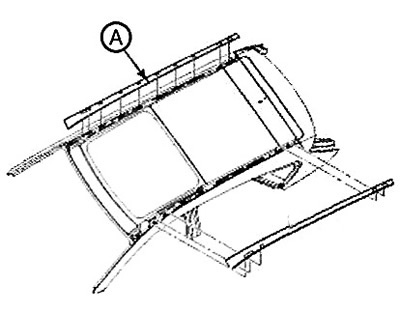
3. Installation is carried out in reverse order.
Note: Replace any damaged fasteners.
Replacement of decorative trim of the luggage compartment door
1. Remove the luggage compartment door trim.
2. Disconnect the connector (A).
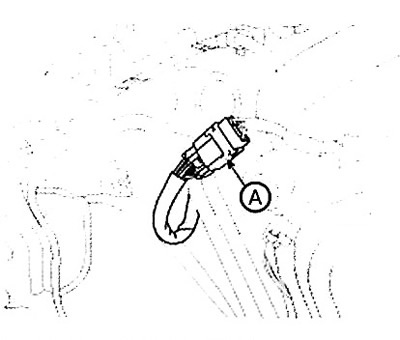
3. Loosen the fastening nuts and remove the decorative trim (A) of the door.
4. Installation is carried out in reverse order.
Note: Replace any damaged fasteners.
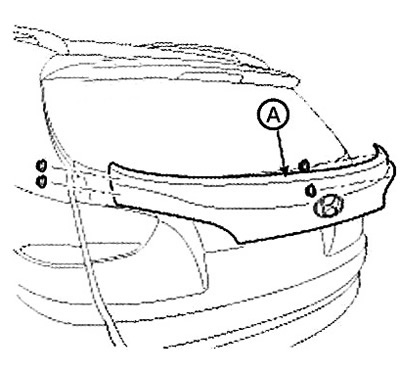
Replacing the rear spoiler
1. Remove the luggage compartment door trim.
2. Loosen the mounting nuts and remove the rear spoiler (A).
3. Disconnect the connectors (A) and the windshield washer nozzle (B).
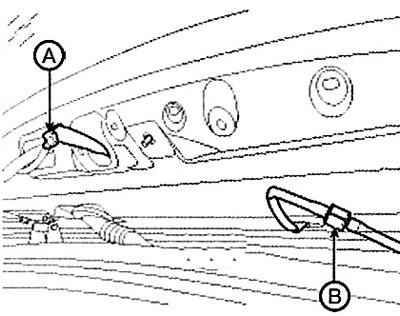
4. Installation is carried out in reverse order.
Note: Replace any damaged fasteners.
Replacing the side decorative door trim
1. Remove the decorative cover (A) of the front door using a screwdriver or a special puller.
2. Remove the decorative trim (B) from the rear door using a screwdriver or a special puller.
3. Installation is carried out in reverse order.
Note: Replace any damaged fasteners.
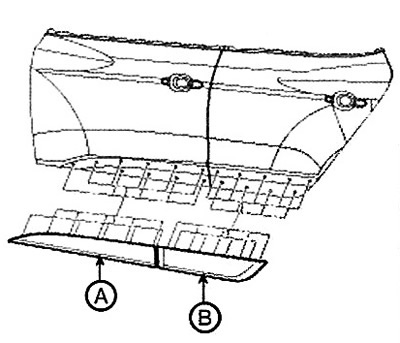
Replacing the decorative threshold trim
1. Loosen the mounting screws.
2. Remove the decorative trim (A) of the threshold using a screwdriver or a special puller.
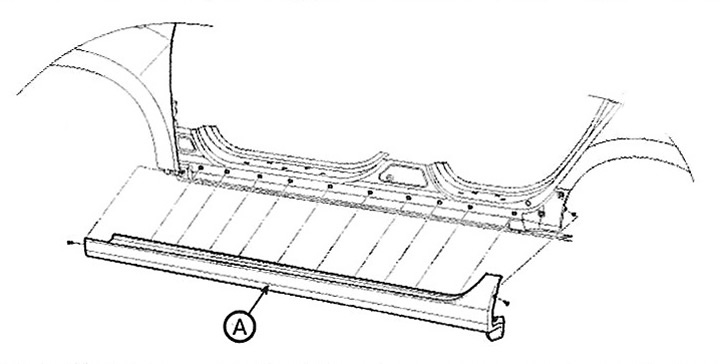
3. Installation is carried out in reverse order.
Note: Replace any damaged fasteners.