HyundaiBook.ru
Repair Chevrolet Repair Honda Repair Toyota Repair Land Rover Repair VAZ Repair Renault Repair Nissan
English Русский
Български
Беларускі
Український
Српски
Hrvatski
Română
Polski
Slovenský
Magyar
ArticlesSitemapContacts  


  Accent   Elantra   Getz   Grandeur   Sonata   Santa Fe   Tucson   Others
Elantra 1 (1990-1995, petrol) Elantra 2 (1995-2000, petrol) Elantra 3 (2000-2006)
  • Main
  • Elantra
  • XD (2000-2006)
  • User manual
  • Faults en route
  • Replacing a flat tire

Replacing a flat tire (Hyundai Elantra XD)

0
The operations described below are…


The operations described below are performed both when rotating wheels and when replacing a flat tire. Before changing a wheel, make sure the selector lever is in the "P" position (in a car with an automatic transmission) or neutral is on (in a car with a manual transmission) and the parking brake is applied.

1. Prepare a spare tire and tools


Remove the spare tire, jack and tool…


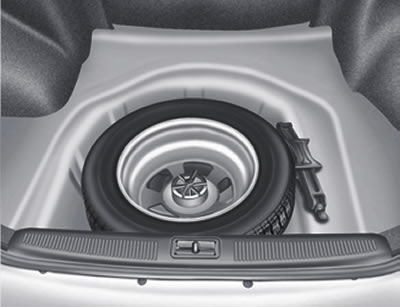
Remove the spare tire, jack and tool kit from the luggage compartment.

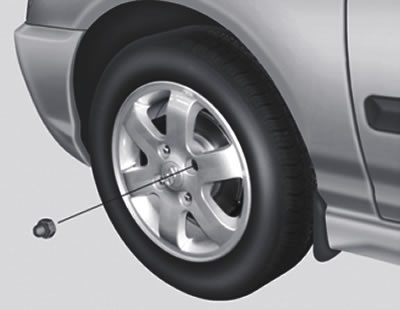
Note: The spare wheel is located under the luggage compartment floor.


2. Chock the wheel


To prevent a jacked-up vehicle from…


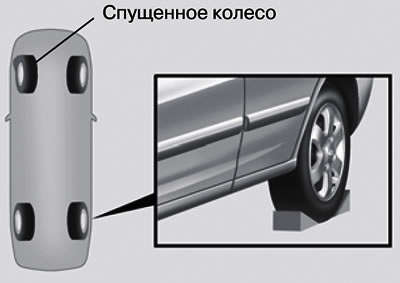
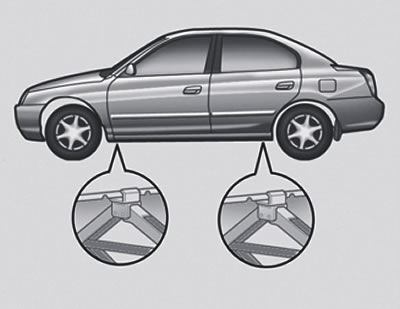
To prevent a jacked-up vehicle from rolling, place chocks under the wheel located diagonally across from the flat tire on the opposite side of the vehicle.


3. Loosen the wheel mounting nuts


Loosen the wheel nuts before raising…


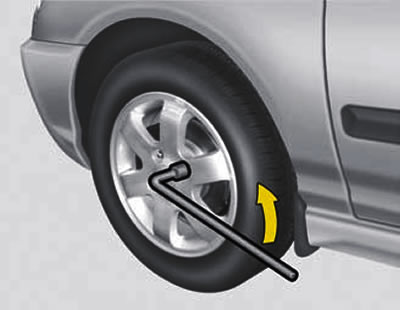
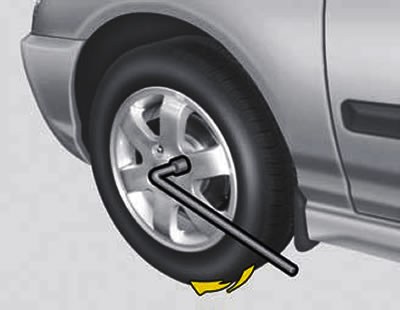
Loosen the wheel nuts before raising the vehicle. To loosen the nuts, turn the wrench counterclockwise, making sure that the head of the wrench fits tightly on the nut and does not slip off. To obtain maximum force on the wrench, position its handle as shown in the figure. Then, holding the key near the end of the handle, press it down with constant force. In this case, do not completely unscrew the nuts, but only loosen them by half a turn.

4. Install the jack


The jack is installed with its base on…


The jack is installed with its base on a solid horizontal surface, as shown in the figure.

5. Lifting the car


Insert the jack bar into the hole in…


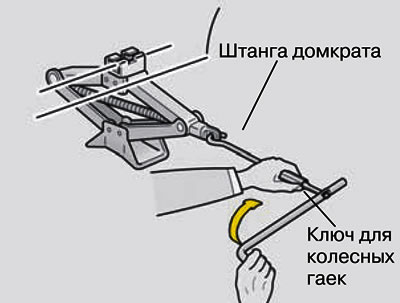
Insert the jack bar into the hole in the lug nut wrench handle and attach the other end of the bar to the jack screw as shown in the figure. To lift the vehicle, turn the key clockwise. After you start lifting the vehicle, check again that the jack is securely installed. When installing the jack on soft ground or sand, place a board, brick, flat stone or other suitable object underneath it to prevent it from sinking into the ground. Raise the vehicle to a height sufficient to accommodate a fully inflated tire. To do this, lift the car higher than is required to remove the flat tire.


Warning: Do not crawl under a vehicle supported by a jack. This is very dangerous because the jack may fall, causing serious injury or death. When lifting a car with a jack, there should be no people in it.


6. Replacing the wheel


Loosen the wheel nuts further, then…


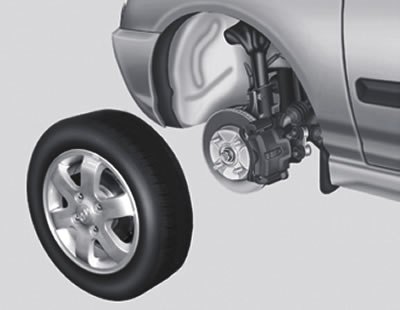
Loosen the wheel nuts further, then remove them by hand. Remove the wheel from the hub studs and place it on the ground to prevent it from rolling away. Take the spare tire, align its holes with the hub studs and place the wheel on the studs. If this doesn't work right away, tilt the wheel and align its top hole with the top stud, then slide the wheel onto the remaining studs while rocking it back and forth.

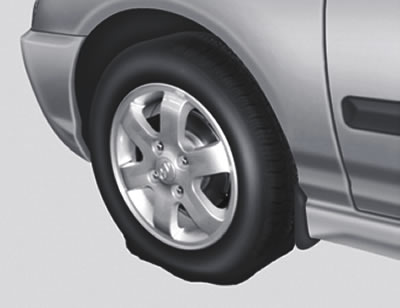
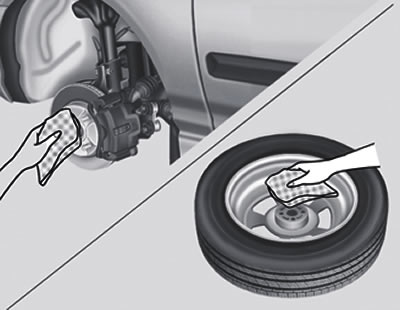
Warning: Wheels and wheel trims may have sharp edges and must be handled with care to avoid serious injury. Before installing the wheel, clean it from foreign objects (dirt, tar, gravel, etc.), which may prevent the wheel from being securely connected to the hub. Remove them if necessary. If the wheel is not tightly fitted to the hub, the wheel nuts may become loose, which may result in loss of wheel and vehicle control. This could cause serious injury or death.


7. Tightening the wheel nuts


7. Tightening the wheel nuts


After installing the wheel, manually…


After installing the wheel, manually tighten the wheel nuts onto the studs with the smaller diameter end facing the wheel. Make sure the wheel is seated correctly by rocking it slightly, then tighten the nuts again by hand as tightly as possible.

8. Lower the car and tighten the nuts


Lower the vehicle by turning the jack…


Lower the vehicle by turning the jack screw counterclockwise, then tighten the wheel nuts by installing the wrench as shown in the figure and making sure that the wrench head fits tightly on the nut. Do not press the key with your foot or increase the tightening force with a key extension.


Tighten all nuts one by one until they stop, then check the tightness again. After installing the wheel, contact a service station as soon as possible to tighten the nuts to the required torque.

Tightening torque of wheel nuts:


Wheels with stamped and light alloy disks: 900-1100 kgf·cm.
This article is available at russian, bulgarian, belarusian, ukrainian, serbian, croatian, romanian, polish, slovak, hungarian
This article has been reviewed by: Konstantin Smirnov
Add to social network:

Previous
Elantra 3: Faults en route
Next

Actions in case of a flat tire
Spare wheel
Engine overheating
Starting the engine from an external power source
The engine does not start
After changing the wheel
Towing a car
Emergency towing
If you have lost your keys
We recommend other articles on the topic of Hyundai manuals:

Replacing the air filter Hyundai Accent 1 (1994-1999)
Replacing a flat tire Hyundai Getz (2002-2011)
Replacing the engine oil filter Hyundai Sonata 3 (1993-1998)
Replacing a flat tire Hyundai Santa Fe 2 (2007-2012, petrol)
If the tire (spare wheel) is flat Hyundai Tucson 2 (2009-2015)
Checking and replacing fuses Hyundai Matrix (2001-2010, petrol)

Link in different formats to this article

Visitor comments
No comments yet


How much will 40 + 25 ?


Elantra 3 (2000-2006) 
  • User manual
  • Control devices
  • Audio system
  • Starting the engine and driving
  • Faults en route
  • Maintenance and care
  • Technical information
  • Power unit
  • Gasoline engines
  • Diesel engines
  • Lubrication system
  • Cooling system
  • Fuel system (gasoline)
  • Fuel system (diesel)
  • Decreased toxicity
  • Ignition system
  • Transmission
  • Clutch
  • Mechanical gearbox
  • Automatic gearbox
  • Drive shafts and axles
  • Chassis
  • Car suspension
  • Steering
  • Brake system
  • Body
  • Exterior (external elements)
  • Interior (internal elements)
  • Air conditioning system
  • Electrical equipment
  • Equipment and devices
  • Headlights and lighting
  • Power devices
  • Electrical circuits
Elantra 2 (1995-2000, petrol) 
  • General information
  • Maintenance
  • Power unit
  • Engine repair
  • Cooling system
  • Intake and exhaust system
  • Fuel system
  • Transmission
  • Clutch
  • Manual gearbox
  • Automatic gearbox
  • Drive shafts and axles
  • Chassis
  • Front suspension
  • Rear suspension
  • Steering
  • Brake system
  • Body
  • Body elements
  • Electrical equipment
  • Equipment and devices
  • Electrical diagrams
Elantra 1 (1990-1995, petrol) 
  • General information
  • Introduction to the guide
  • Maintenance
  • Power unit
  • Minor engine repair
  • Engine overhaul
  • Lubrication system
  • Cooling system
  • Fuel injection system
  • Ignition system
  • Exhaust system
  • Transmission
  • Clutch
  • Manual gearbox
  • Automatic gearbox
  • Drive shafts
  • Chassis
  • Front suspension
  • Rear suspension
  • Steering
  • Wheels and tires
  • Troubleshooting
  • Brake system
  • Body
  • Body elements
  • Electrical equipment
  • Equipment and devices
  • Power devices
  • Heating and air conditioning
  • Electrical circuits
HyundaiBook.ru © 2018-2026 · Mobile version · Sitemap: EN BG BY UA RS HR RO PL SK HU · Administration · Site search · Hyundai owners Accent 1 · Accent 2 · Accent 3 · Elantra 1 · Elantra 2 · Elantra 3 · Getz · Sonata 3 · Sonata 4 · Santa Fe 2 · Tucson 1 · Tucson 2 · Matrix ·
This site uses cookies to optimize its functionality. By continuing, you agree to our terms.