
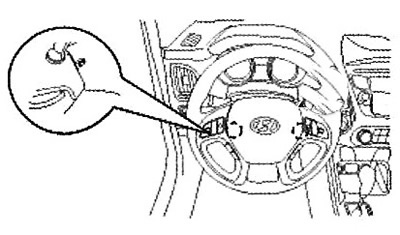
Driver's airbag
Removal
1. Before starting work, disconnect the negative battery cable and wait at least three minutes.
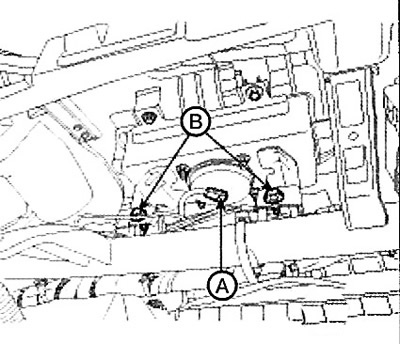
2. Remove the two airbag module mounting bolts.
3. Remove the wiring harness retaining clip (C) and disconnect the horn connector (A).
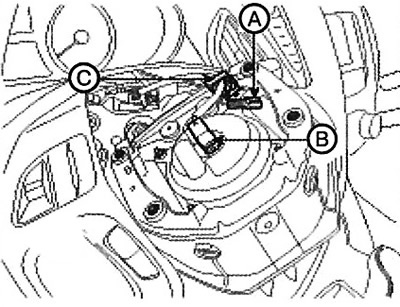
4. Release the locking pin of the driver airbag connector (B) and disconnect the connector.
Attention: The removed module should be stored in a clean, dry place with the soft cover facing up.
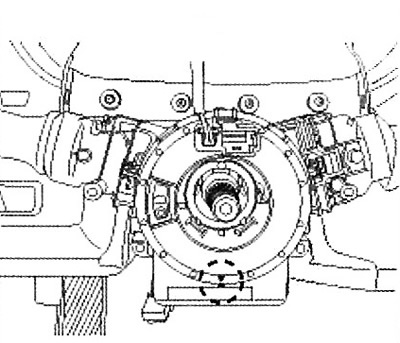
5. Remove the steering wheel and steering column cover.
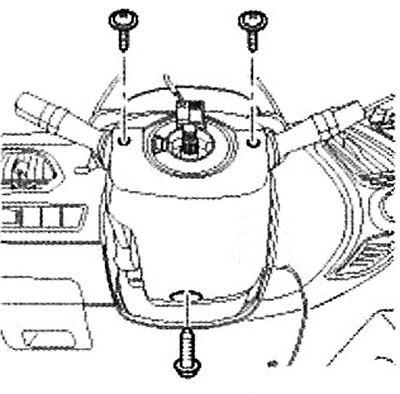
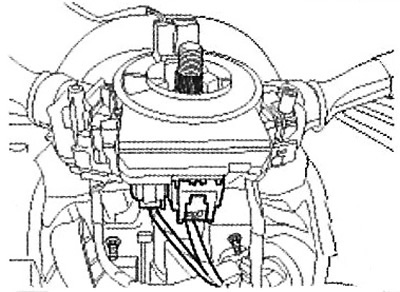
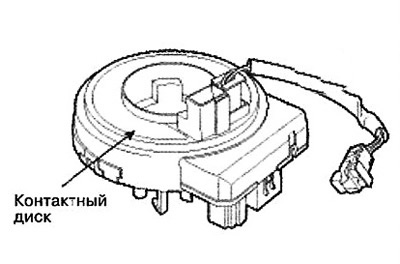
6. Disconnect the contact disk and the horn connector, then remove the contact disk.
Driver's airbag (DAB)
If the following checks reveal any faulty components, replace the air bag module assembly.
Caution: Never test the airbag circuit resistance, even with the tester specified in the manual. Measuring the circuit resistance with a tester will cause the airbag to deploy, which may result in serious injury.
1. Check the panel cover for dents, scratches and deformations.
2. Check the airbag module for dents, scratches, or deformation.
3. Check the latches and connectors for damage, the terminals for deformation, and the wire harness for pinching.
4. Inspect the airbag squib for dents, scratches or damage.
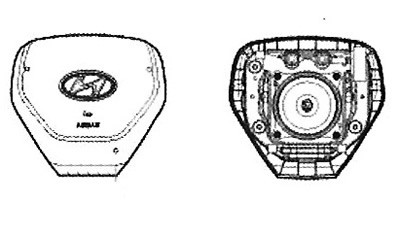
5. Install the air bag module into the steering wheel hub to check fit.
Contact disk
1. If the following inspection procedure reveals at least one faulty element, replace the contact disk with a new one.
2. Check the connectors and protective tubes for damage; check the terminals for deformation.
Installation
1. Remove the ignition key from the lock.
2. Before starting work, disconnect the negative battery cable and wait at least three minutes.
3. Connect the connectors of the contact disk harness and the connector of the horn harness to the contact disk.
4. Set the center position by aligning the marks on the contact disk and the cover. Until the marks are aligned, turn the contact disk clockwise until it stops, and then 2 turns counterclockwise.
5. Install the steering column cover and steering wheel.
6. Connect the driver airbag module (DAB) and horn connectors and install the module on the steering wheel.
7. Use new mounting bolts to install the DAB module.
Note: Tightening torque: 7.8 - 10.8 Nm.

8. Connect the negative battery cable.
9. After installing the airbag, make sure the system is working properly:
A. Turn the ignition switch to the "ON" position, the SRS indicator light should come on for approximately 6 seconds and then go out.
B. Make sure the horn is working.
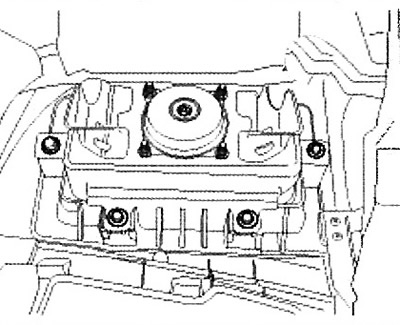
Passenger airbag
Removal
1. Before starting work, disconnect the negative battery cable and wait at least three minutes.
2. Remove the glove box.
3. Disconnect the connector (A) of the passenger airbag (PAB) and loosen the mounting bolts (B).
4. Remove the instrument panel.
Note: Replace the instrument panel if it was damaged by the passenger air bag deployment.
5. Remove the heater duct from the dashboard.
6. Unscrew the 4 mounting nuts from the instrument panel. Remove the passenger airbag.
Attention: The removed module should be stored in a clean, dry place with the pad side facing up.
Installation
1. Remove the ignition key from the lock.
2. Before starting work, disconnect the negative battery cable and wait at least three minutes.
3. Install the passenger airbag to the instrument panel and tighten the mounting nuts.
Note: Tightening torque: 7.8 - 11.8 Nm.
4. Install the heater duct onto the dashboard.
5. Install the instrument panel.
6. Tighten the passenger airbag mounting bolt.
Note: Tightening torque: 7.8 - 11.8 Nm.
7. Connect the passenger air bag (PAB) harness connectors and the SRS main harness connectors.
8. Install the glove box.
9. Connect the negative battery cable.
10. After installing the RAV module, check that it functions correctly.
Turn the ignition switch to the "ON" position, the SRS indicator light should come on for approximately 6 seconds and then go out.
Side airbag
Removal
Note: The side airbag cannot be separated from the seatback, so to replace it, the entire seatback assembly must be replaced.
1. Before starting work, disconnect the negative battery cable and wait at least three minutes.
2. Remove the front seat assembly.
3. Remove the seat back assembly.
Installation
Caution: When wiring, make sure that the wires are not pinched or interfere with other parts.
Note:
Do not open the cover on the side airbag cover.
Pay attention to the correct installation of the module cover. Incorrect installation may prevent normal opening.
1. Remove the ignition key from the lock.
2. Before starting work, disconnect the negative battery cable and wait at least three minutes.
3. Install the new seat back assembly.
4. Install the front seat assembly.
5. Check that the harness wires are not pinched or interfering with other parts by tilting and sliding the front seat forward as far as it will go.
6. Connect the negative battery cable.
7. After installing the side airbag (SAB), check that it functions properly.
Turn the ignition switch to the "ON" position, the SRS indicator light should come on for approximately 6 seconds and then go out.