
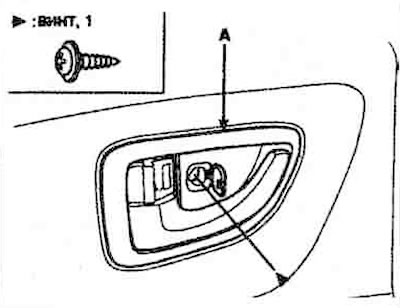
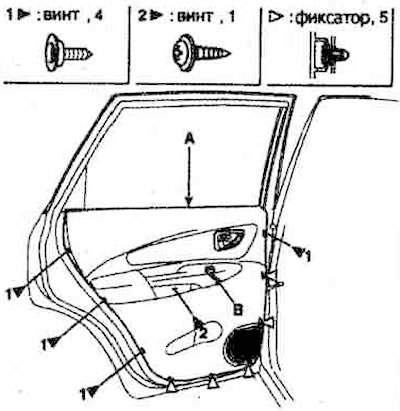
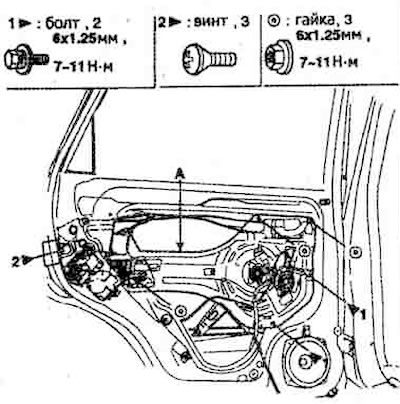
Door trim
1. Remove the inner handle cover (A).
2. Loosen the screws (A) securing the inner door trim, then remove the trim clips. Remove the door trim. Disconnect the wiring from the switch (B) of the glass movement servo drive.
3. Remove the trim seal.
4. Installation is carried out in the reverse order of removal.
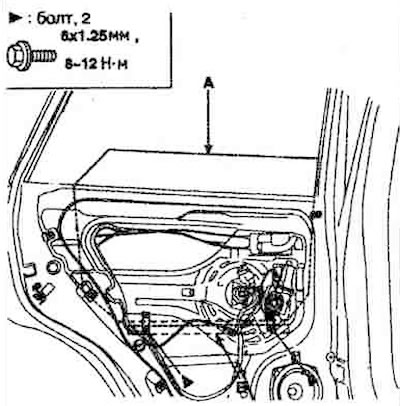
Door glass
1. Remove the door trim.
2. Remove the guide (A), door seal (B), then remove the delta molding (C).

3. Move the glass (A) to a position where the mounting bolts can be unscrewed. Remove the glass through the special opening (B).
4. Installation is carried out in the reverse order of removal.
Note: After installation, make sure there are no gaps between the glass and the guide.
Rear guide
1. Remove the door trim.
2. Remove the glass.
3. Loosen the guide mounting bolts and nuts. Then remove the guide (A).
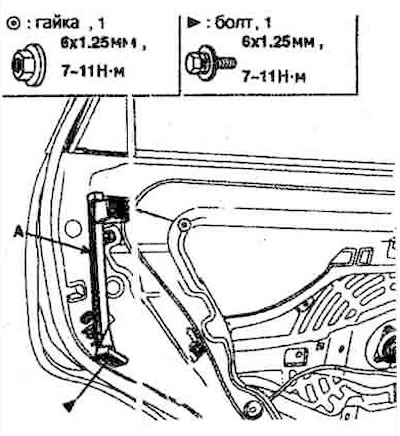
4. Installation is carried out in the reverse order of removal.
Servo motor
1. Cover the door frame.
2. Disconnect the plug (A) from the servo motor.
3. Loosen the mounting nuts and remove the engine (B).
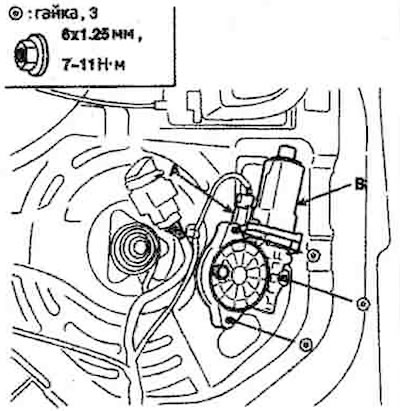
4. Installation is carried out in the reverse order of removal.
Door module
1. Remove the door trim.
2. Remove the glass.
3. Remove the glass guide.
4. Disconnect the wiring from the servo motor (A), speaker (B) and lock actuator (C). Remove the clamps.
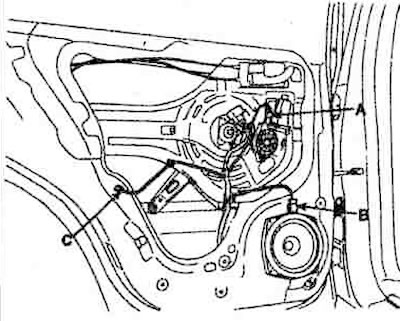
5. Remove the door module assembly (A).
6. Installation is carried out in the reverse order of removal.
Note: Check that the door closes and opens easily.
Door lock
1. Remove the door module.
2. Remove the lock cover, then disconnect the lock cable (A) and the inner handle cable (B).
3. Remove the lock (C).
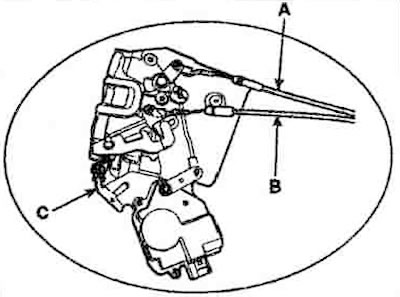
4. Installation is carried out in the reverse order of removal.
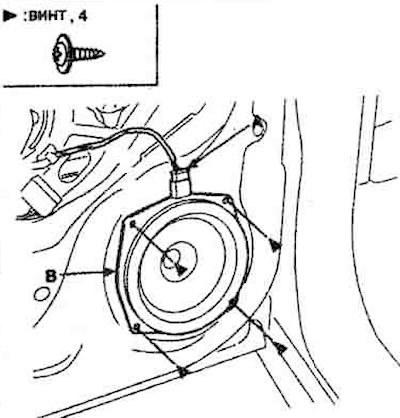
Speaker
1. Remove the door trim.
2. Disconnect the wiring from the speaker (A), then remove the speaker (B).
3. Installation should be carried out in the reverse order of removal.
3. Installation should be carried out in the reverse order of removal.