
Withdrawal
1. Remove the following items:
A. Front seat.
B. Rear seat.
C. Interior trim.
D. Ceiling lining.
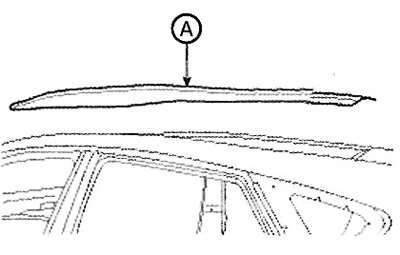
E. Roof rack and moulding.
F. Front fixed glass.
Note: To protect the interior, cover it before removing the panoramic sunroof.
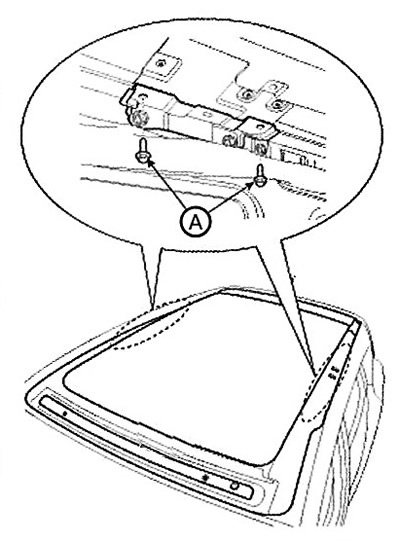
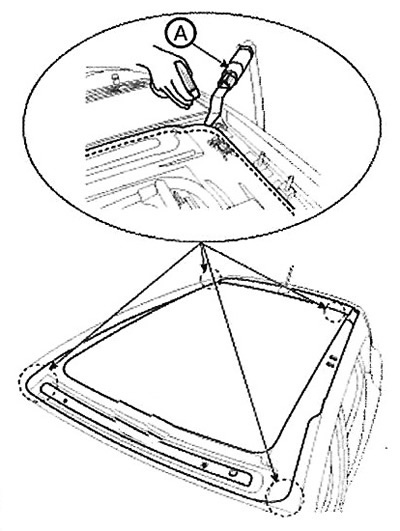
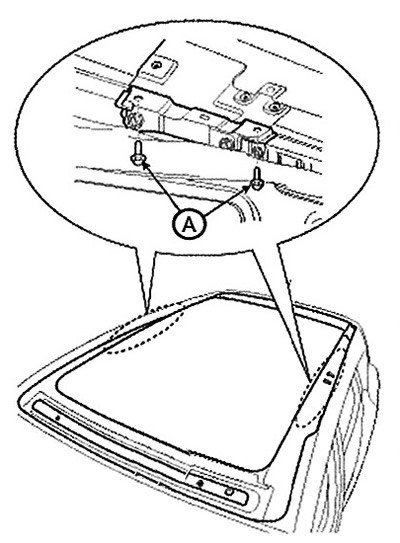
2. Turn away fixing bolts and remove an arm (A) securing the panoramic sunroof panel.
Note: Tightening torque: 19.6-29.4 Nm.
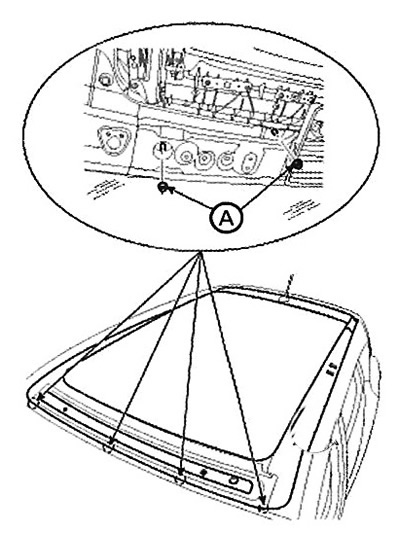
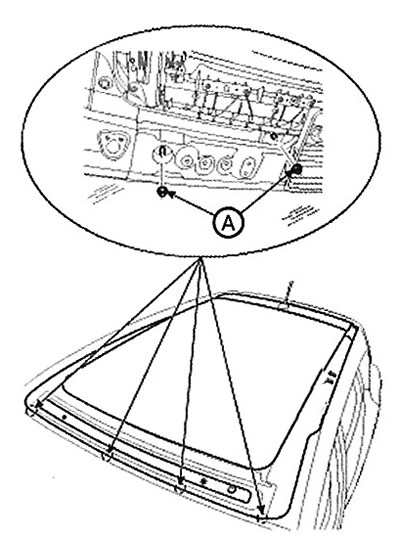
3. Loosen the nuts (A) panoramic sunroof.
Note: Tightening torque: 19.6-29.4 Nm.
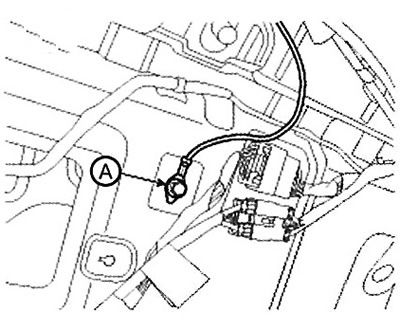
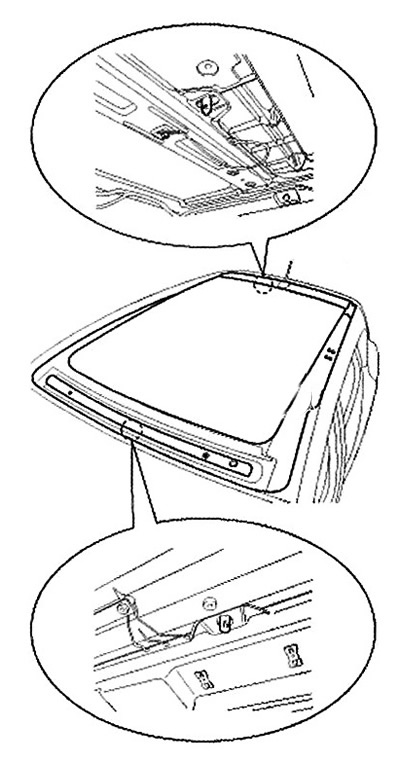
4. Disconnect the wire (A) «masses», by loosening the bolt.
Note: Tightening torque: 10.8-13.7 Nm
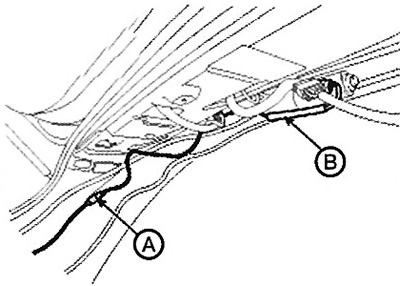
5. Disconnect the connector (A) and wiring (IN).
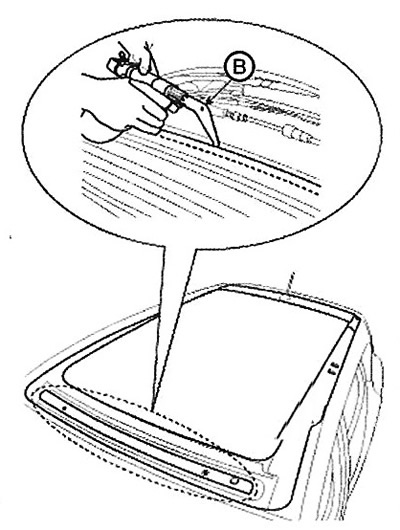
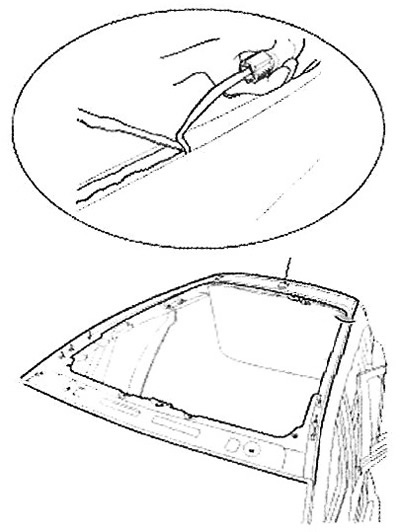
6. Press the panoramic sunroof away from the frame with a flathead screwdriver and cut off the sealant at the edge with the special tool (09816-2Р130) (A).
Note: Be careful not to damage the panoramic sunroof when placing tools between the frame and the sunroof.
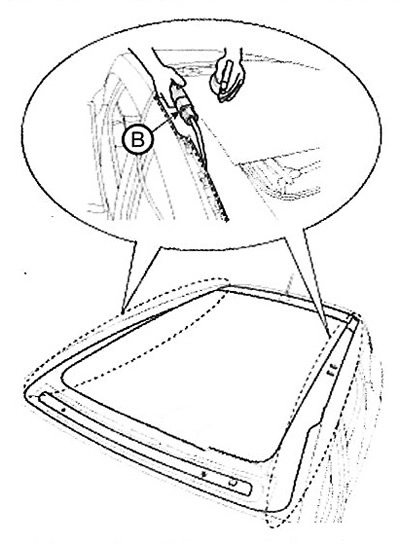
7. Press the panoramic sunroof away from the frame with a flathead screwdriver and cut off the sealant from the front with the special tool (09816-2P121, 09816-2P122) (IN).
Note:
The blade is tilted for pushing up (09816-2P121, 09816-2P122).
The blade is sloped for downward pushing (09816-2P123, 09816-2P124).
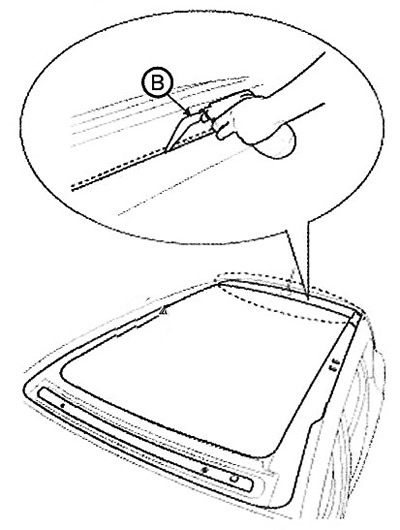
8. Press the panoramic sunroof away from the frame with a flathead screwdriver and cut off the sealant from the side with the special tool (09816-2P121, 09816-2P122) (IN).
Note:
The blade is tilted for pushing up (09816-2P121, 09816-2P122).
The blade is sloped for downward pushing (09816-2P123, 09816-2P124).
9. Press the panoramic sunroof away from the frame with a flathead screwdriver and cut off the sealant at the back with a special tool (09816-2P121, 09816-2P122) (IN).
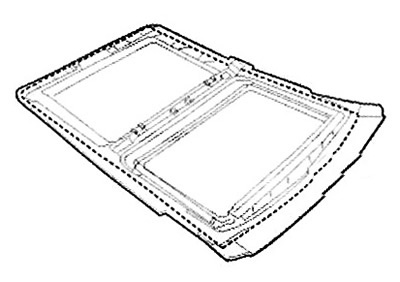
10. Cut the tape between the panoramic sunroof and the body. Remove panoramic sunroof (A).
Note: An assistant is required to remove and install the panoramic sunroof.
Installation
1. Use a knife to level the layer of old adhesive on the seating surface of the panoramic sunroof opening around the entire perimeter to a thickness of approximately 2 mm.
A. It must not be removed before the painted surface of the body, damage to the paintwork will interfere with normal adhesion.
B. Remove the rubber seal and clips from the body.
C. Cover all surrounding surfaces before applying the compound.
2. Clean the contact surface of the body with a sponge dampened with alcohol. After cleaning, avoid getting oil, grease and water on the cleaned surface.

3. Using a sponge, apply a thin coat of body primer to the old adhesive remaining around the windshield opening. Leave it on for at least 10 minutes to dry:
A. Do not apply glass primer to the body, be careful not to confuse sponges with different primers.
B. Never touch the primed surface with your hands.
C. Close the dashboard before applying window sealants.

4. Apply a light coat of glass primer to the outer surface of the retainers.
A. Do not touch the primed surface with your hand. Otherwise, the adhesive may not adhere properly to the glass, resulting in water leakage after the glass is installed.
B. Do not apply body primer to the glass.
C. Keep water, dust and abrasive materials out of the primer.
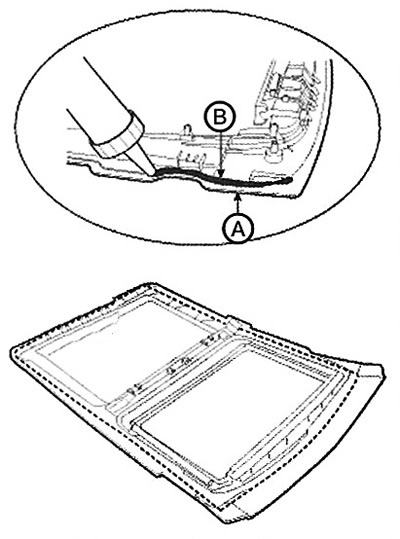
5. Fill the cartridge with adhesive, being careful not to allow air pockets to form, which may interfere with the even distribution of the adhesive. Install the cartridge in the glue gun and apply a strip (IN) glue on the edges of the panoramic sunroof (A), as it shown on the picture. Apply adhesive no later than 30 minutes after priming the glass. In the corners, a strip of glue should be made a little thicker.
6. Install the panoramic sunroof.
Note: An assistant is required to remove and install the panoramic sunroof.
7. Tighten nuts (A) panoramic sunroof.
Note: Tightening torque: 19.6-29.4 Nm.
8. Tighten the bolts (A) panorama sunroof panel mounting bracket.
Note: Tightening torque: 19.6-29.4 Nm.
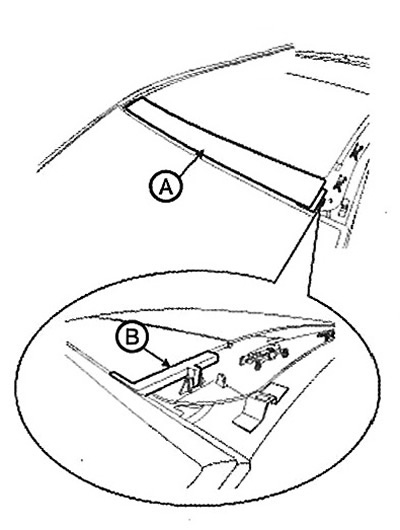
9. Insert special tool (09816-2S100) (IN) between the fixed glass and the sides of the panel to install the fixed glass (A), as it shown on the picture.
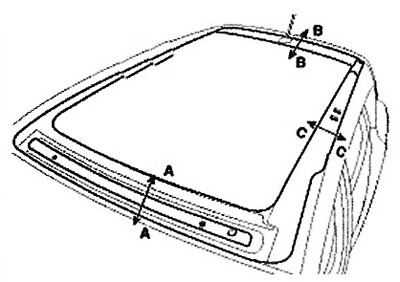
10. After installing the panoramic sunroof, check the vertical alignment and clearances on all sides of the sunroof.

11. Remove excess adhesive with a spatula or wipe off with a piece of cloth. To remove adhesive from a painted surface or glass, use a soft cloth soaked in alcohol.
12. Wait for the glue to dry (at least one hour), then pour water over the roof and check for leaks. If a leak is detected, this area must be thoroughly dried and then sealed with a sealant:
A. Do not drive the vehicle for at least four hours after installing the glass. If necessary, use the car to move at low speed.
B. Glass must remain dry for the first hour after installation.
13. Install all remaining removed parts. Install the rearview mirror after the adhesive has completely cured. Advise the client to refrain from doing the following for two to three days:
A. Slam doors when all car windows are closed.
B. Allow excessive body twisting (e.g. when making sharp turns or driving over bumps).
14. Install the following items:
A. Front seat.
B. Rear seat.
C. Interior trim.
D. Ceiling lining.
E. Roof rack and moulding.