
HyundaiBook.ru
Repair Chevrolet Repair Honda Repair Toyota Repair Land Rover Repair VAZ Repair Renault Repair Nissan
English Русский
Български
Беларускі
Український
Српски
Hrvatski
Română
Polski
Slovenský
Magyar
ArticlesSitemapContacts  


  Accent   Elantra   Getz   Grandeur   Sonata   Santa Fe   Tucson   Others
Tucson 1 (2005-2010) Tucson 2 (2009-2015)
  • Main
  • Tucson
  • LM (2009-2015)
  • Body
  • Exterior (external elements)
  • Replacing the front fixed sunroof glass

Replacing the front fixed sunroof glass (Hyundai Tucson LM)

0
Contents: Removal ⇓ Installation ⇓

Removal


1. Remove the roof rack cover (A) using a screwdriver or a special puller.

2. Loosen the mounting nuts and remove the roof rack (A).

3. Remove the molding (C) using a screwdriver or a special puller.
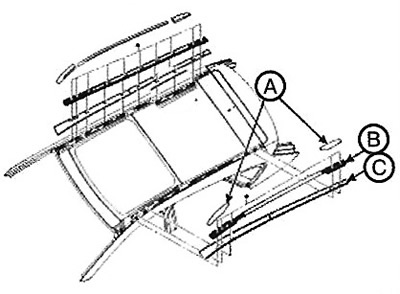
3. Remove the molding (C) using a screwdriver or a special puller.


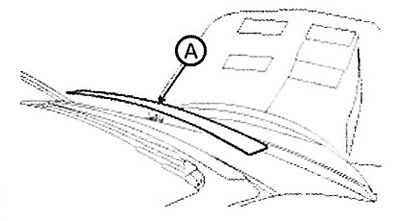
4. Disconnect the seal (A) of the fixed glass.

Note: If the fixed glass seal is damaged, it must be replaced.
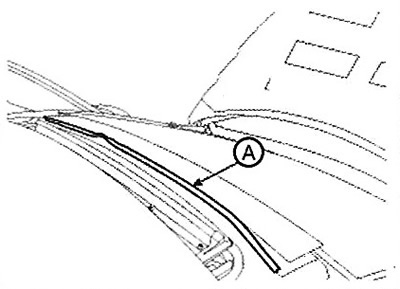

Note: If the fixed glass seal is damaged, it must be replaced.


5. Press the front fixed glass away from the body with a flat screwdriver and cut off the sealant at the rear and side with a special tool (09816-2P130)(A).
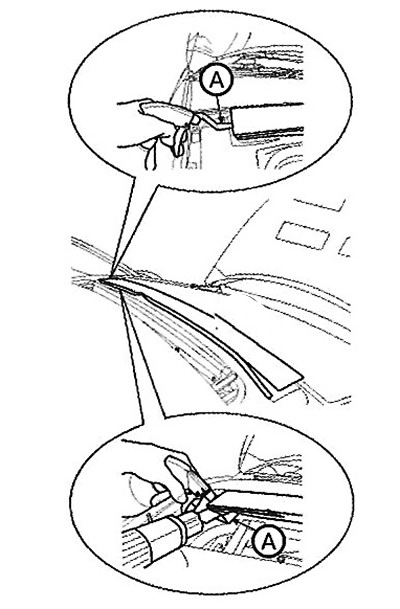
5. Press the front fixed glass away from the body with a flat screwdriver and…


6. Pry the front fixed glass away from the frame with a flat-head screwdriver and cut off the sealant (B) at the edge with a knife (A).
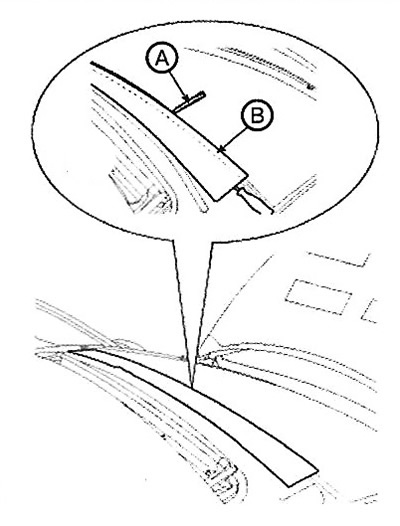


6. Pry the front fixed glass away from the frame with a flat-head screwdriver…


7. Remove the front fixed glass (A).

7. Remove the front fixed glass (A).

Installation


Note: Do not reinstall the removed fixed glass.


1. Using a knife, level the layer of old glue on the seating surface of the panoramic sunroof opening around the entire perimeter to a thickness of approximately 2 mm.

A. It is not allowed to remove it down to the painted surface of the body, damage to the paintwork will interfere with normal gluing.

B. Remove the rubber seal and retainers from the body.

C. Cover all surrounding surfaces before applying the compound.
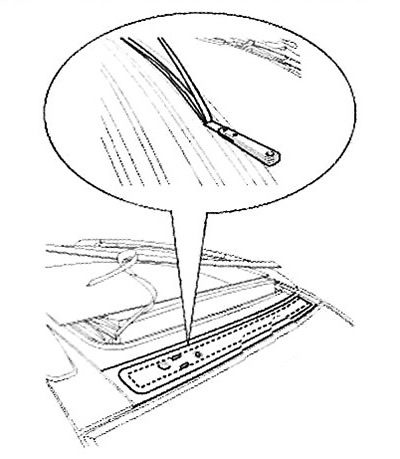
C. Cover all surrounding surfaces before applying the compound.


2. Using a sponge, apply body primer to the original adhesive remaining around the perimeter of the windshield opening. Wait for the body primer to dry (10 minutes):


A. Do not apply glass primer to the body, be careful not to mix up sponges with different primers.

B. Never touch the primed surface with your hands.

C. Before applying the compositions to the window opening, close the dashboard.
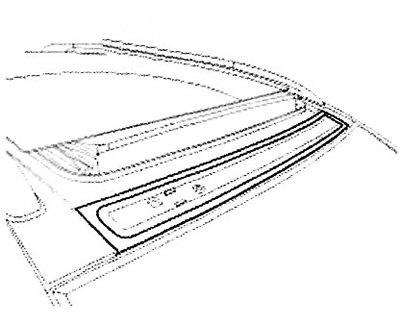
C. Before applying the compositions to the window opening, close the dashboard.


3. Fill the cartridge with glue, avoiding air pockets that could disrupt the uniform distribution of the glue. Place the cartridge in the glue syringe and apply a strip (B) of glue along the edges of the panoramic sunroof frame, as shown in the figure. Apply the glue no later than 30 minutes after priming the glass. In the corners, the glue strip should be slightly thicker.
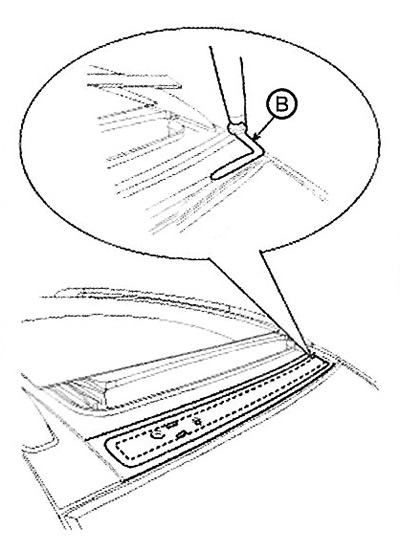
3. Fill the cartridge with glue, avoiding air pockets that could disrupt the…


4. Insert the special tool (09816-2S100) (B) between the fixed glass and each side of the panel to install the fixed glass (A) as shown in the figure.
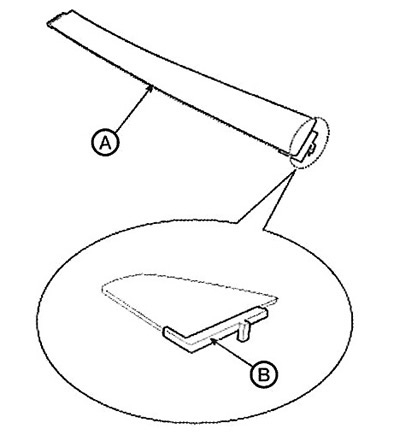


4. Insert the special tool (09816-2S100) (B) between the fixed glass and each…


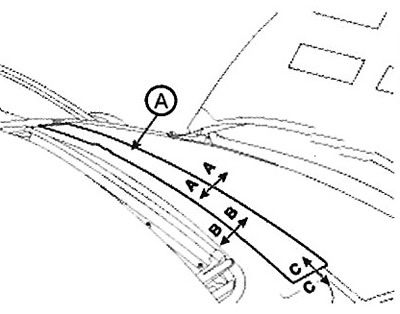
5. After installing the panoramic sunroof, check the vertical alignment and clearances on all sides.

The text is provided by the web resource: www.hyundaibook.ru

5. After installing the panoramic sunroof, check the vertical alignment and…

5. After installing the panoramic sunroof, check the vertical alignment and…


6. Install the roof molding (C).

7. Install the roof rack (B) and cover (A).
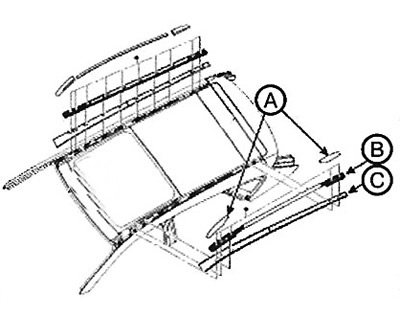
7. Install the roof rack (B) and cover (A).
This article is available at russian, bulgarian, belarusian, ukrainian, serbian, croatian, romanian, polish, slovak, hungarian
This article has been reviewed by: Konstantin Smirnov
Add to social network:

Previous
Tucson 2: Exterior (external elements)
Next

Replacing the sunroof curtain
Replacing the sunroof fairing
Replacing the sunroof electric motor
Replacing the sunroof glass
Sunroof — device
Replacing the panoramic sunroof assembly
Adjusting the panoramic sunroof assembly
Initialization of the sunroof electric motor
Opening and closing the hatch manually
Special tools and devices
We recommend other articles on the topic of Hyundai manuals:

Replacing bulbs. Front interior light Hyundai Accent 3 (2005-2010)
Replacing the front brake pads Hyundai Elantra 1 (1990-1995, petrol)
Replacing the air filter (installed in front of the evaporator) Hyundai Getz (2002-2011)
Front door — adjusting the position of the door, glass and handle Hyundai Sonata 3 (1993-1998)
Keys, door locks, sunroof, anti-theft system Hyundai Santa Fe 2 (2007-2012, petrol)
Front fog lamp switch (optional) Hyundai Matrix (2001-2010, petrol)

Link in different formats to this article

Visitor comments
No comments yet


How much will 11 + 22 ?


Tucson 2 (2009-2015) 
  • General information
  • Faults en route
  • User manual
  • Maintenance
  • Power unit
  • Gasoline engines
  • Diesel engines
  • Engine cooling system
  • Engine lubrication system
  • Engine power system
  • Control system
  • Intake and exhaust systems
  • Engine electrical equipment
  • Transmission
  • Clutch
  • Mechanical gearbox
  • Automatic gearbox
  • Drive shafts
  • Chassis
  • Suspension and wheels
  • Brake system
  • Steering
  • Body
  • Exterior (external elements)
  • Interior (internal elements)
  • Security systems
  • Air conditioning and heater
  • Electrical equipment
  • Electrical circuits
Tucson 1 (2005-2010) 
  • General information
  • User manual
  • Maintenance
  • Power unit
  • Gasoline engine G6BA
  • Gasoline engine G4GC
  • Diesel engine D4EA
  • Fuel system (gasoline)
  • Fuel system (diesel)
  • Engine lubrication system
  • Engine cooling system
  • Engine electrical equipment
  • Transmission
  • Clutch
  • Car gearbox
  • Drive shafts and cardan
  • Chassis
  • Car suspension
  • Steering
  • Brake system
  • Body
  • Exterior (external elements)
  • Interior (internal elements)
  • Air conditioning and heater
  • Airbags
  • Electrical equipment
  • Equipment and devices
  • Electrical circuits
HyundaiBook.ru © 2018-2026 · Mobile version · Sitemap: EN BG BY UA RS HR RO PL SK HU · Administration · Site search · Hyundai owners Accent 1 · Accent 2 · Accent 3 · Elantra 1 · Elantra 2 · Elantra 3 · Getz · Sonata 3 · Sonata 4 · Santa Fe 2 · Tucson 1 · Tucson 2 · Matrix ·
This site uses cookies to optimize its functionality. By continuing, you agree to our terms.