
Contents: Repair of minor body damage ⇓ Repair of minor car body scratches ⇓ Car body dent repair ⇓ Repair of rusty areas and holes ⇓ Body repair - putty and painting ⇓
Repair of minor body damage
If there is damage to the body, remove nearby decorative trim pieces, then tap the damaged area with a hammer.
Now remove the paint from the damaged area using sandpaper. You can also use a wire brush. In places where the repair area borders with undamaged paint, sand the paint using fine-grained abrasive paper.
If the damaged area is covered with rust, it must be removed using a rust remover and corrosion inhibitor.
Prepare the putty according to the manufacturer's instructions. If there are holes eaten away by rust, they can be covered with zinc or aluminum tape. Before you proceed further, make sure the work area is completely clean.
Apply putty. It is best applied with a flexible spatula. Apply layers of filler at 20 minute intervals until the area where the filler is applied is slightly raised relative to the rest of the surface.
Profiling can be done using special tools. Then, using progressively finer grit sandpaper and more water, sand the area to be repaired until it is smooth. Clean up the edges of the paint border.
Now spray the entire area to be repaired with primer from a can or apply it with a brush. If using a spray can, protect other areas from exposure to the product. The primer must cover the surface at a distance of at least 2.5 cm from the border of the area being repaired. The primer has a liquid consistency, so no rollers will form.
Using sandpaper (grain size 400) and plenty of water, sand the primed area until it is smooth and blends with the adjacent paint. Minor irregularities can be removed using a fine abrasive paste.
Once the paste has dried, sand the repair area again before applying the final coat of primer. Make sure the primed surface is smooth and free of imperfections.
Now apply the top coat. To work outdoors, you need to choose a dry, warm and windless day. Protect other parts of your car from paint spills. Apply paint from a spray can, starting from the center of the area to be repaired, in a thin layer, using circular motions. Apply paint in several thin layers.
After about two weeks, when the paint is completely dry, treat the repaired surface with a special polishing compound. When performing bodywork, remember that the final quality depends on the effort and time spent.
Repair of minor car body scratches
If the scratch is shallow and does not penetrate the metal of the car body, repair is not difficult. Treat the scratched area with a restorer or very fine polishing paste to remove any loose paint from the scratch. Rinse the damaged area with water.
Apply a thin coat of paint to the scratch using a brush. Continue applying thin coats until the level of paint applied to the scratch is equal to the level of the surrounding paint. The new paint should dry within two weeks. Then treat the painted area with a fine sanding paste. Finally, apply a polish.
If the scratch has penetrated deep enough into the metal to cause rust, the repair technique will be different. Use a pocket knife to remove the rust from the scratch, then apply a rust inhibitor to prevent further rust from forming. Using a rubber applicator, fill the scratch with primer paste. If necessary, the paste can be mixed with solvent to obtain a thinner paste, which is ideal for filling scratches. Before the paste in the scratch dries, wrap your finger in a cotton cloth, soak it in the solvent and quickly rub it over the surface of the scratch. At the same time, a depression will appear on the surface of the paste in the scratch. The scratch can now be painted over as described above.
Car body dent repair
If a dent appears in the car body, the first thing you need to do is push it out to restore the original shape of the body. There is some difficulty in returning the body to its original shape, since the metal at the site of damage is stretched. Therefore, it is better to make the level of the damaged area approximately 3 mm below the level of the surrounding surface. For shallow dents, try to pull them out completely.
If the back side of the dent is accessible, you can push it out by hitting it lightly from the back side using a hammer with a wooden or plastic head. When doing this work, hold a wooden block on the opposite side to prevent the metal from bulging.
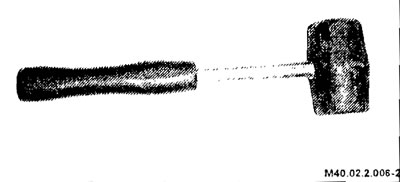
Rubber-headed hammer
If the dent is located in a place where the reverse side is inaccessible, another technology should be used. Drill several small holes in the metal around the dented area. Then screw long self-tapping screws into the hole. After this, the dent can be pulled out by grasping the screw heads with pliers.
The next stage of repair will be removing paint from the damaged area and another 2.5 cm from its border from the undamaged part of the body. This is easiest to do with a wire brush or a special attachment on a drill, but you can also do it with regular sandpaper. To complete the preparation for filler, scratch the surface of the bare metal with a screwdriver or the end of a file, or drill small holes in the damaged area. This will ensure better adhesion of the putty paste. Further repairs are carried out as described in the previous section.
Repair of rusty areas and holes
Remove paint from the damaged area and from the surrounding metal for about 2.5 cm using sandpaper, a wire brush or a drill attachment. Once the paint is removed, you will be able to assess the extent of the corrosion damage and decide whether to replace the entire part or repair the damage. Remove all decorative trim in the damaged area. Then, using metal shears or a hacksaw blade, cut out the piece of metal damaged by corrosion. Fold the edges of the hole inward to create some support for the spackling paste.
Brush the damaged area to remove rust powder from the remaining metal. Treat the damaged area with a rust inhibitor. If the reverse side of the damaged area is accessible, treat it as well.
Before applying putty, you need to seal the hole. This can be done using zinc mesh, aluminum tape or polyurethane foam.
Zinc mesh is the best material for sealing large holes. Cut a piece to a suitable size, then place it in the hole so that the edges are on top of the surrounding body metal. The mesh can be secured in place with a few lumps of putty placed around the perimeter.
Aluminum tape can be used for small or very narrow openings. Unwind a piece of the required size from the skein and glue it over the hole, placing a second piece to cover the first if the width is not enough. Press the edges of the tape with the handle of a screwdriver so that it fits well to the metal base.
Polyurethane foam is good to use for openings located in areas of the body with a complex configuration. The procedure for preparing the foam is as follows: mix equal amounts of liquid from both jars included in the kit in one container. Wait until the mass begins to thicken and pour it into the hole, placing a piece of cardboard underneath. As the polyurethane begins to expand, it will protrude from any uncovered holes. After it has completely hardened, cut off the excess using a hacksaw blade.
Attention: In case of major damage to the body, it is necessary to carry out a major overhaul, during which the damaged parts of the body are replaced.
Body repair - putty and painting
Before reading this section, please read the previous sections of this chapter. There are many types of putty, but the most convenient to use is the one that comes with a can of putty and a tube of hardener. It is convenient to apply the putty with a wide and flexible plastic spatula (with an applicator).
Mix a small amount of putty with hardener according to the instructions.
Using a spatula, apply the paste to the area to be treated. Using a spatula, smooth out the surface of the putty. Do this work quickly enough before the putty starts to harden.
Continue applying thin coats of filler at 20 minute intervals until the filler level is slightly raised above the body surface.
Once the putty has hardened, any excess can be removed using a metal spatula or file. Next, you should sand the area to be repaired with sandpaper, starting with grain number 40 and ending with grain number 400.
Sandpaper should be wrapped around a rubber band, cork or wooden block, otherwise the surface of the putty will not be smooth enough. During sanding, the sandpaper should be periodically moistened with water. This allows you to achieve a very smooth surface.
At the final stage of grinding, the area to be treated should be surrounded by a ring of cleaned metal.
The area to be treated should be wetted with water to remove dust formed during grinding.
Spray the area to be treated with a thin layer of primer from a spray can. This will help to identify any imperfections made during puttying. Fill these defects with a fresh layer of putty and sand again with sandpaper. Repeat the primer and filler application process until you achieve the desired result.
Wash the area to be repaired with water and dry completely.
The area being repaired is now ready for painting. Paint application should be done in a warm, dry, windless place where there is no dust. If you are going to work outdoors, you should choose the day very carefully. If repairs are being made to one body part, nearby parts should be covered. Decorative body parts must also be covered. For this you can use duct tape and old newspapers.
Before applying paint, shake the aerosol can well, then spray on a test surface (for example, on an old can), until the technique is developed. Apply a first thin coat of paint to the area to be repaired. Using 400 grit sandpaper, sand the surface until completely smooth, then rinse with water and dry. After this, continue applying new layers of paint.
Spraying should be continued until the required layer thickness is achieved. Spraying should begin from the center of the area being treated and, making circular movements, move towards the edges, spraying approximately a 5-centimeter zone beyond the border of the area being treated. Remove all protective equipment 10-15 minutes after applying the last layer.
The new paint should dry for 2 weeks. After that, polishing agents should be used.