
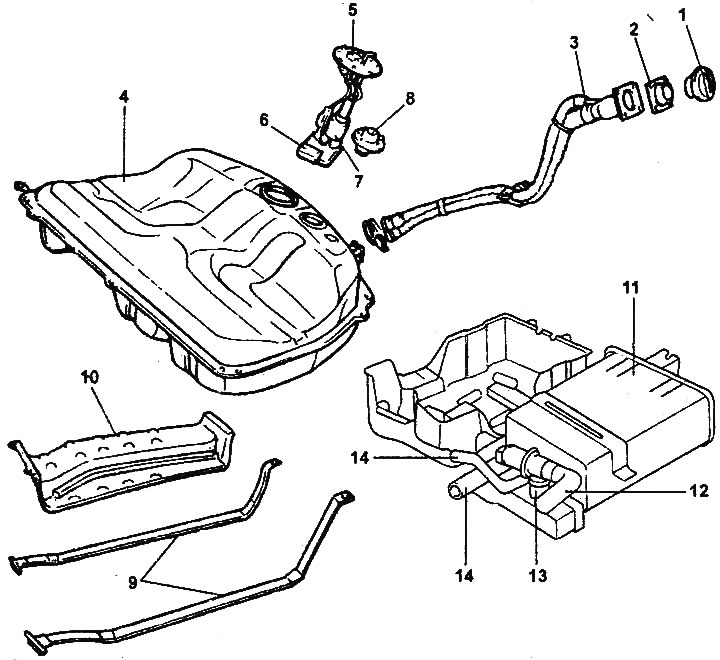
Fuel tank.
1 - fuel tank filler cap, 2 - seal, 3 - fuel tank filler neck and drain hose assembly, 4 - fuel tank, 5 - fuel pump and fuel level sensor assembly, 6 - fuel level sensor, 7 - fuel pump, 8 - check valve and fuel shut-off valve assembly, 9 - fuel tank mounting strap, 10 - protective cover, 11 - adsorber, 12 - adsorber vent pipe, 13 - adsorber safety valve, 14 - fuel vapor recovery system hose.
Removal
1. To release residual pressure from the fuel lines and high-pressure hoses, disconnect the fuel pump connector, then start the engine and let it run. After the engine stalls on its own, turn the ignition switch to the "OFF" position.
Note: To prevent fuel splashing, make sure that the residual pressure in the high-pressure fuel lines is relieved before disconnecting the main fuel pipes and hoses.
2. Disconnect the cable from the negative terminal of the battery.
3. Remove the fuel tank filler cap.
4. Raise the car on a lift.
5. Remove the main muffler and, if necessary, the center pipe of the exhaust system.
(The original text is available on the website: «www.HyundaiBook.ru»)
6. Remove the fuel tank protective cover.
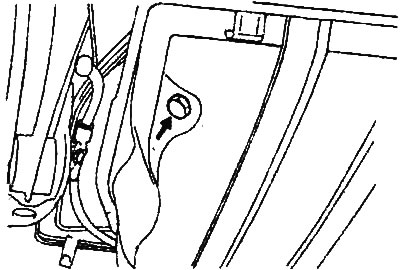
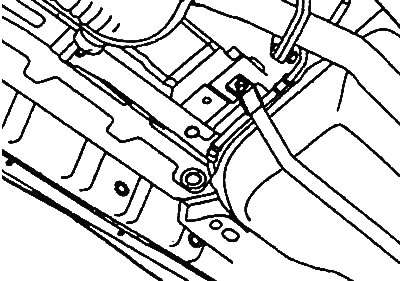
7. Remove the drain plug and drain the fuel from the tank.
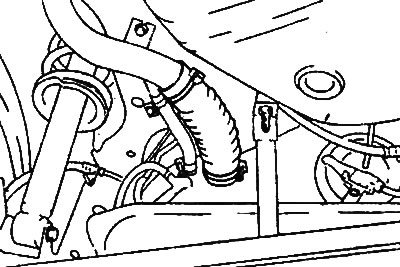
8. Disconnect the fuel return hose and the fuel vapor recovery system hose.
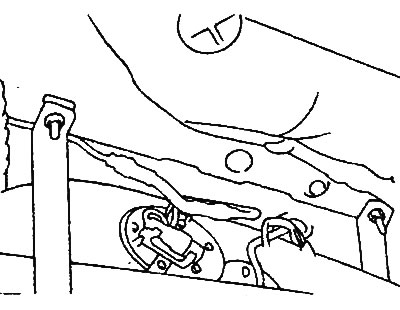
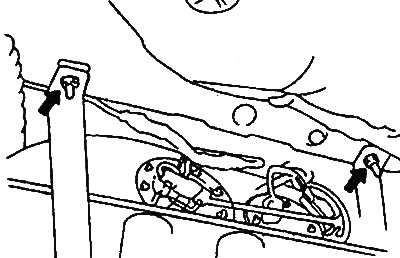
9. Disconnect the high pressure fuel hose from the fuel pump.
10. Support the fuel tank with a transmission jack stand or other temporary support.
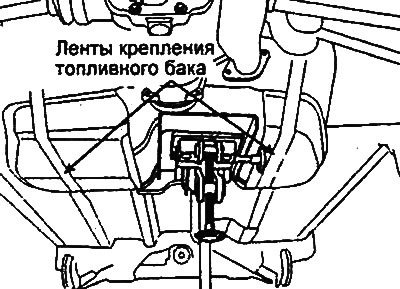
11. Remove the two self-locking nuts securing the fuel tank in place and remove the two fuel tank retaining straps. Disconnect the filler hose and drain hose from the fuel tank.
12. Disconnect the filler hose and drain hose from the fuel tank.
13. Remove the fuel vapor recovery system hose and fuel tank.
Examination
1. Check fuel hoses and pipes for cracks, kinks, deformation, abrasions or blockages. If there are signs of blockage or contamination of fuel pipes located under the floor of the vehicle, it is necessary to remove the corresponding section of pipes and blow it out with compressed air.
2. Check the serviceability of the cap valve and the condition of the fuel tank filler cap.
3. Checking the fuel shut-off valve (on the fuel tank).
Note: The fuel shut-off valve is installed to prevent fuel from leaking from the tank in the event of an accident (vehicle overturning) into the fuel vapor discharge line.
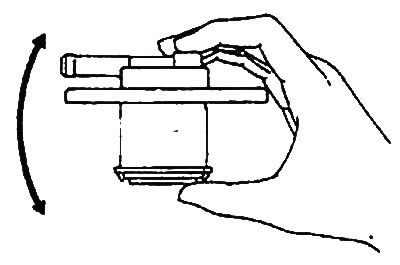
- a) Disconnect the fuel vapor recovery system hose and remove the fuel shut-off valve from the fuel tank.
- b) The valve is considered to be in good working order if, when shaking the valve slightly up and down, the sound of a float moving inside (knocking) can be heard.
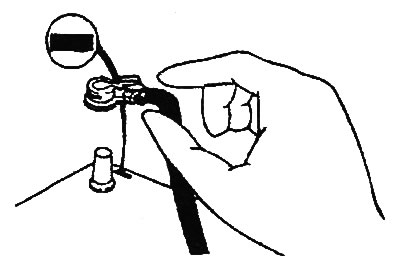
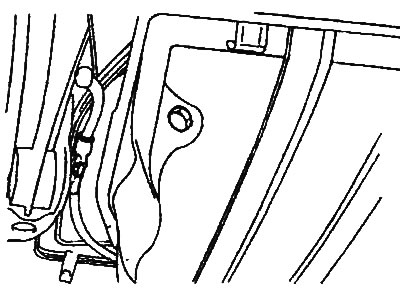
- c) Turn over and slowly immerse the fuel shut-off valve in a container of water, blocking the valve nipple with your finger, as shown in the figure.
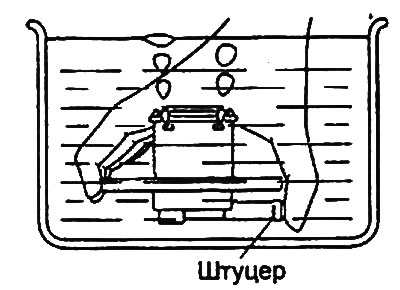
- d) Check that the air has been removed from the valve by checking for any air bubbles that appear, then slowly remove the valve from the container.
- d) The valve is considered to be in good working order if after opening the nipple there is no water leaking out of the valve. If water leaks out through the nipple, the valve is considered to be faulty. If faults are detected, replace the fuel shut-off valve.

4. Checking the fuel tank.
- a) Check the fuel tank and its mounts for deformation, corrosion or cracks.
- b) Check the fuel tank for dust or foreign particles inside.
Note: If the inside of the fuel tank needs to be cleaned, use a neutral detergent.
- c) Check the fuel pump filter in the tank for damage or clogging.
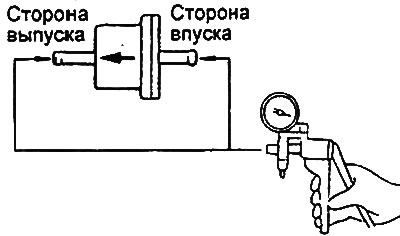
5. Check the serviceability of the two-way valve.
- a) Connect the hand vacuum pump to the two-way valve.
- b) When a vacuum pump is connected to the intake side, a vacuum is created and maintained in the intake or exhaust guide lines.
- c) When connected to the outlet side, no vacuum is created.
Installation
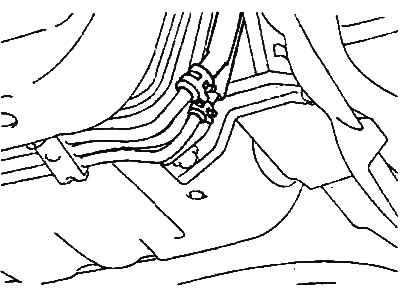
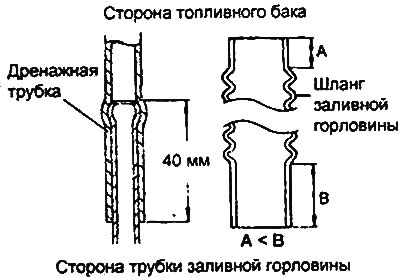
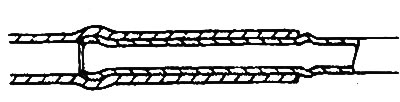
1. Connect the drain hose and filler neck hose to the fuel tank so that the hose fits onto the tube at a distance of approximately 40 mm from its edge.
2. When connecting the filler hose, it is necessary to connect the end of the hose with the short straight section on the side of the fuel tank pipe.
3. Make sure the fuel tank buffers are securely fastened (welded). Install the fuel tank in place, tightening the self-locking nuts of the tank fastening straps until the rear ends of the straps touch the car body.
4. Connect the evaporative emission hose and the fuel return hose. Connect the hose to the tube so that the hose fits onto the tube as shown in the figure.
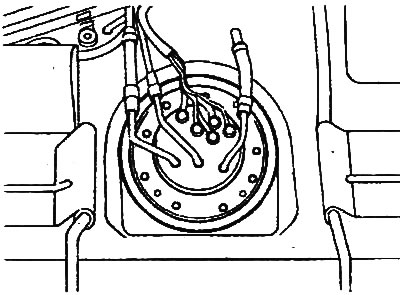
5. Install the fuel pump with the fuel level sensor assembly onto the fuel tank. Tighten the fuel pump mounting screws to the specified torque.
- Tightening torque: 2-3 Nm
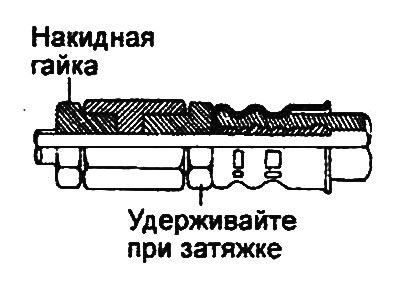
6. To connect the high-pressure fuel hose to the fuel pump, first temporarily tighten the union nut of the high-pressure fuel hose by hand, then tighten the nut to the specified torque.
Caution: Be careful when performing this operation to ensure that the fuel hose does not become kinked.
- Tightening torque 30-40 Nm
Note: Be careful when tightening the union nut, do not twist or bend the fuel pipes to avoid damage to the connection between the pipe and the fuel pump nipple.
7. Connect the fuel pump connector.
8. Install and tighten the drain plug to the specified torque.
- Tightening torque: 15-25 Nm
9. After completing the work, fill the tank with fuel and activate the fuel pump (turn the ignition key to the "ON" position for a few seconds), then check for fuel leaks.