
Removal
1. Remove the front wheel.
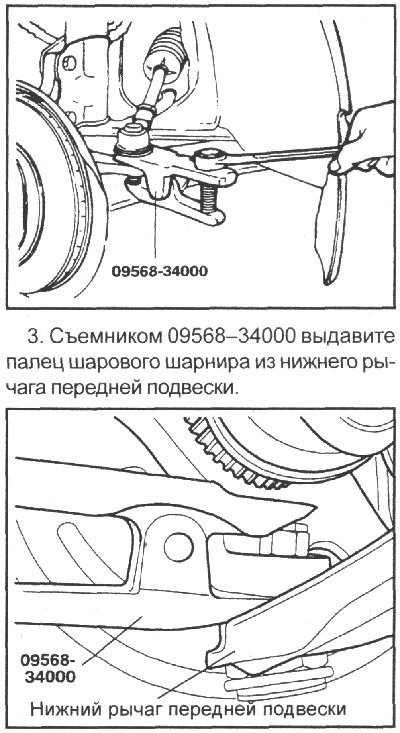
2. Loosen the nut and use puller 09568–34000 to press out the ball joint pin of the steering tie rod end from the steering knuckle.
4. Remove the two bolts securing the lower part of the strut to the steering knuckle.
6. Remove the lower front suspension arm.
Installation
The installation of the lower arm of the front suspension is carried out in the reverse order of removal.
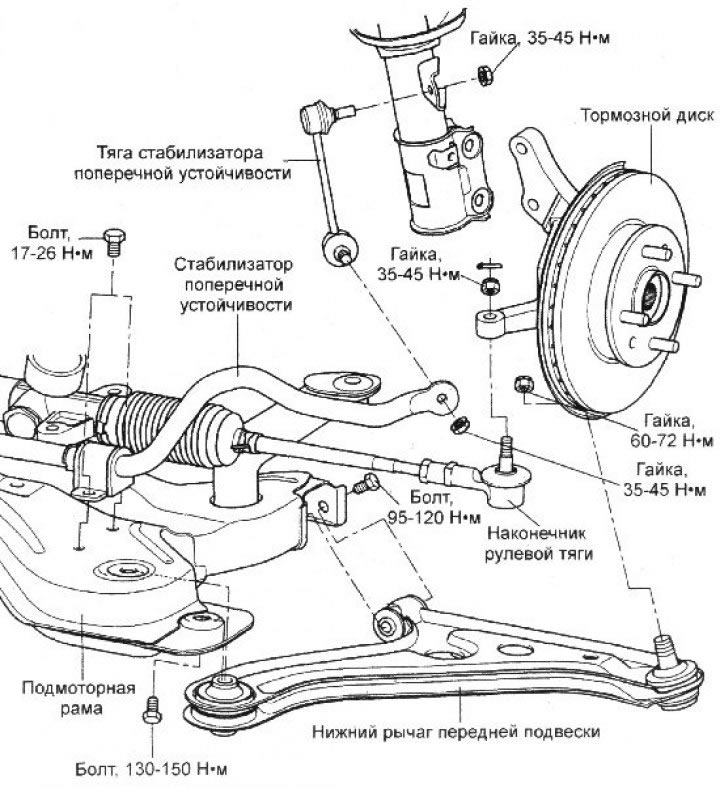
Tighten all threaded connections to the required torques:
- Wheel nuts: 90–100 Nm
- Front lower arm ball joint pin retaining nut: 60–72 N·m
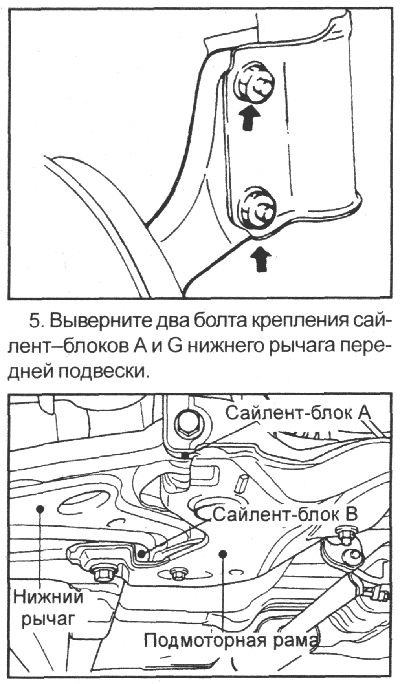
- Silent block mounting bolt A: 95–120 Nm
- Silent block mounting bolt G: 130–150 Nm
- Nuts for fastening the pins of the ball joints of the stabilizer link: 35–45 N·m
Disassembly
Replacing the ball joint and dust cover
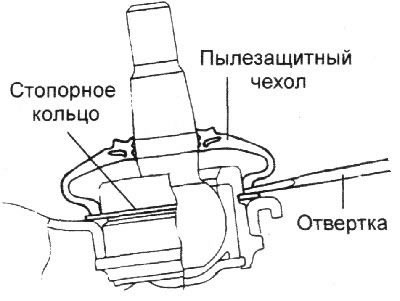
1. Using a flat-head screwdriver, remove the dust cover from the lower control arm ball joint.
2. Remove the retaining ring.
3. Using a plastic hammer, knock the ball joint pin out of the lower front suspension arm.
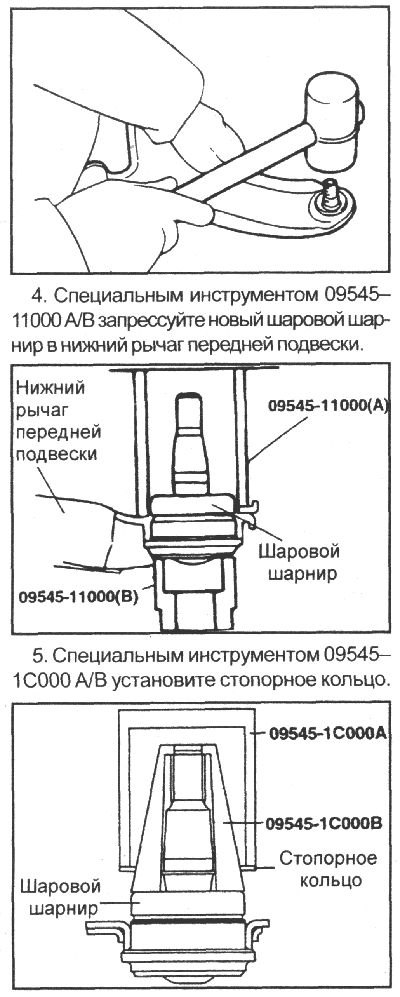
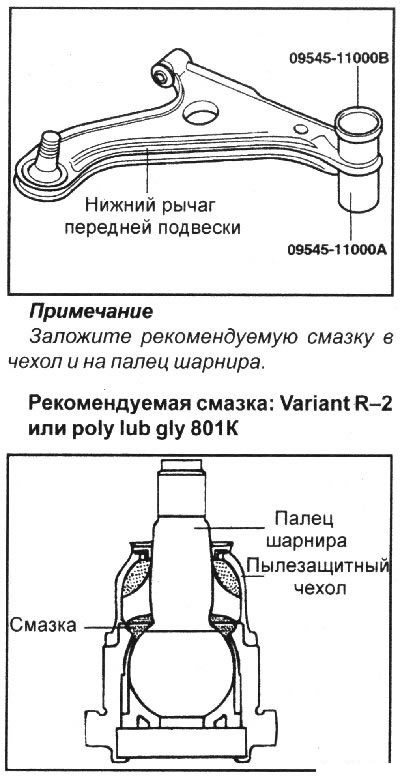
6. Using special tool 09545–11000 A/B, install the new protective cover.
Examination
1. Check the silent blocks for wear and deterioration.
2. Check the lower front suspension arm for bending or damage.
3. Check the ball joint protective boot for cracks.
4. Check the condition of all bolts.
5. Check the torque required to turn the ball joint pin of the lower arm of the front suspension.
- If there are cracks in the protective boot, replace the ball joint.
- Rock the lower arm ball joint pin from side to side several times.
- Measure the torque required to turn the lower arm ball joint pin. Torque: 3.5–10 N·m
- If the torque exceeds the permissible values, replace the ball joint.
- If the torque is significantly below the permissible value, the ball joint can be used repeatedly as long as it does not jam or have excessive play.