


Contents: Technical characteristics of the…⇓ Torsion beam rear suspension ⇓ Rear suspension shock absorbers ⇓ Rear suspension springs ⇓ Rear wheel hubs ⇓
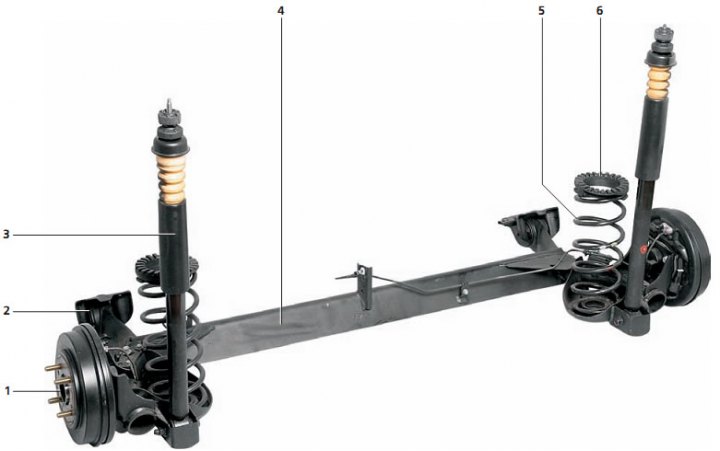
Rear suspension elements: 1 - wheel hub; 2 - rear suspension beam mounting bracket; 3 - shock absorber; 4 - rear suspension beam; 5 - spring; 6 - upper suspension spring gasket.
Technical characteristics of the rear suspension
| Type | H-beam |
| Shock absorbers: type stroke length of the rod, mm | Gas filled 241 |
| Resistance developed by a telescopic stand at a rod movement speed of 0.3 m/s, N (kg): during the recoil process during compression stroke | 440±80 (44±8) 160±50 (16±5) |
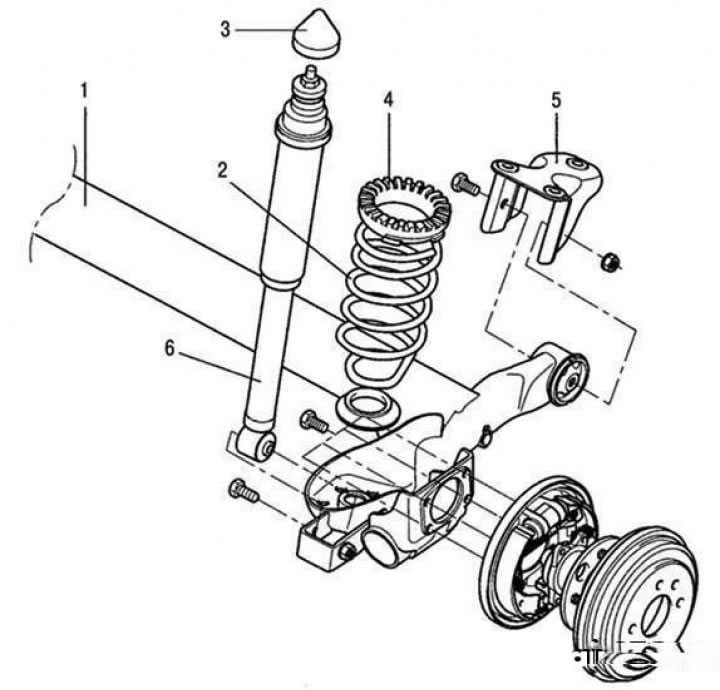
Rear suspension: 1 – rear suspension torsion beam; 2 – rear suspension spring; 3 – cap; 4 – upper support cup of the suspension spring; 5 – Rear suspension torsion beam mounting bracket; 6 – rear suspension shock absorber
Torsion beam rear suspension
Removal
Remove the rear wheel.
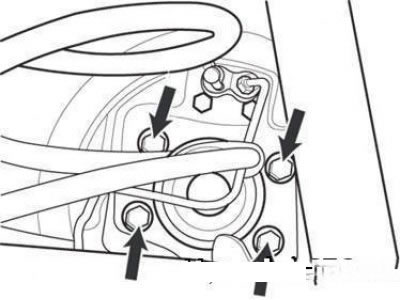
Rear wheel hub axle mounting bolts
Remove the rear wheel hub and hub bearing.
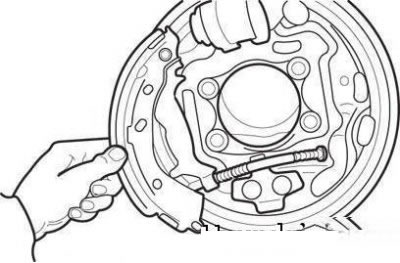
Disconnecting the parking brake cable
Disconnect the parking brake cable.
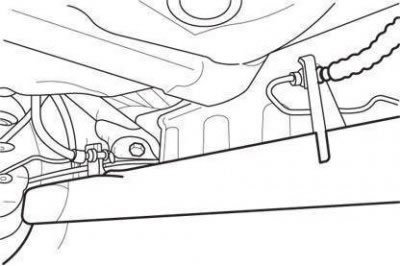
Fastening brake hoses and brake lines to the rear suspension beam
Disconnect the brake hose and brake line.
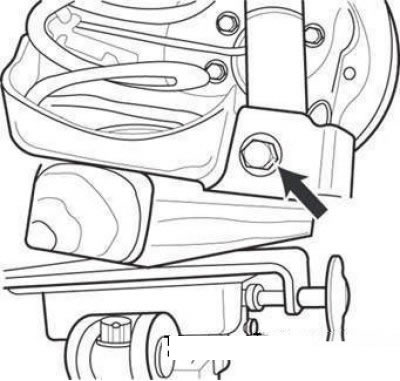
Installing a jack under the rear suspension torsion beam
Place a jack under the torsion beam and remove the rear shock absorber lower mounting bolt.
Slowly lower the jack to remove the suspension spring.
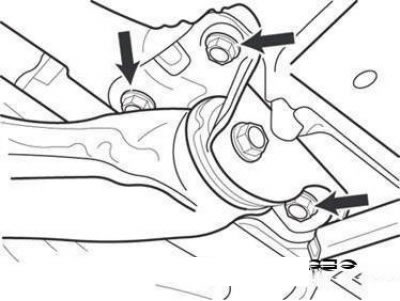
Torsion beam to body mounting bracket bolts
Loosen the bolts of the torsion beam mounting bracket to the body.
Installation
Installation is carried out in the reverse order of removal.
Tighten the threaded connections to the torques specified below.
Tightening torques, Nm:
- Rear wheel hub bearing mounting bolts - 80-90
- Lower shock absorber mounting bolt - 100-120
- Torsion beam suspension mounting bolts — 100–120
- Suspension beam bracket mounting bolts — 100–120
Connect the parking brake cable.
Remove air from the brake hydraulic system (see section "Brake system").
Rear suspension shock absorbers
Removal
Remove the rear wheel.
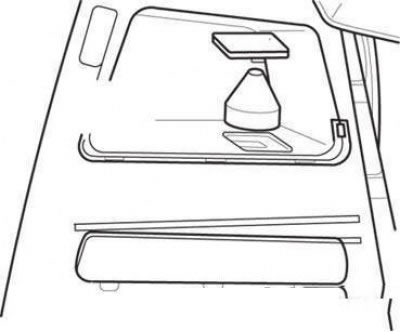
Rear shock absorber cap
In the luggage compartment, remove the mat from the side panel trim and use a screwdriver to remove the plug.
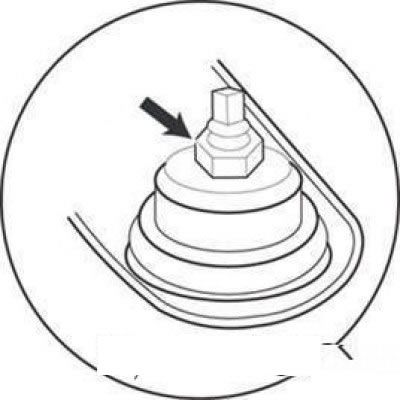
Upper shock absorber mounting nut
Loosen the upper shock absorber mounting nut.
Place a jack under the rear suspension beam and remove the lower shock absorber mounting bolt.
Remove the rear shock absorber.
Checking the technical condition
Check the shock absorber for wear or damage.
Check rubber parts for damage and deterioration of material properties.
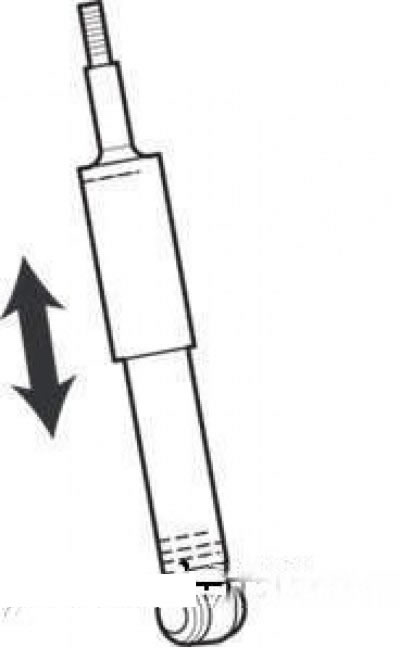
Checking the operation of the shock absorber
Check the shock absorber for increased rigidity or extraneous noise during operation.
Installation
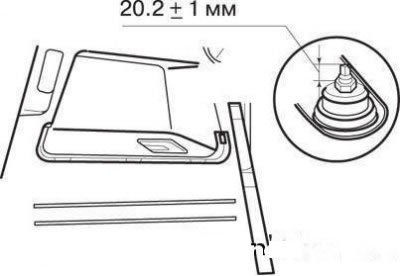
Tightening the upper shock absorber mounting nut
Tighten the upper shock absorber mounting nut.
Place a jack under the suspension beam.
Raise the vehicle to the required height and tighten the lower shock absorber mounting bolt to a torque of 100–120 N·m.
The original text is located on the portal: HyundaiBook.ru
Attention! Check the correct position of the suspension spring.
Rear suspension springs
Removal
Remove the rear wheel.
Note: When removing the suspension beam, make sure that the brake hose is not loaded.
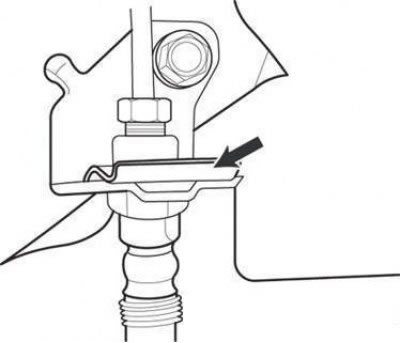
Brake hose mounting bracket
Remove the brake hose retainer.
Place a jack under the suspension beam and unscrew the lower shock absorber mounting bolt.
Unscrew the bolt securing the beam to the bracket and the three bolts securing the bracket to the body.
Remove the suspension spring.
Checking the technical condition
Check the suspension spring for cracks and deformation.
Check the spring support cups for damage and deformation.
Installation
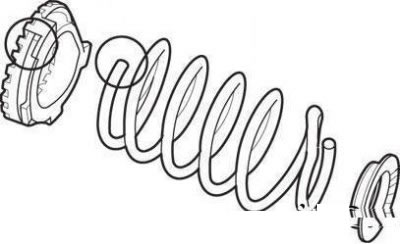
Upper spring support cup
The last turn of the spring should be located in the groove of the upper support cup.
Insert the lower support cup into the spring.
Install the suspension spring back to its original position.
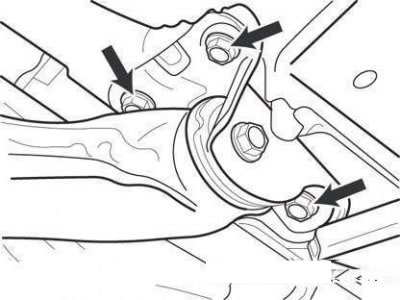
Suspension beam bracket to body mounting bolts
Raise the car with a jack and tighten the bolts securing the suspension beam bracket to the body.
Tighten the lower shock absorber mounting bolt.
Rear wheel hubs
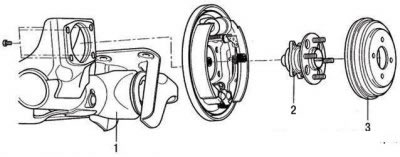
Rear wheel hub: 1 – rear suspension beam; 2 – rear wheel hub; 3 – brake drum
Removal
Remove the brake drum.
To remove the brake drum from the wheel hub, unscrew the mounting screw.
Remove the wheel speed sensor (on vehicles with ABS).
Loosen the rear wheel hub mounting bolts.
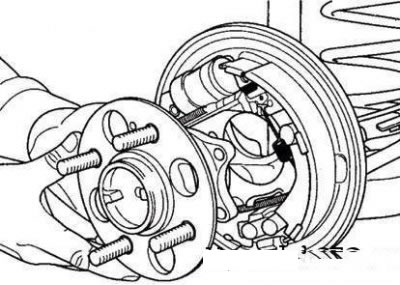
Removing the rear wheel hub assembly with the axle
Remove the hub through the brake mechanism.
Checking the technical condition
Check the hub for cracks or damage.
Check the cap and the open part of the seal for signs of grease leakage.
Make sure there is no increased noise when the hub rotates.
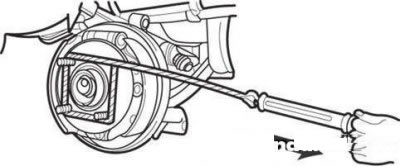
Checking the moment of resistance to rotation of the hub bearing
Check the moment of resistance to turning of the hub bearing.
The torque resistance to rotation is no more than 1.8 Nm.
Installation
Install the hub bearing.
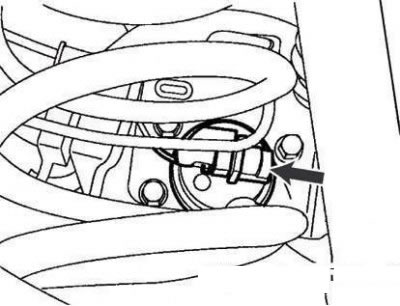
Wheel speed sensor
Install the wheel speed sensor.
Install the wheel.
Caution: Securely connect the wheel speed sensor connector (on vehicles with ABS).