
Contents: Checking the steering wheel free play ⇓ Checking the wheel turning angles ⇓ Checking the condition of the tie…⇓ Checking the condition of the power…⇓ Checking the fluid level in the…⇓ Replacing the power steering fluid ⇓ Bleeding the power steering system ⇓ Checking the power steering pump…⇓
During each vehicle maintenance, check the condition of the steering gear protective cover, the tie rod caps and the tightness of their fit. They must be replaced if there are cracks, tears or other defects that compromise the tightness.
Note: All power steering systems make different sounds when operating. One of the most common sounds is a hissing noise when turning the steering wheel while the vehicle is stationary. This sound is especially noticeable when turning the steering wheel while simultaneously pressing the brake pedal. This sound is in no way related to the functionality of the steering system. Do not replace the distributor unless the hissing noise becomes very loud. A new distributor will also make a slight noise, and this replacement will not always correct the problem.
Make sure that the steering wheel spoke is horizontal when the car wheels are straight. If not, determine the cause of the malfunction and fix it.
Turn the steering wheel from lock to lock and check the following visually and audibly:
- reliability of fastening of the steering column, steering gear and steering wheel;
- absence of gap in rubber-metal hinges and steering rod hinges, as well as in the connections of the elastic coupling of the steering shaft;
- reliability of tightening and locking of the bolts securing the rods to the steering rack and the nuts of the ball joint pins;
- absence of jamming and interference that prevents the steering wheel from turning.
If knocks and jams are detected, disconnect the transverse rods from the pivot arms of the telescopic suspension struts and repeat the check. Having made sure that the knocks and jams come from the steering, remove it from the car and check the gap between the rack stop and the nut. The maximum allowable gap between the stop and the nut is 0.2 mm. If necessary, replace worn parts and adjust the gap between the stop and the nut.
Checking the steering wheel free play
Set the steering wheel to the straight-ahead position and start the engine.
Check the steering wheel for free play around its circumference.
The steering wheel free play should be 0–30 mm.
If the specified value is exceeded, check the connections between the steering shaft and the steering gear.
Checking the wheel turning angles
Checking the wheel turning angles
Place the vehicle on a turning stand with its front wheels and check the wheel turning angles.
Wheel steering angle (vehicle without load):
- internal — 37° ±1°30'
- outer — 33°03'
If the wheel steering angles do not match the specified values, adjust the wheel alignment and check the steering angles again.
Checking the condition of the tie rod ends
Checking the moment of resistance to rotation of the ball joint pins of the steering rod ends
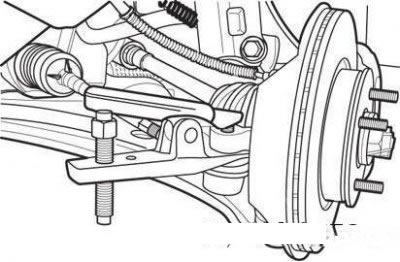
Disconnecting the steering rod from the steering knuckle
Using a special tool, disconnect the steering rod from the steering knuckle.
Check that there is no excessive play in the tie rod end ball joint by rotating the joint by the pin several times in a circular motion.
Checking the moment of resistance to rotation of the hinge pin
Tighten the nut securing the tie rod hinge pin and check the moment of resistance to turning the hinge pin; it should be equal to 0.5–2.5 N·m.
If the turning resistance moment exceeds the specified upper limit, replace the tie rod end.
If the torque of the pivot pin is less than the specified lower limit, check the clearance in the pivot pin and replace it if necessary.
Checking the steering wheel turning force on a stationary vehicle
Place the car on a level horizontal surface and set the steering wheel to the straight-ahead position.
Increase the crankshaft speed to (1000±100) min⁻¹.
Note: After checking, reduce engine speed to idle speed.
Checking the steering wheel turning force
Using a spring scale, check the steering wheel turning force by turning it 1.5 turns in both directions.
The steering wheel turning force on a stationary vehicle should be 29 N (3.0 kgf).
When turning the steering wheel, make sure that there are no sudden changes in force.
If the steering wheel is too difficult to turn, perform the following checks and adjustments:
- check the tie rod end ball joints and boots for cracks or damage;
- check the turning moment of the steering gear drive pinion and the ball joints of the steering rod ends;
- ball joint rotation moment.
Checking the return of the steering wheel to the straight-ahead position
Check the spontaneous return of the steering wheel according to the following parameters.
When making moderate or sharp turns, the steering wheel effort and return should be the same for left and right turns.
After turning the steering wheel 90° and holding it for a few seconds while the vehicle is moving at 35 km/h, the released steering wheel should turn at least 70° towards the neutral position.
Note: When turning the steering wheel very sharply, you may feel increased resistance for a short time. This is not a sign of a malfunction, but is due to a slight decrease in the power steering pump supply.
Checking the condition of the power steering
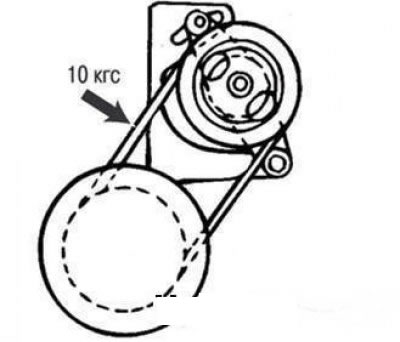
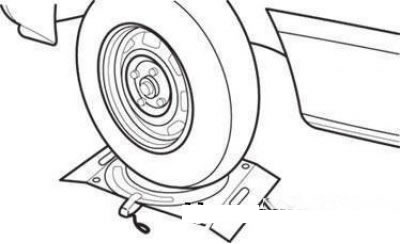
Checking the deflection of the power steering pump drive belt
Check the deflection of the power steering pump drive belt by pressing on it with a force of 98 N (10 kgf) in the place indicated by the arrow in the figure.
The deflection of the power steering pump drive belt should be 6–9 mm.
If the belt deflection is not within the specified limits, adjust the belt tension as described below.
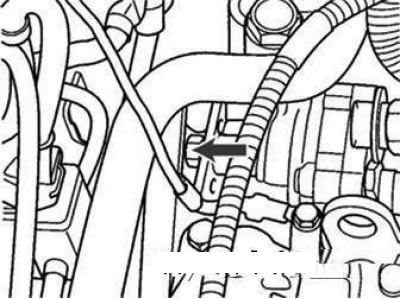
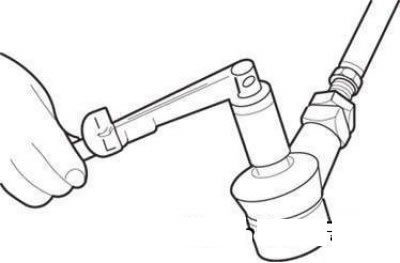
Pump drive belt tension adjustment bolt
Loosen the pump drive belt tension adjustment bolt.
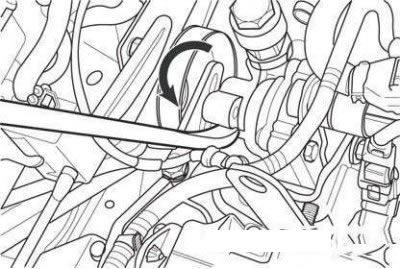
Adjusting the tension of the pump drive belt
Insert a suitable lever between the bracket and the pump, adjust the belt tension to the desired value by turning the pump body.
Tighten the adjusting bolt.
Check the belt tension and readjust if necessary.
Caution: Turn the pump drive belt in the normal direction several times and check the belt deflection again.
Checking the fluid level in the power steering reservoir
Place the vehicle on a level, horizontal surface.
Start the engine. With the vehicle stationary, turn the steering wheel right and left several times without interruption to warm up the working fluid to a temperature of 50–60°C.
With the engine idling, turn the steering wheel from lock to lock several times.
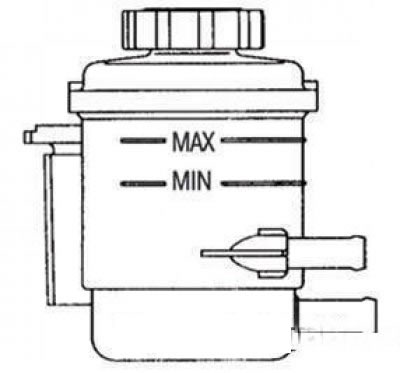
Power steering reservoir
Make sure there is no foaming or clouding of the liquid in the tank.
Stop the engine and check the difference in fluid level in the reservoir with the engine stopped and running.
If the fluid level has changed by at least 5 mm, bleed the power steering system again.
If the fluid level rises sharply after the engine is stopped, bleed the system again.
Note: Incomplete bleeding will cause the pump to make a rattling noise, the distributor to be noisier, and will shorten the life of the pump.
Replacing the power steering fluid
Raise the front of the vehicle until the wheels are off the ground and place it on stands.
Disconnect the drain hose from the hydraulic fluid reservoir and plug the reservoir opening.
Attach a vinyl hose to the drain hose and lower the end into the prepared container.
Disconnect the high-voltage wire from the ignition coil.
Drain the fluid from the system by turning the starter on and off several times and turning the steering wheel all the way in both directions.
Attach the drain hose to the tank and secure it securely with a clamp.
Note: The volume of PSF-3 fluid for filling the system is 0.75–0.8 l.
Fill the power steering reservoir with the required grade of fluid.
Start the engine.
Make sure there is no fluid leakage through the hose connection, stop the engine.
Add fluid to the bottom of the power steering reservoir filter.
Remove air from the system.
Bleeding the power steering system
Disconnect the high-voltage wire from the ignition coil. Turn the starter on and off for 15-20 seconds, and turn the steering wheel from lock to lock five to six times.
If bleeding is performed with the engine idling, air will enter the fluid. Therefore, perform bleeding only when the engine is cranked with the starter.
Note: When bleeding, add fluid to the tank so that its level does not fall below the filter.
Connect the high-tension wire to the ignition coil and let the engine idle.
Turn the steering wheel until there are no air bubbles in the fluid in the reservoir.
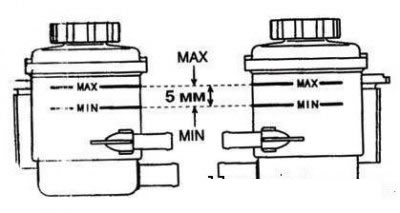
Level marks on the power steering reservoir body
Make sure that the liquid has not become milky and that its level is between the "MAX" and "MIN" marks on the tank wall.
Make sure that the fluid level in the reservoir changes slightly when you turn the steering wheel in both directions.
Repeat the system bleeding:
- if the liquid level has changed by more than 10 mm;
- if the fluid level rises sharply when the engine is stopped.
Checking the power steering pump discharge pressure
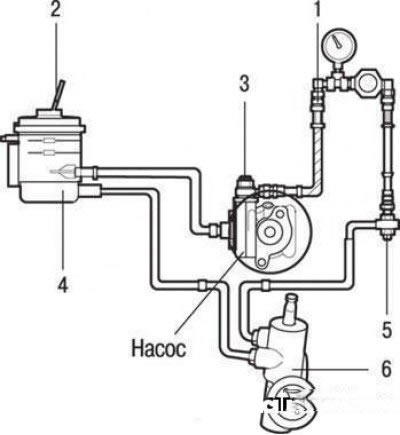
Connection diagram for checking the power steering pump discharge pressure: 1 – control pressure gauge (09572-21000); 2 – thermometer; 3 – adapter (09572-22100); 4 – tank; 5 – pressure gauge adapter (09572-21200); 6 – steering mechanism
Disconnect the high pressure hose from the pump. Attach the pressure tester to the pump and high pressure hose as shown in the figure.
Bleed the system, then start the engine and warm up the working fluid to operating temperature (approximately 50–60°C) by turning the steering wheel several times.
Increase the crankshaft speed to (1000±100) min⁻¹.
Close the pressure gauge valve and check that the fluid pressure complies with the specified limits.
The power steering pump discharge pressure is 8.3–8.8 MPa (85–90 kgf/cm²).
Attention! It is permissible to close the pressure gauge tap for no more than 10 seconds.
If the pressure is not within the specified limits, repair the pump.
Remove the test fixtures and connect the high-pressure hose to the pump, tighten the fitting to a torque of 55–65 N·m.
Bleed the system.