
Spare wheel, unified with the rest of the car wheels
The vehicle is equipped with a spare wheel with a tire of the same type, size and model as the other four wheels of the vehicle. This allows the spare wheel to be used both for replacing a damaged wheel and for occasional wheel changes.
Small spare tire
The small wheel is lighter and smaller. The small wheel is only intended for short-term use in the event of damage to the vehicle wheel. Vehicle mileage on a small spare tire should be limited to a short distance. It is forbidden to use a small wheel for long-term movement over long distances.
When using a small size spare tire, the driving stability of the vehicle may deteriorate compared to the case when all four wheels of normal size are installed on the car. Therefore, when driving a car, be especially careful. To prevent damage to the small spare tire or vehicle, observe the following precautions.
- Do not exceed the speed of 80 km/h.
- Avoid driving over obstacles on the road. Also, do not drive into a mechanized car wash. Because the diameter of the small wheel is smaller than the stock wheels fitted to the vehicle, the vehicle's ground clearance will be reduced by approximately 10 to 25 mm.
- It is forbidden to install an anti-skid chain on the spare wheel, as it does not fit this wheel.
- The small spare wheel must not be fitted to vehicles of other makes and models. The small spare tire is designed for this vehicle model only.
- No more than one small spare wheel may be fitted to the vehicle at a time.
Removal and installation of a spare wheel
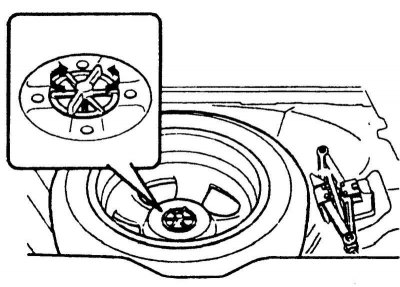
Pic. 1.141. Spare wheel holder
To remove the spare wheel, unscrew the fixing bolt (pic. 1.141).
To secure the spare wheel in its storage location, finger-tighten the bolt firmly to take up the free wheel play.
Flat tire replacement
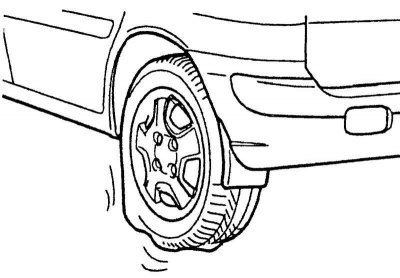
Pic. 1.142. Flat tire
The operations described below can be used for both changing wheels and changing wheels. When preparing to change a flat tire, make sure the selector is in the «R» («Parking») (Automatic transmission) or the shift lever is in the reverse gear position (Manual Transmission) and the parking brake is on.
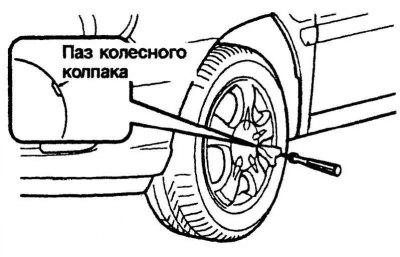
Pic. 1.143. Removing the decorative cap
Wrap a piece of cloth around the end of the mount to avoid damaging the surface of the hubcaps and discs. Insert the mounting key into the groove of the wheel cap, gently wring out and remove the cap (pic. 1.143).
Get your spare wheel and tools ready.
Remove the spare wheel, jack, jack handle and tool bag from the trunk.
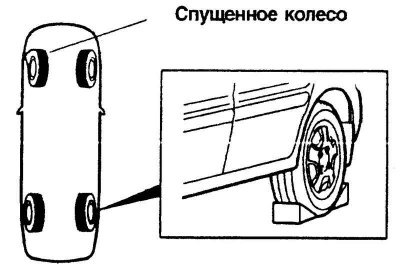
Pic. 1.144. Vehicle wheel lock
To prevent the vehicle from moving when it is jacked up, install the brake shoes (thrust pads) under the wheel located on the opposite side diagonally to the wheel being replaced (pic. 1.144).
Loosen the wheel nuts slightly before lifting the vehicle.
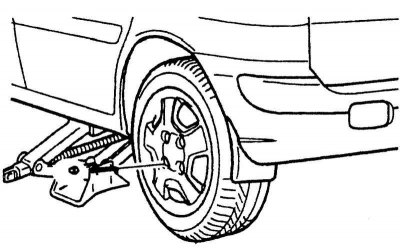
Pic. 1.145. Installing the wheel nut wrench
To loosen the wheel nuts, turn the wrench handle counterclockwise. When doing this, make sure that the wrench head fits snugly around the wheel nut. To obtain the most convenient lever, set the key to the position shown in Figure 1.145.
Then turn while holding the key at the end of the handle. Do not completely loosen the wheel nuts at this stage. Just loosen them half a turn.
Car jacking
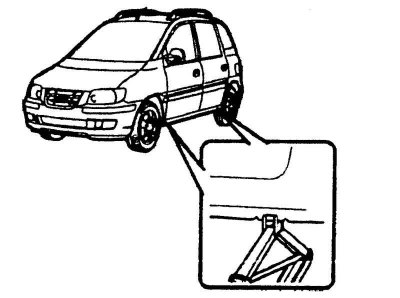
Pic. 1.146. Proper jacking points
The base of the jack must be placed on a hard, level surface. The jack must be located as shown in Figure 1.146.
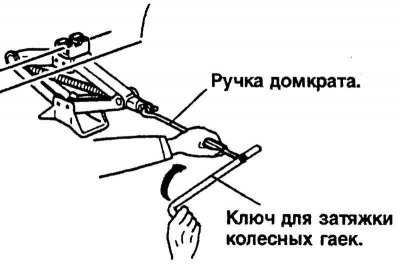
Pic. 1.147. Lifting a car with a jack
Insert the wrench to tighten the wheel nuts into the handle of the jack, as shown in Figure 1.147.
To raise the vehicle, turn the jack handle clockwise. When the jack begins to raise the vehicle, re-check that the jack is secure. If the jack is on soft ground or sand, it may be necessary to place a block, flat stone, or other object under it to keep it from sinking into the ground. Raise the vehicle high enough to fit a fully inflated tire.
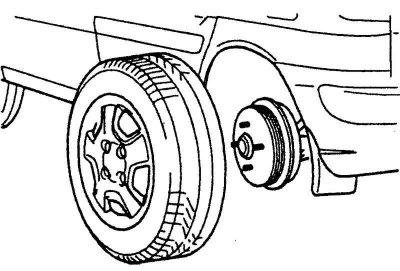
Pic. 1.148. Removing the wheel
Remove the wheel cover (optional equipment) off the wheel. Use a wrench to loosen the wheel nuts, then unscrew them by hand, remove the wheel and place it on the ground so that it does not roll away (pic. 1.148).
To put the wheel on the hub, lift it up, align the holes with the studs and slide the wheel onto them. If this is difficult, tilt the wheel slightly and align the top hole with the stud first. Then wobble the wheel to insert the remaining studs into the wheel holes.
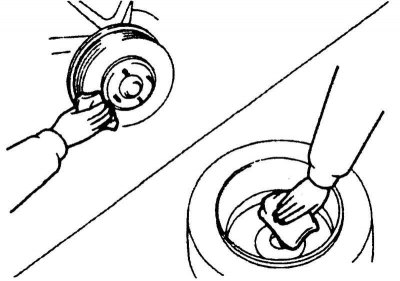
Pic. 1.149. Cleaning wheels and rims
Check that there are no foreign materials on the hub or wheel before putting the wheel back in place (dirt, tar, gravel, etc.), which may interfere with the installation of the wheel on the hub. If they are, remove them (pic. 1.149).
If good contact is not made between the mating surfaces of the wheel and hub, the wheel nuts can loosen, which can result in the loss of the wheel and loss of control of the vehicle.
Pic. 1.150. Installing the wheel nuts
To install the wheel cover while holding it to the wheel, thread the wheel nuts onto the threads and hand-tighten. Nuts must be installed with the cone facing inward (pic. 1.150).
Rock the wheel to make sure it is fully seated and finger-tighten the wheel nuts again.
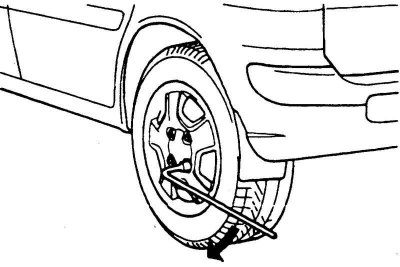
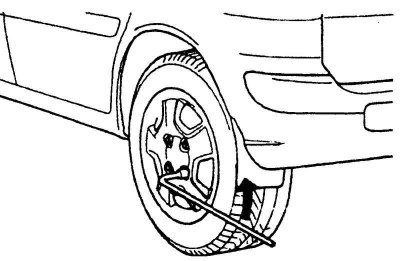
Pic. 1.151. Tightening the wheel nuts
Lower the vehicle to the ground by turning the jack handle counterclockwise. Install the key in the position shown in Figure 1.151 and tighten the wheel nuts.
Make sure the wrench head fits snugly around the wheel nut. When tightening the wheel nuts, it is forbidden to step on the wheel wrench or extend the latter with a pipe, as this may lead to the tightening of the nut.
Tighten all wheel nuts one by one. Recheck all nuts for tightness.
After changing a wheel, take the vehicle to a specialist as soon as possible so that the mechanic can tighten the wheel nuts to the correct torque.
Tightening torque for wheel nuts.
Steel disc and aluminum alloy disc: 90–110 kPa.
After installing the wheel, remove the valve cap and check the air pressure in the tire.
If the air pressure in the tire is higher than recommended, bleed it to the required value.
After changing tires, always secure the flat tire in the trunk and store the jack, jack handle and tools.