
Contents: Disassembly (2.0L/2.4L engines) ⇓ Disassembly (2.7L engine) ⇓ Examination ⇓ Assembly (2.7L engine) ⇓
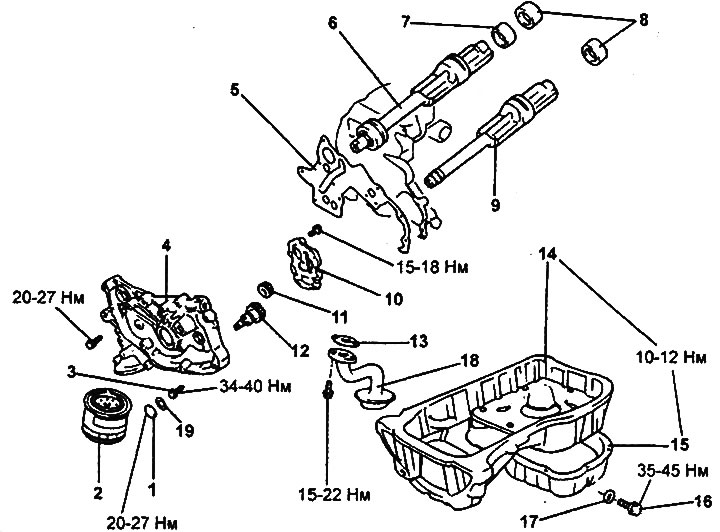
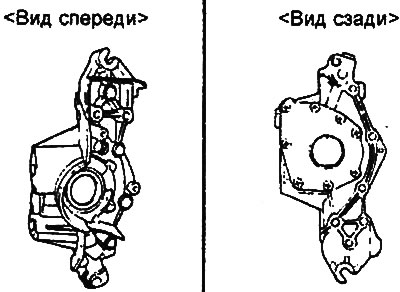
Oil pump housing, oil pump and balance shafts (2.0L/2.4L engines).
1 - plug, 2 - oil filter, 3 - bolt of oil pump driven gear, 4 - oil pump housing, 5 - oil pump housing gasket, 6 - right balance shaft, 7 - front bearing, 8 - rear bearing, 9 - left balance shaft, 10 - oil pump cover, 11 - oil pump driven gear, 12 - oil pump driving gear, 13 - gasket, 14 - upper part of oil pan, 15 - lower part of oil pan, 16 • drain plug, 17 - gasket, 18 - oil intake pipe, 19 - O-ring.
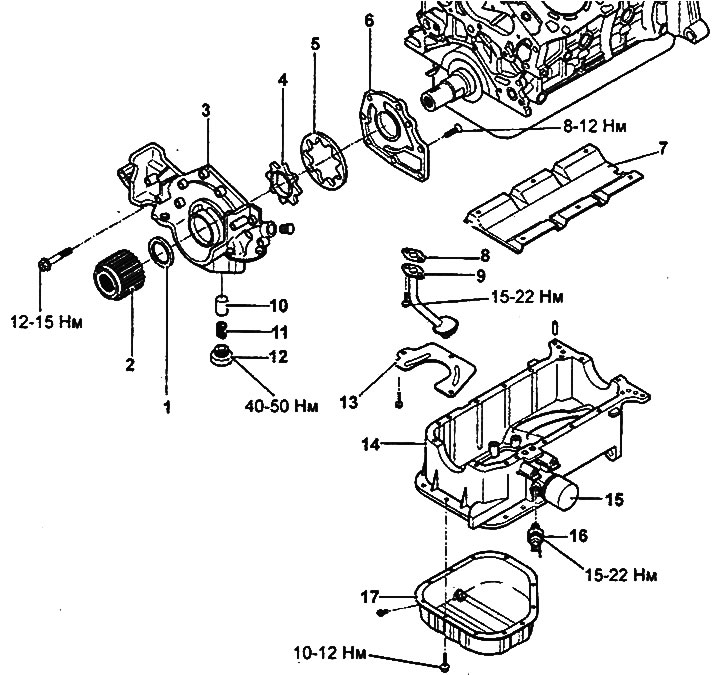
Oil pan housing and oil sump (2.7L engine).
1 - crankshaft oil seal, 2 - crankshaft sprocket, 3 - oil pump housing, 4 - oil pump internal gear, 5 - oil pump external gear, 6 - oil pump cover, 7 - upper oil deflector plate, 8 - oil intake gasket, 9 - oil intake, 10 - pressure relief valve plunger, 11 - pressure relief valve plunger spring, 12 - plug, 13 - lower oil deflector plate, 14 - upper part of oil pan, 15 - oil filter, 16 - oil pressure switch, 17 - lower part of oil pan.
Disassembly (2.0L/2.4L engines)
1. Remove the timing belt (see chapter "Engine - Mechanical part", chapter "Timing Belt Replacement").
2. Loosen the oil pan mounting bolts.
3. Using a rubber-faced hammer, tap the oil pan, then remove the pan (upper and lower parts).
4. Remove the oil pickup and its gasket.
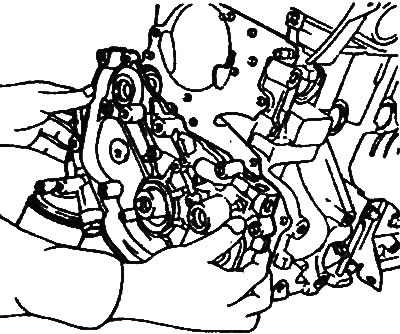
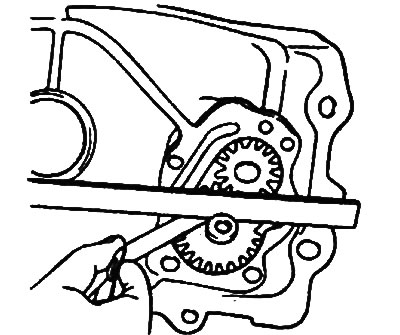
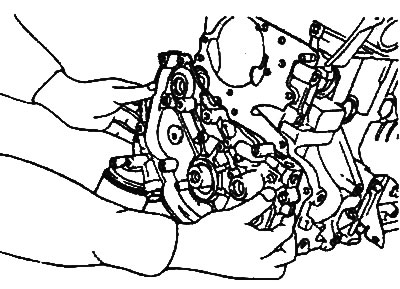
5. Remove the oil pump housing assembly.
6. Remove the oil pressure switch.
7. Remove the oil filter bracket and its gasket.
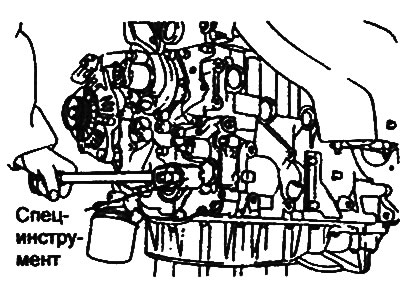
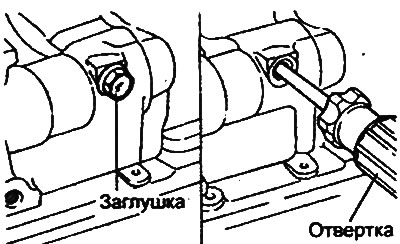
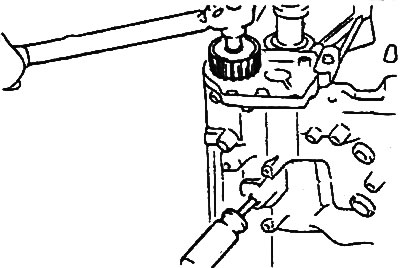
8. Using a special key, unscrew the oil pump plug in the oil pump housing.
9. Unscrew the plug on the left side of the cylinder block and insert a screwdriver with a diameter of 8 mm into the technological hole. The screwdriver should go to a depth of more than 60 mm.
10. Loosen the bolt securing the driven gear of the oil pump and the left balance shaft.
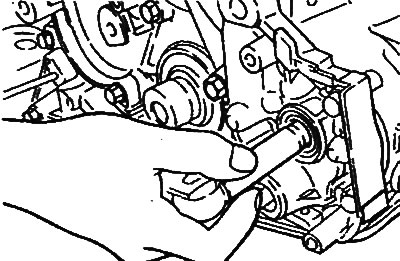
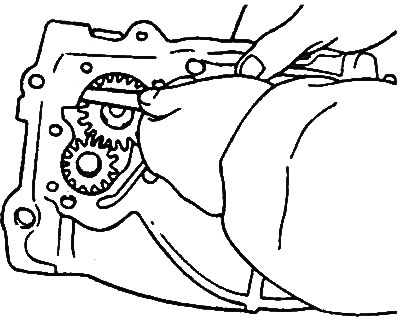
11. Loosen the oil pump housing mounting bolts, then remove the oil pump housing assembly and gasket. Remove both balance shafts from the cylinder block.
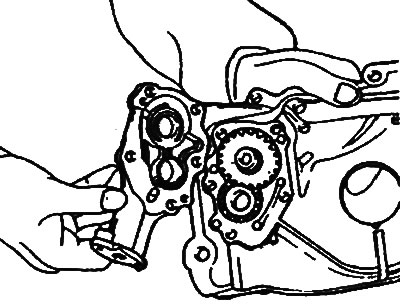
12. Remove the oil pump cover from the oil pump housing.
13. Remove the oil pump gears from the oil pump housing.
14. Remove the screwdriver from the access hole.
Disassembly (2.7L engine)
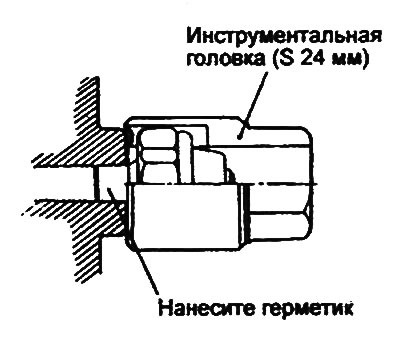
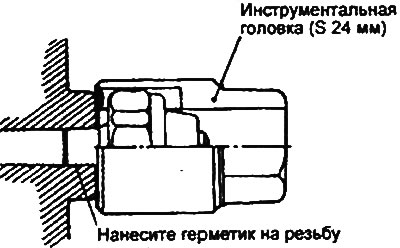
1. Using a 24 mm socket, unscrew the oil pressure switch.
Note: Be careful not to damage the oil pressure switch sensor as the sensor threads are coated with sealant.
2. Remove the oil filter and oil pan.
3. Remove the oil pick-up.
4. Loosen the three mounting bolts and remove the oil filter bracket and gasket.
5. Unscrew the plug of the pressure reducing valve, remove the spring and plunger.
6. Remove the oil pump housing assembly.
Examination
Oil pump housing
1. Check the condition of all oil passages. Clean if necessary.
2. (2.0L / 2.4L Engines) Check the front balance shaft bearing for wear, damage and scoring. If there is any bearing failure, replace the oil pump housing.
3. Check the oil pump housing for cracks or other damage.
4. Replace the oil pump housing if cracks or damage are found.
Balance shaft (2.0L/2.4L engines)
1. Check the balance shaft journals for wear or scoring.
2. If excessive wear or scoring is present, carefully inspect the bearings.
3. Replace bearings or balance shaft if necessary.
- Right balance shaft:
- Oil clearance:
- in front bearing: 0.020-0.061 mm
- in the rear bearing: 0.050-0.091 mm
- Left balance shaft:
- Oil clearance:
- in front bearing: 0.020-0.054 mm
- in the rear bearing: 0.042-0.083 mm
Seal
1. Check the seal lip for wear or damage. Replace the seal if necessary.
2. Check the seal lip for deterioration. Replace the seal if necessary.
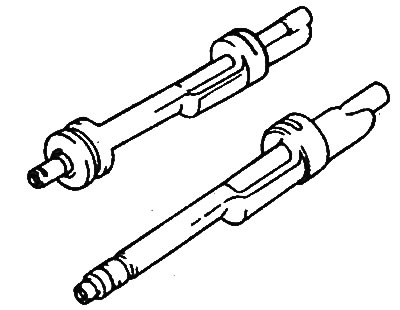
Engine Oil Pressure Switch Sensor
The procedure for checking the sensor switch is given in the chapter "Lubrication system".
Pressure reducing valve
The procedure for checking the pressure reducing valve is given in the chapter "Lubrication system".
Oil filter bracket
1. Check the contact surface of the bracket with the oil filter for damage.
2. Check the oil filter bracket for cracks and signs of oil leaks.
Oil pump (2.0L/2.4L engines)
1. Install the oil pump gears into the housing. Check that the gears rotate smoothly and that there is no significant clearance in the engagement.
2. Check for annular wear marks on the contact surfaces of the housing and cover of the oil pump with the gears.
3. Measure the clearance between the pump body and the tops of the gear teeth.
- Nominal value:
- Pinion: 0.16-0.21mm
- Driven gear: 0.18-0.21 mm
- Maximum permissible value:
- Pinion: 0.25mm
- Driven gear: 0.25mm
4. Measure the end clearance of the gears.
- Nominal value:
- Pinion: 0.08-0.14mm
- Driven gear: 0.06-0.12 mm
- Maximum permissible value:
- Pinion: 0.25mm
- Driven gear: 0.25mm
-------------NO PAGE84---------------------
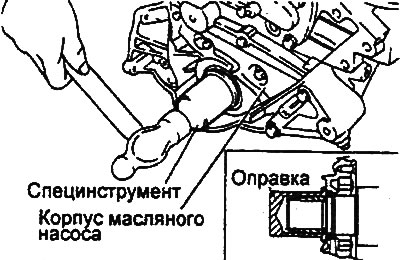
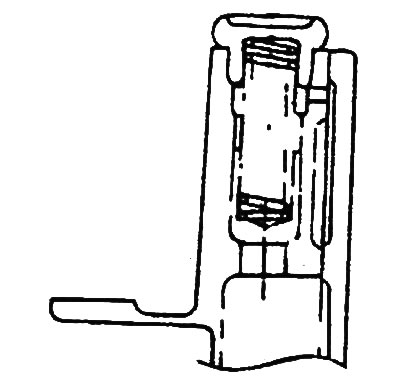
3. Install the special tool (mandrel) on the front of the crankshaft and apply a thin layer of engine oil to the outer surface of the special tool before installing the oil pump housing. Install the special tool (mandrel) on the front of the crankshaft and apply a thin layer of engine oil to the outer surface of the special tool before installing the oil pump housing.

4. Install a new gasket onto the oil pump housing assembly, then temporarily tighten the mounting bolts (with flange).
5. Tighten the oil pump housing mounting bolts (M6) as an assembly to the specified torque.
- Tightening torque: 20-27 Nm

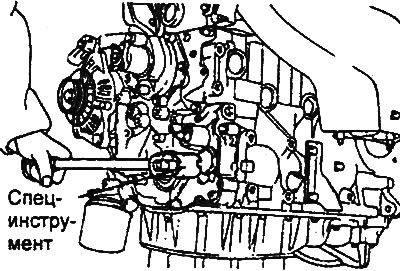
6. Insert a screwdriver into the plug hole on the left side of the cylinder block. Make sure the balance shaft is in the correct position, then replace the bolt with a new one, install the bolt in place and tighten it.
7. Install a new O-ring into the groove of the oil pump housing.
8. Using the special tool, tighten the oil pump plug to the specified torque.
- Tightening torque: 20-27 Nm
[The original source of the article is the website: HYUNDAIBOOK.ru]
9. The installation procedures for the oil pan and oil pressure switch are given in the chapter "Lubrication System".
Assembly (2.7L engine)
1. Install the oil pump housing assembly onto the gasket.
- Tightening torque:
- Oil pump housing: 12-15 Nm
- Oil pump cover: 8-12 Nm
2. Using a drift, install the crankshaft oil seal into the oil pump housing until it rests against the seating surface.
3. Install the plunger and spring of the pressure reducing valve. Tighten the plug to the rated torque,
- Tightening torque: 40-50 Nm
4. Install the oil pickup on the new gasket and tighten the oil pickup mounting bolts.
- Tightening torque: 15-22 Nm
5. The installation procedures for the oil pan and oil pressure switch are given in Chapter "Lubrication system".