
There is no need to add water to the electrolyte of a maintenance-free battery.
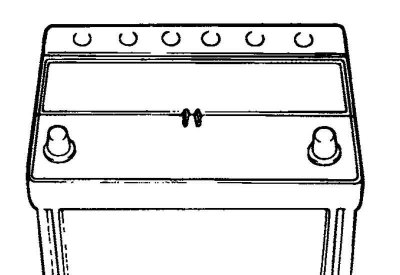
Fig. 7.47. Ventilation hole in the battery cover
The battery is completely sealed, except for a small ventilation hole in the cover (Fig. 7.47).
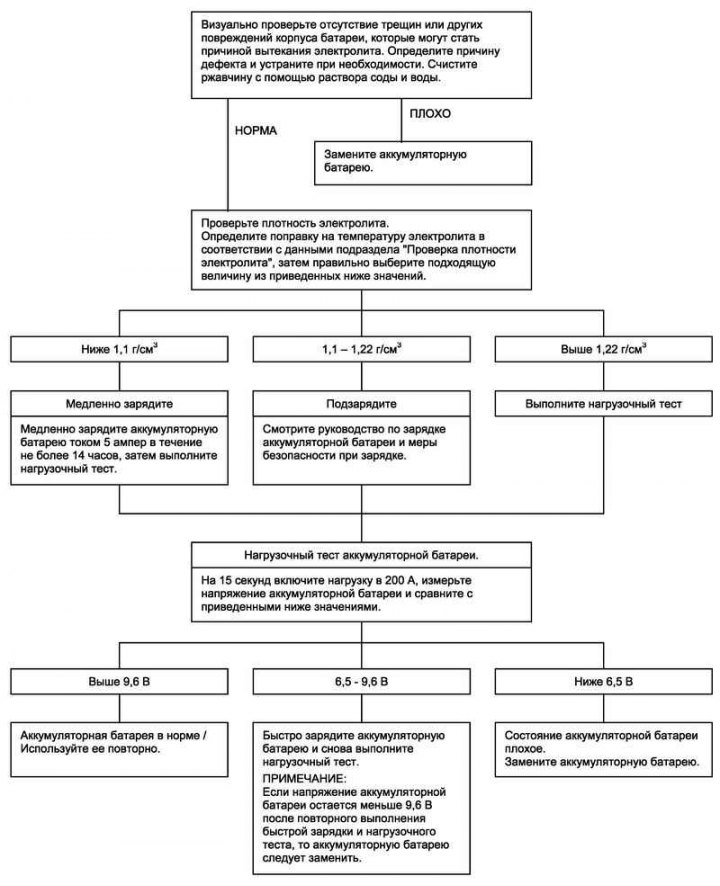
Fig. 7.48. Visual inspection diagram of the battery
Checking the density of the electrolyte
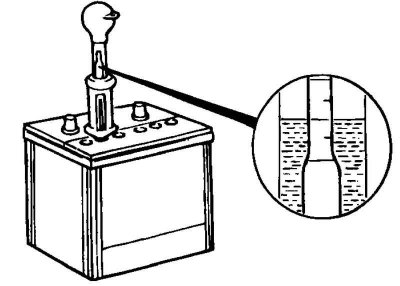
Fig. 7.49. Checking the density of the electrolyte
The density of the battery electrolyte changes with temperature. Heating liquefies the solution and reduces the density of the electrolyte. Cooling thickens the solution and increases the density of the electrolyte (Fig. 7.49).
When the battery is fully charged, the electrolyte density should be 1.260–1.280 g/cm³ at a temperature of 26.7°C. If the actual electrolyte temperature deviates from the standard value, an adjustment must be made: 4 points (0.004 g/cm³) must be added to the density value for every 5.56°C of temperature above 26.7°C, or 4 points (0.004 g/cm³) must be subtracted for every 5.56°C of temperature below 26.7°C.
For example: the hydrometer shows a density value of 1.280 g/cm³ and the thermometer shows an electrolyte temperature of -12.2°C (10°F). According to the figure provided, the measured density value should be reduced by 7 points (0.028 g/cm³). Thus, the reduced value of the electrolyte density at 26.7°C will be 1.252 g/cm³.
Calculation formula: 1.280 – 0.028 = 1.252.
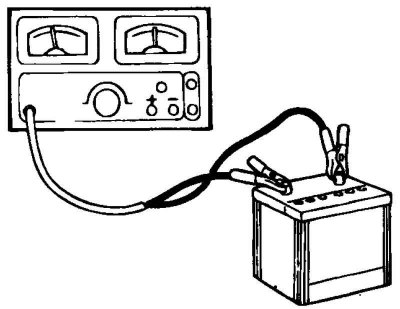
Fig. 7.50. Charging the battery
Do not measure the electrolyte density with a hydrometer immediately after adding water to the electrolyte. To ensure that the water and electrolyte mix and a uniform density is achieved, either slowly charge the battery (at 5 A) for several minutes or leave the battery stationary for approximately one hour (Fig. 7.50).
Attention! If the electrolyte density in any battery bank (one or more) differs from the average value by 50 points (0.05 g/cm³) or more, this is a sign of internal damage. In this case, the battery should be replaced.
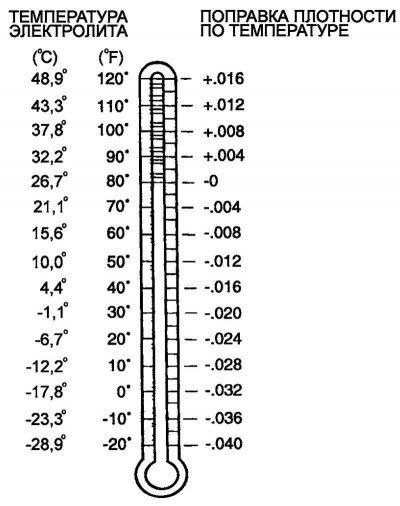
Fig. 7.51. Schematic diagram of the dependence of the electrolyte density on its temperature
Visual inspection of the battery
Turn the ignition key to the "OFF" position and turn off all additional electrical equipment.
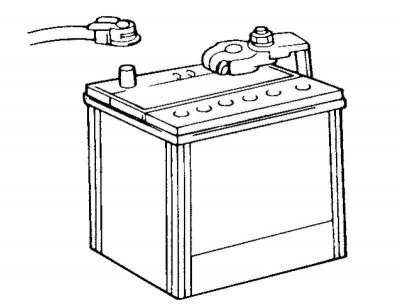
Fig. 7.52. Disconnecting the battery cables
Disconnect the wires from the battery terminals (disconnect the wire from the negative (–) terminal first) (Fig. 7.52).
Remove the battery from the vehicle.
Warning! Use extreme caution if the battery case has cracks or other sources of electrolyte leakage, avoid skin contact with the electrolyte. Always wear suitable rubber gloves when removing the battery (do not use household gloves).
Check the battery tray for corrosion caused by acid (electrolyte) leakage. If corrosion is present, wash the damaged areas with a solution of clean warm water and soda. Clean the damaged areas with a stiff wire brush and wipe with a cloth soaked in a soda solution.
Clean the top of the battery with the solution.
Check the battery case and cover for cracks. If cracks are present, replace the battery.
Clean the battery terminals with a suitable battery cleaner.
Clean the inner surface of the battery connection wire contact retainers with the appropriate special tool. Replace damaged or worn connecting wires and damaged contact retainers.
Install the battery into the vehicle.
Connect the jumper cable contacts to the battery terminals and make sure the ends of the contact retainers are flush with the ends of the battery terminals.
Tighten the connector wire contact retainer nut securely.
After tightening, apply a small amount of mineral grease to all connection points.
Warning! When charging a battery, flammable and explosive gas is released under the battery cover. Do not smoke or use an open flame near a battery that is being charged or has recently been charged. Do not disconnect live circuits near the terminals of a battery that is being charged. A spark may appear between disconnected wires (in an open circuit) and cause an explosion. Keep flammable objects away from an open battery.