
Contents: Checking the drive belts of…⇓ Adjusting the alternator drive belt…⇓ Adjusting the power steering pump…⇓ Checking the tension of the drive…⇓
Checking the drive belts of attachments
1. Check the drive belt for damage and excessive wear and make sure it is installed correctly in the pulley grooves. If the belt "squeals" or slips, check the condition of the pulley contact surfaces and the belt tension. If defects are found, replace the drive belt.
Caution: If the belt tension is loose, it will cause slipping noise and rapid belt wear.
Note:
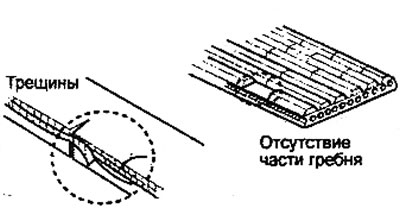
- Peeling of the rubber from the cord on the inner (from the side of the ridges) and outer surfaces of the belt, exposure or damage to the cord, peeling of the ridges from the rubber base, the presence of cracks, peeling or wear on the side surfaces of the belt and belt ridges are not permitted.
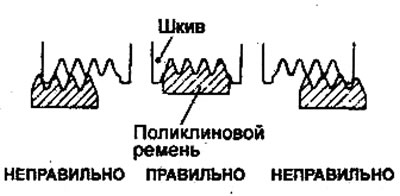
- After installing the poly V-belt, make sure that the belt raceways are correctly seated in the pulley grooves.
 |
 |
Note:
- The term "used belt" refers to a belt that has been in service for more than 5 minutes.
- Perform the belt deflection check on a cold engine or at least 30 minutes after the engine has been stopped.
- After installing the belt, start the engine and let it run for 5 minutes, then check the belt tension again.
2. Check that the belt does not slip off the tensioner roller. Check the surface of the tensioner roller and the smoothness of its rotation. If necessary, replace the tensioner.
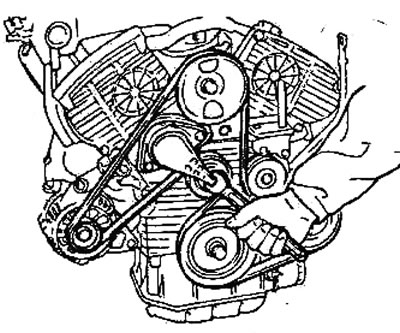
3. (2.0L / 2.4L engines) Check the belt deflection at the locations indicated by the arrows in the figure by pressing at the center of the belt span between the pulleys with a force of 98 N. Adjust the belt deflection if it does not correspond to the nominal value given in the table "Checking and adjusting accessory drive belts".
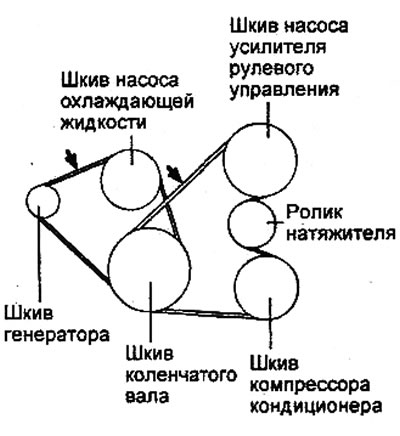
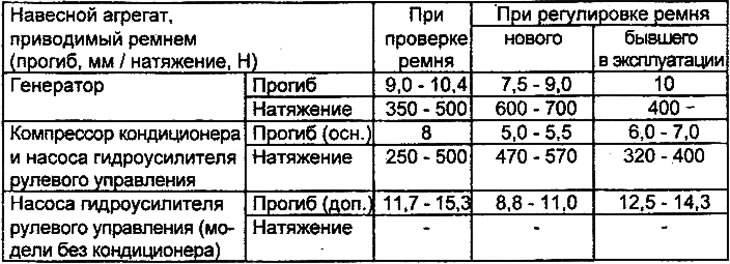
Table. Checking and adjusting the drive belts of attachments (2.0 l / 2.4 l engines).
Adjusting the alternator drive belt (2.0L/2.4L engines)
Attention:
- If the belt tension is loose, it will cause a slipping sound and rapid belt wear.
- If the tension is too high, there is a risk of damage to the coolant pump or generator bearings.
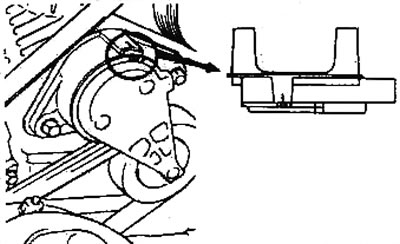
1. Loosen the nut "A" of the generator hinge mount and the lock bolt "B" of the generator adjusting bar.
2. Turn the adjusting bolt to adjust the belt tension and deflection to the nominal values.
The basis of the material is information from the website (www.HyundaiBook.ru)
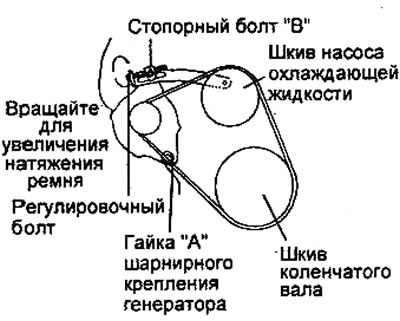
3. Tighten the locking bolt "B" of the generator adjusting bar.
4. Tighten the nut "A" of the generator hinge mount.
Tightening torques:
- Nut "A": 35-55 Nm
- Bolt "B": 20-25 Nm
- Adjusting bolt 8-12 Nm
5. Check the belt tension or deflection and readjust if necessary.
Adjusting the power steering pump and air conditioning compressor drive belt (2.0L / 2.4L engines)
1. Loosen the lock bolt "A" on the tensioner roller bracket.
2. Adjust the belt tension by turning the adjusting bolt "B".
3. Tighten the lock bolt "A".
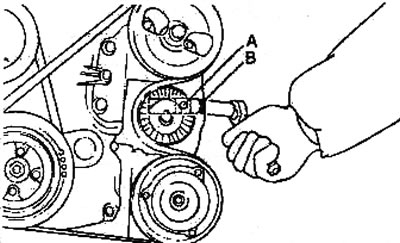
4. Turn the engine crankshaft one revolution, then check the belt tension. If necessary, repeat the adjustment.
Checking the tension of the drive belt of the auxiliary units (2.7 l engine)
Note: Since an automatic tensioner is installed, there is no need to adjust the tension of the accessory drive belt.
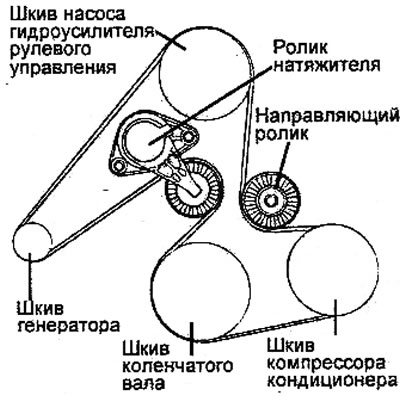
Models with air conditioning.
1. Check that the tensioner setting mark is between the "MIN" and "MAX" positions.
2. If the position of the mark does not correspond to that shown in the figure, replace the belt.
- a) Place the new belt on the tensioner pulley and install the tensioner on the engine (if the tensioner is already installed, loosen its mounting bolts to install the belt.)
- Tightening torque: 20-27 Nm
- b) Install the belt on the pulleys in the following sequence:
- generator pulley;
- power steering pump pulley;
- crankshaft pulley;
- air conditioning compressor pulley.
- c) Using a 16mm wrench, turn the tensioner lever clockwise approximately 14 degrees and place the belt on the idler pulley.
- d) Make sure that the belt tracks are correctly seated in the pulley grooves.
- d) Check that the tensioner setting mark is between the "MIN" and "MAX" positions.