Contents: Removal ⇓ Installation ⇓
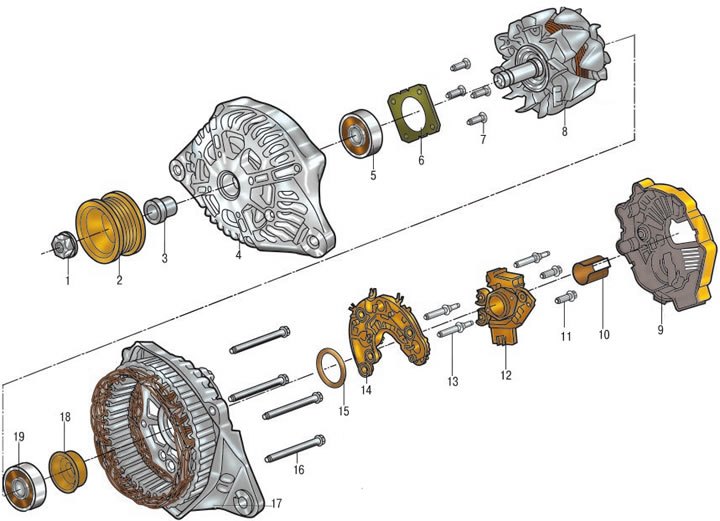
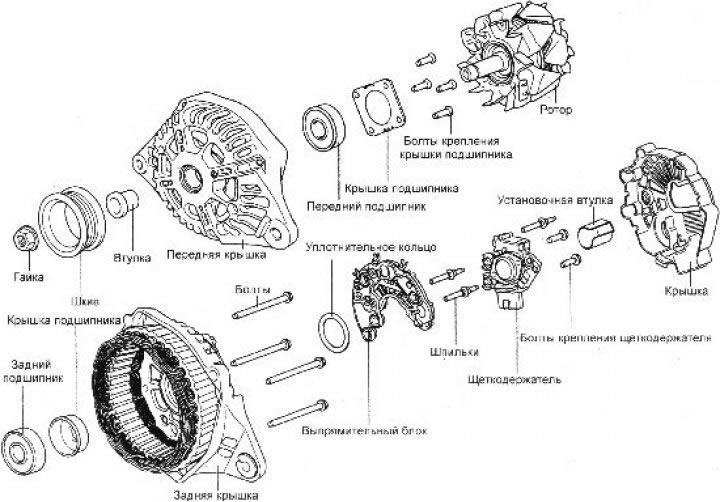
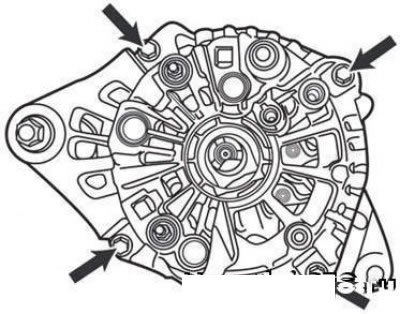
Generator: 1 - nut; 2 - pulley; 3 - spacer sleeve; 4 - front cover; 5 - front bearing; 6 - bearing mounting washer; 7, 11 - screws; 8 - rotor; 9 - lid; 10 - mounting sleeve; 12 - brush holder; 13 - hairpin; 14 - rectifier block; 15 - sealing ring; 16 - bolt; 17 - stator housing; 18 - bearing cap; 19 - rear bearing
Removal
1. Disconnect the cable from the negative terminal of the battery.
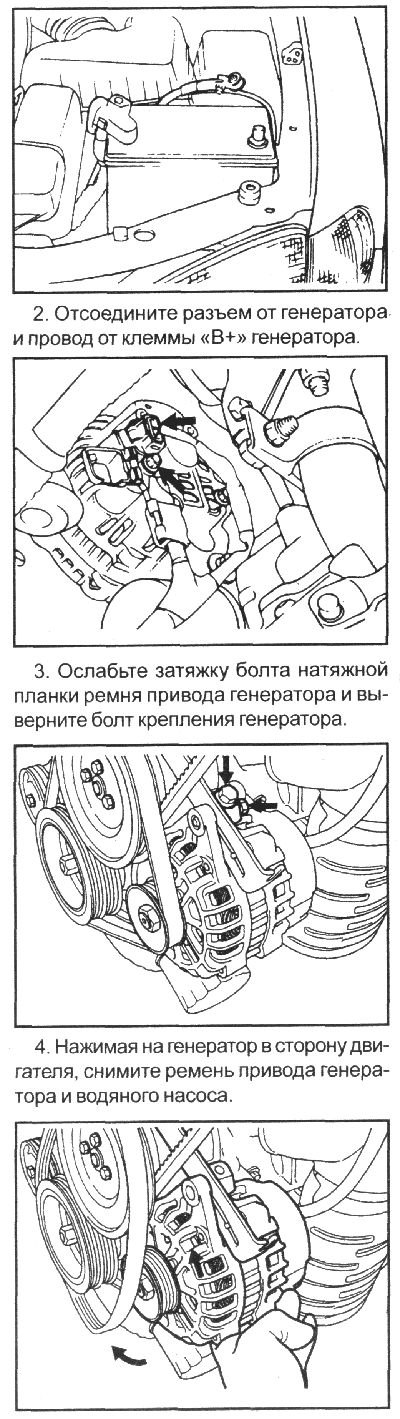
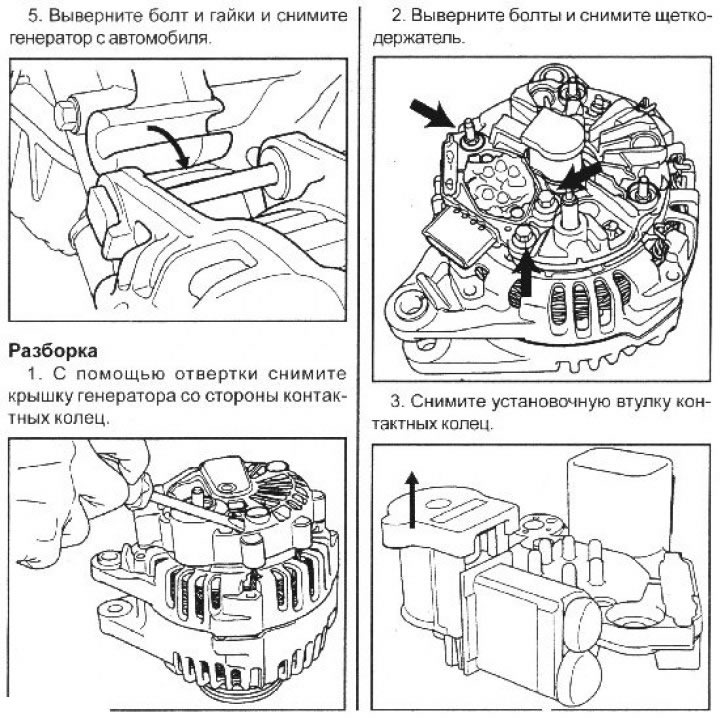
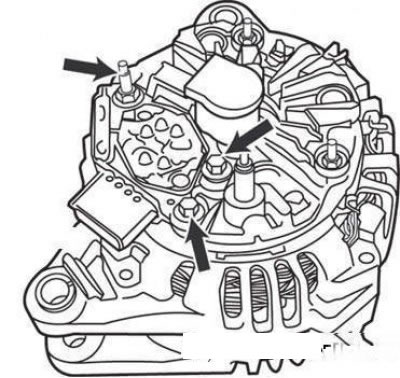
Brush holder mounting bolts
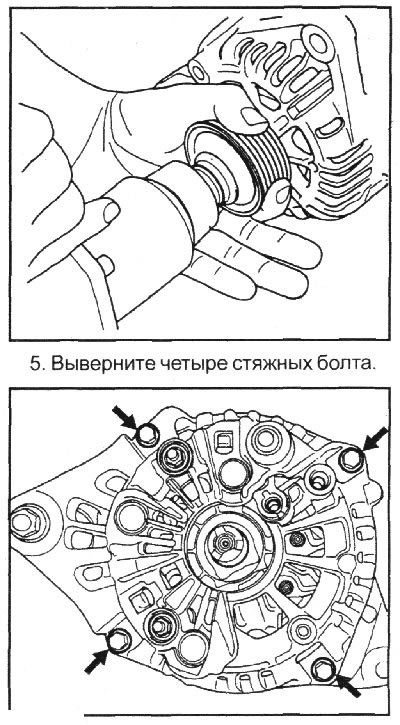
Generator tie bolts
6. Insert the blade of two flat-head screwdrivers between the front cover and the stator magnetic core and remove the cover.
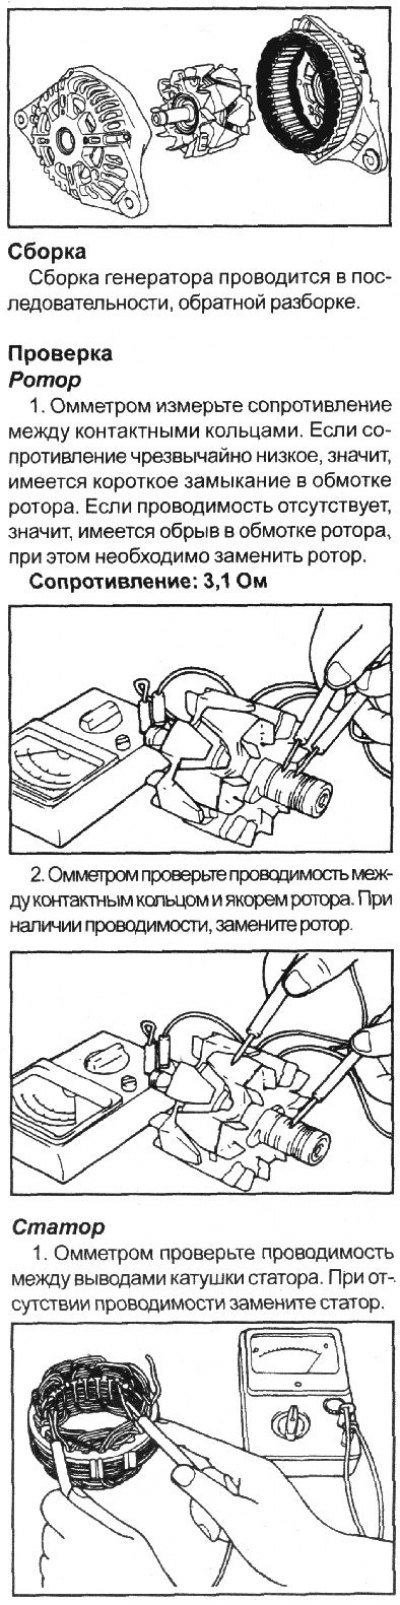
2. Use an ohmmeter to check the conductivity between the stator coils and the stator. If there is conductivity, replace the stator.
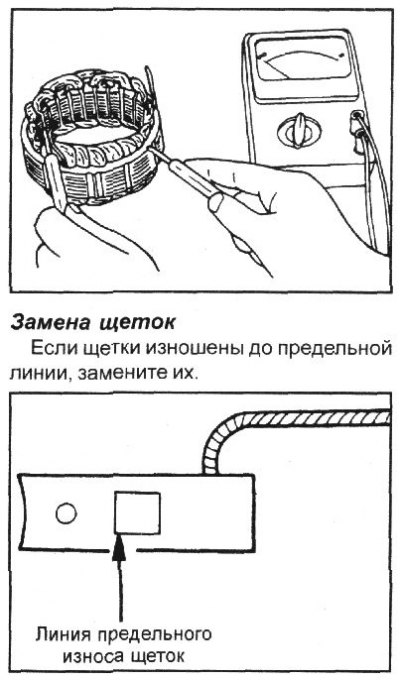
1. Unsolder the braided wire and remove the old brush and spring.
2. Install the brush spring and new brush into the brush holder.
3. Insert the brush so that there is a distance of 2–3 mm between the wear limit line and the end of the brush holder.
4. Solder the braided wire to the brush holder.
Installation
Installation is carried out in the reverse order of removal.
Note.
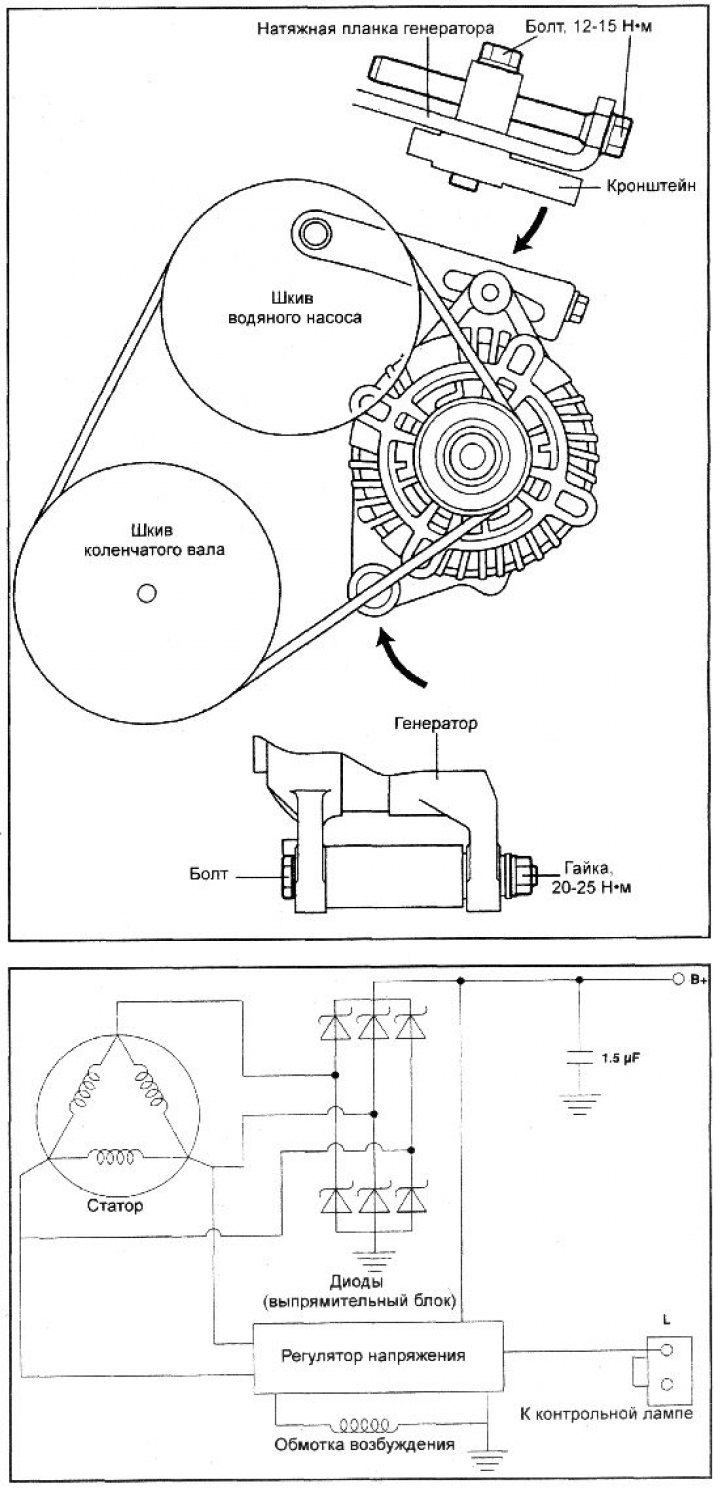
- 1. Mount the alternator to the engine. Insert the central alternator mounting bolt, but do not screw the nut onto it.
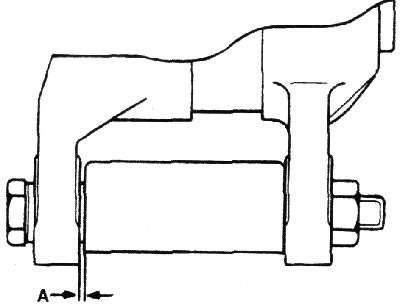
- 2. Move the alternator to one side along the central alternator mounting bolt and measure the distance between the alternator support and the bracket. Select a set of spacer washers (washer thickness 0.198 mm) corresponding to the measured distance. Install the washers between the front post of the alternator casing and the front cover of the cylinder block (gap "A" in the figure). The number of washers must be sufficient so that they do not fall out when released.
- 3. Insert spacer washers and screw the nut onto the central generator mounting bolt.
(This article is based on information from the website: www.HyundaiBook.ru)