
Contents: Removal and installation ⇓ Examination ⇓
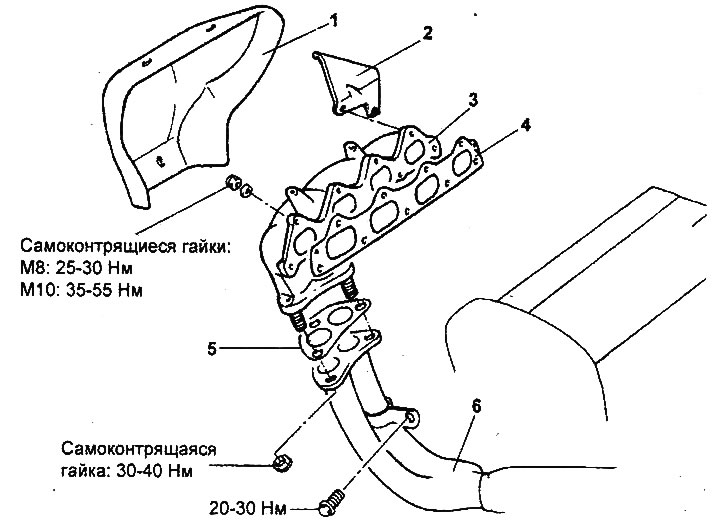
Exhaust manifold (2.0L/2.4L engines, type 1).
1 - heat shield, 2 - engine mount bracket, 3 - exhaust manifold, 4 - exhaust manifold gasket, 5 - gasket, 6 - exhaust system inlet pipe.
Note: Models with 2.0L/2.4L engines also featured an exhaust manifold (type 2) combined with a catalytic converter.
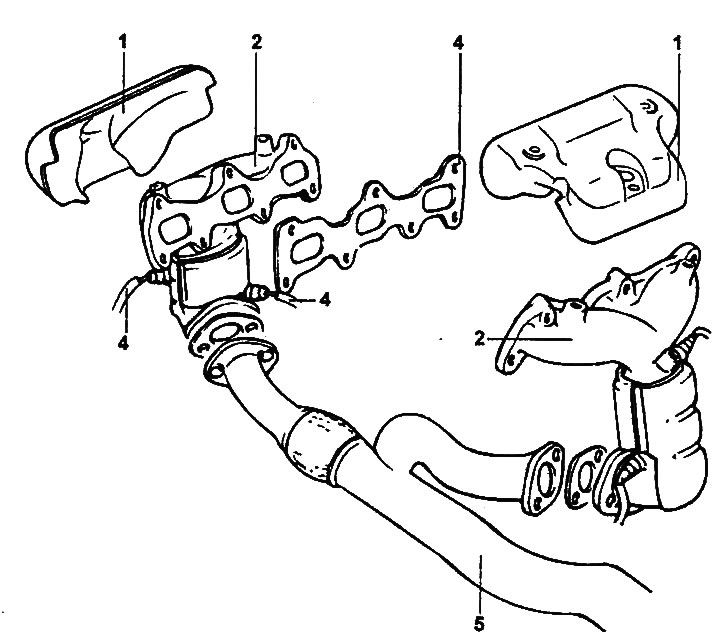
Exhaust manifold (2.7L engine, type 1).
1 - heat shield, 2 - exhaust manifold, 3 - gasket, 4 - oxygen sensor, 5 - exhaust pipe.
Exhaust manifold (2.7L engine, type 2).
1 - heat shield, 2 - exhaust manifold of the left cylinder head, 3 - exhaust manifold of the right cylinder head, 4 - exhaust manifold gasket, 5 - gasket, 6 - exhaust pipe, 7 - oxygen sensor.
Removal and installation
1. Remove the exhaust manifold heat shield.
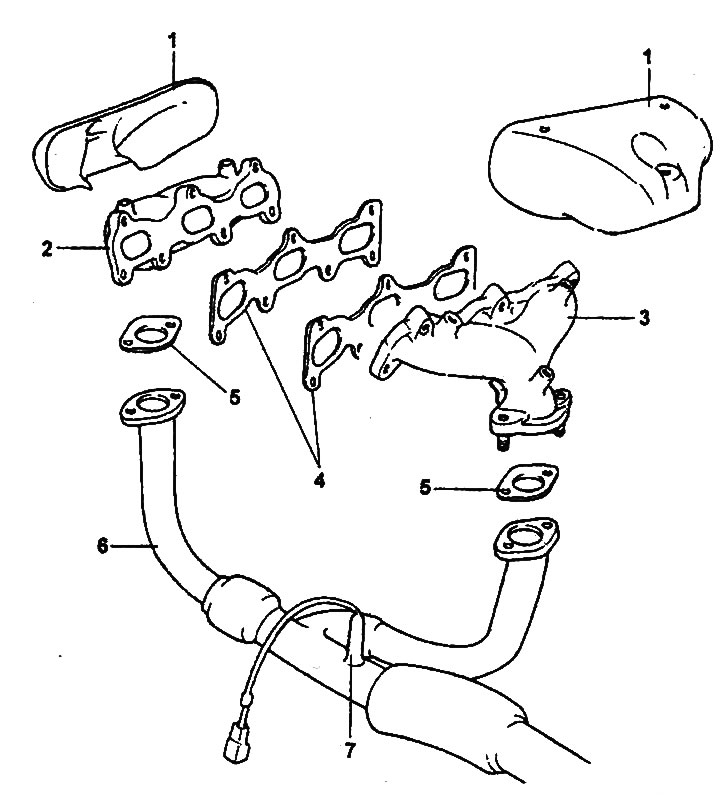
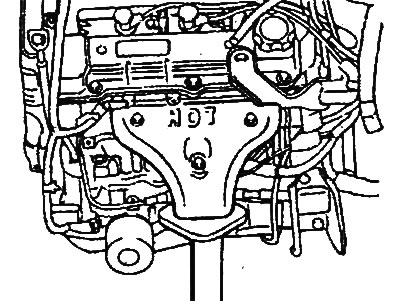
Engines 2.0L / 2.4L |
Engine 2.7 l. |
2. Remove the exhaust manifold assembly from the cylinder head.
The original source of the article is the website: HyundaiBook.ru
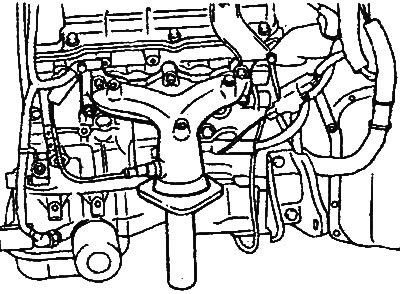
Engine 2.7 l.
3. Remove the exhaust manifold gasket.
4. Install the exhaust manifold on the gasket and tighten the nuts to the specified torque.
Tightening torque:
- 2.0L/2.4L Engines:
- M8: 25-30 Nm
- M10: 35-55 Nm
- 2.7L Engine: 25-30 Nm
Caution: Replace the exhaust manifold gasket with a new one before reinstalling.
Note: After removing the self-locking nuts, replace them with new ones.
5. Install the heat shield.
Examination
1. Check the exhaust manifold for cracks and damage.
2. Using a precision ruler and a flat feeler gauge, measure the warpage (non-flatness) of the exhaust manifold mating surface.
Non-flatness of the mating surface:
- Nominal: less than 0.15 mm
- Maximum allowable: 0.30 mm
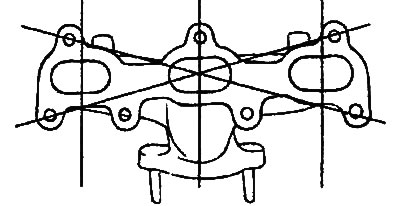
Engine 2.7 l.