
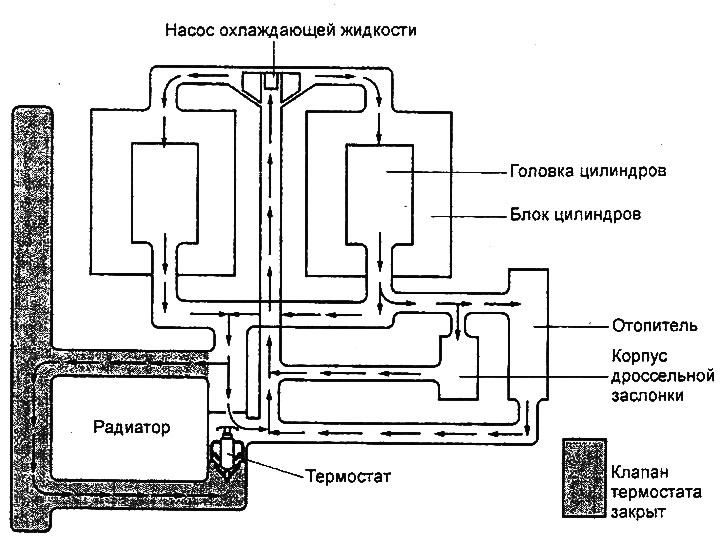
Cooling system diagram (2.7L engine).
Checking the tightness of the cooling system
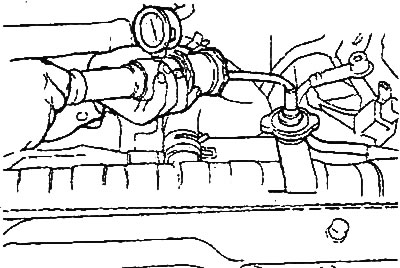
1. Make sure the coolant level reaches the radiator filler neck.
2. Connect the radiator cap valve tester to the radiator filler neck and apply a pressure of 150 kPa. Maintain the specified pressure for 2 minutes and check for coolant leaks from the radiator, hose connections or the cooling system hoses themselves.
Note:
- Thoroughly remove moisture from the surface of all parts being checked for leaks.
- When removing the radiator cap valve tester from the radiator filler neck, be careful not to splash coolant.
- When connecting and disconnecting the tester, as well as during testing, be careful not to deform the radiator filler neck.
(This article is based on information from the website HYUNDAIBOOK.ru)
3. If there are any leaks, repair or replace the relevant part.
Checking the radiator cap
Note: Make sure the radiator cap is clean before checking, as rust or other foreign matter on the cap gasket may cause incorrect pressure gauge readings.
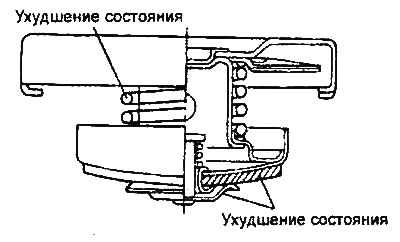
1. Check the radiator cap for damage, cracks and deterioration of the seal (wear, etc.).
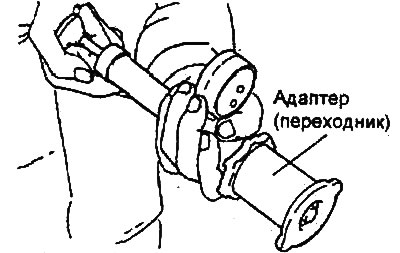
2. Connect the radiator cap to the special tester.
3. Change the pressure until the pressure gauge needle stops (valve opening pressure).
Nominal value:
- Valve opening pressure:
- 2.0L/2.4L Engine: 86.1-124.5 kPa
- 2.7L Engine: 93.2-122.6 kPa
- Valve closing pressure: 83.4 kPa
4. If the pressure gauge needle remains stationary for 10 seconds at a pressure value exceeding the maximum permissible valve response pressure, then the radiator cap is in good condition.
5. Replace the radiator cap if the valve opening pressure is below the nominal value.