
Contents: Removal and installation ⇓ Examination ⇓
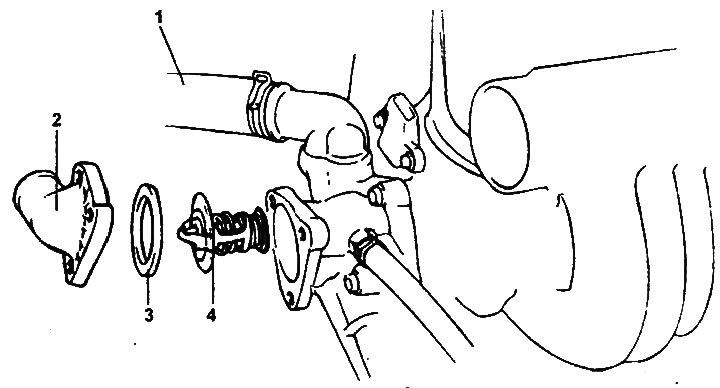
Thermostat assembly (2.0L/2.4L engines).
1 - upper radiator hose, 2 - cooling system inlet pipe, 3 - gasket, 4 - thermostat.
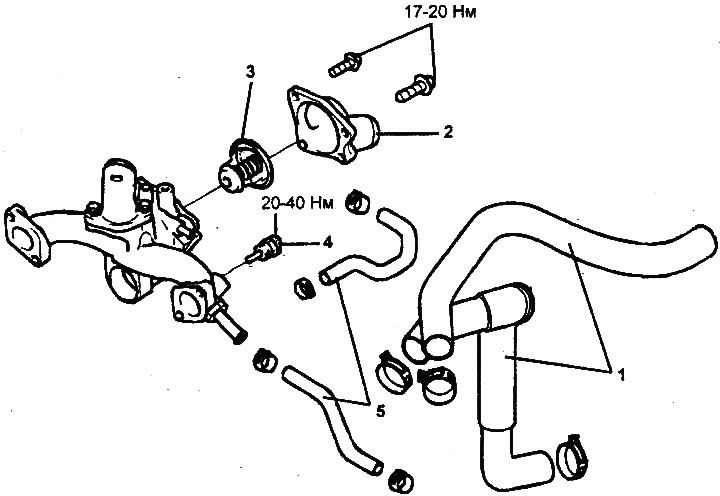
Thermostat assembly (2.7L engine).
1 - radiator hoses, 2 - cooling system outlet pipe, 3 - thermostat, 4 - coolant temperature sensor, 5 - cooling system hose.
Removal and installation
1. Drain the coolant until its level is below the thermostat.
2. Remove the cooling system inlet pipe and gasket.
3. Remove the thermostat.
4. If necessary, remove the coolant temperature sensor.
5. Install the coolant temperature sensor. Apply sealant to the sensor threads before installation.
- Tightening torque: 20-40 Nm
6. Install the thermostat. Check that the thermostat is correctly installed in the housing and that its flange fits tightly against the housing at the installation location.
7. Install the cooling system inlet pipe with a new gasket and tighten it.
Tightening torque:
- Engines 2.0l / 2.4l: 10-15 Nm
- 2.7L Engine: 17-20 Nm
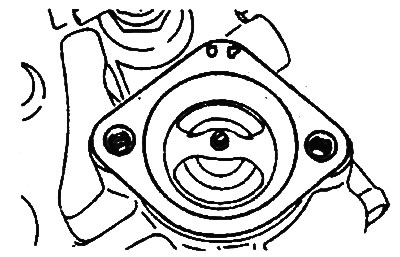
Engines 2.0 l / 2.4 l. |
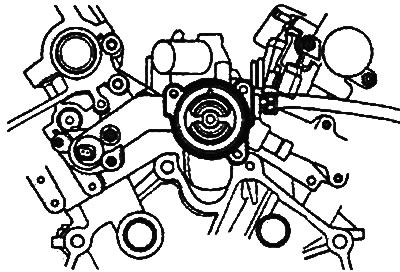
Engine 2.7 l. |
8. Fill the cooling system with clean coolant.
Examination
1. Check that the thermostat valve is tightly closed at room temperature (20°C).
2. Check the thermostat for defects or damage. If there are various deformations, visible damage or other defects, replace the thermostat.
3. Check for rust or deposits on the thermostat valve. If rust or deposits are found, clean the valve.
4. Checking the operation of the thermostat.
- a) Immerse the thermostat in a container with cooling liquid or water and heat the water while stirring it.
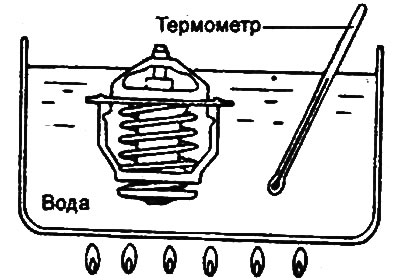
- b) Check that the valve opening temperature and the valve full opening temperature correspond to the nominal values.
Temperature:
- valve opening start: 80-84°C
- full valve opening: 95°C
- c) Even if the thermostat valve opens at a temperature slightly below the nominal value, replace the thermostat.
Note: The thermostat housing has marks indicating the temperature at which the valve begins to open. When replacing, use a thermostat with a similar mark.