
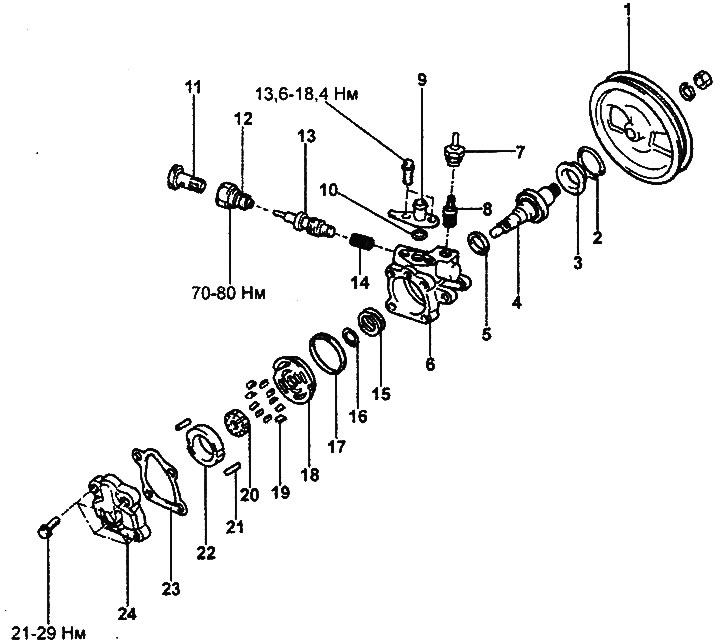
Power steering pump.
1 - pump drive shaft pulley, 2 - retaining ring, 3 - boot, 4 - pump drive shaft assembled with bearing, 5 - oil seal, 6 - pump housing, 7 - working fluid pressure sensor with sealing ring, 8 - spool valve, 9 - return hose branch pipe, 10 - sealing ring, 11 - bypass bolt, 12 - discharge pipe fitting with sealing ring, 13 - working fluid flow regulator, 14 - regulator spring, 15 - spring, 16 - inner sealing ring, 17 - outer sealing ring, 18 - rear disk, 19 - blade, 20 - rotor, 21 - dowel pin, 22 - stator ring, 23 - gasket, 24 - pump housing cover.
Removal
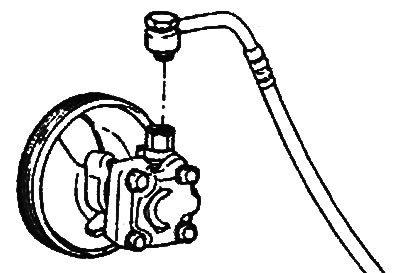
1. Loosen the bypass bolt and disconnect the discharge line from the fitting.
- Tightening torque: 55-65 Nm
2. Disconnect the return hose from the branch pipe and drain the working fluid into a special container.
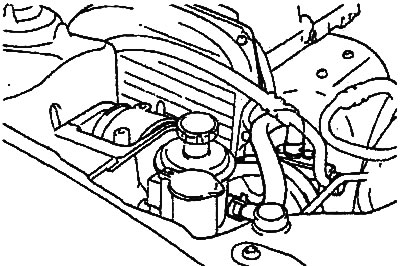
Note: Avoid contact of working fluid with the generator housing.
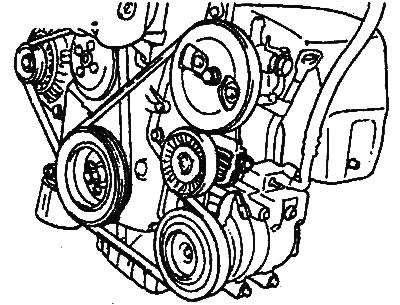
3. (Models with 2.7L engine) Remove the accessory drive belt.
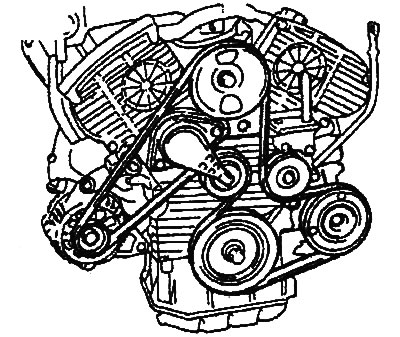
4. (Models with 2.0L and 2.4L engines) Loosen the adjusting bolt and remove the accessory drive belt.
5. Disconnect the working fluid pressure sensor connector.
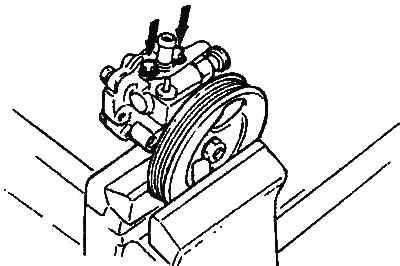
6. Loosen the pump mounting bolts and remove the power steering pump assembly.
- Tightening torque: 39-60 Nm
Disassembly
1. Loosen the two bolts and remove the return hose pipe and sealing ring.
- Tightening torque: 13.6-18.4 Nm
2. Loosen the four bolts and remove the pump housing cover and gasket.
- Tightening torque: 21-29 Nm
Note: Do not reuse the gasket.
3. Remove the dowel pins and remove the stator ring.
4. Remove the rotor with blades and the rear disk from the pump housing.
5. Remove the outer and inner sealing rings and take out the spring.
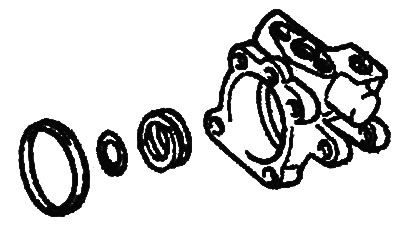
Note: When assembling the pump, install new O-rings.
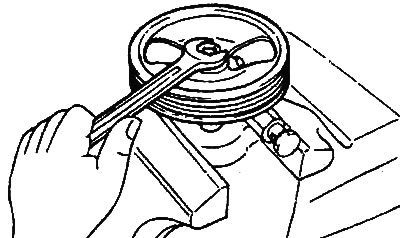
6. Remove the pump shaft pulley.
- a) Unscrew the pulley mounting nut and spring washer.
- Tightening torque: 55-70 Nm
- b) Remove the pulley and key.
7. Using the special tool, remove the retaining ring.
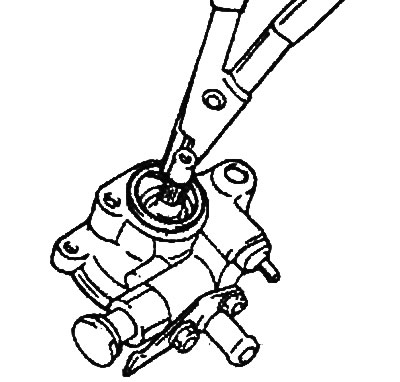
8. Remove the pump drive shaft assembly with the bearing.
Note: Use a plastic-faced hammer if necessary.
9. Remove the seal from the pump body.
Note: Do not reuse the seal.
10. Unscrew the discharge pipe fitting, remove the working fluid flow regulator and spring from the pump body.
- Tightening torque: 70-80 Nm
Note: Do not disassemble the working fluid flow regulator.
11. Remove the sealing ring from the fitting.
12. Remove the working fluid pressure sensor.
13. Remove the valve with spring from the pump body.
14. Remove the sealing ring from the working fluid pressure sensor.
Examination
1. Clean all removed parts with a suitable cleaning solution.
2. Check for damage to the internal components of the pump. If damage is found, replace the pump assembly.
3. Check the pump drive shaft pulley for cracks and deformations. If any defects are found, replace the pulley.
4. Check for leaks of working fluid through the pump drive shaft seal. Replace the seal if necessary.
5. Check the splines of the pulley and pump drive shaft for excessive wear and damage. Replace any worn or damaged parts as necessary.
Assembly
1. The power steering pump is assembled in the reverse order of disassembly; the bolt tightening torques are specified in the description of the disassembly procedure and in the assembly drawing "Power steering pump".
2. During assembly, lubricate all pump parts with working fluid.
Installation
1. The power steering pump is installed in the reverse order of removal; the bolt tightening torques are specified in the description of the removal procedure and in the assembly drawing "Power steering pump".
2. When installing, position the hoses so that they are not twisted and do not come into contact with the vehicle's components.
3. After installation:
- bleed the power steering system (see chapter "Maintenance and general check and adjustment procedures");
- check the working fluid pressure (see section "Checking the working fluid pressure").