
Removing and installing the steering column.
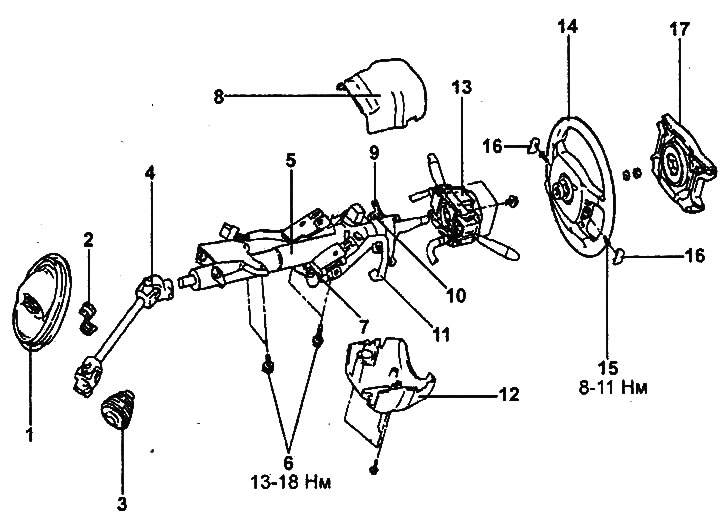
1 - intermediate shaft casing, 2 - bearing, 3 - protective cover, 4 - intermediate shaft, 5 - steering column assembly, 6 - bolts, 7 - spring, 3 - upper steering column casing, 9 - steering wheel lock mechanism, 10 - special bolt, 11 - steering column angle adjustment lever, 12 - lower steering column casing, 13 - combination switch, 14 - steering wheel, 15 - steering wheel trim mounting bolt, 16 - steering wheel side trim, 17 - steering wheel trim assembly.
Removal
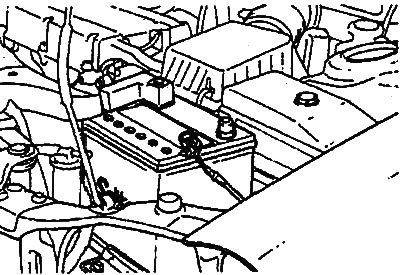
Note: Before removing the steering column, disconnect the cable from the negative battery terminal and wait at least 30 seconds before continuing the procedure.
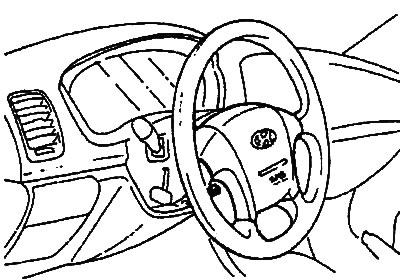
1. Remove the side steering wheel trims and use a hex key to unscrew the trim mounting bolts.
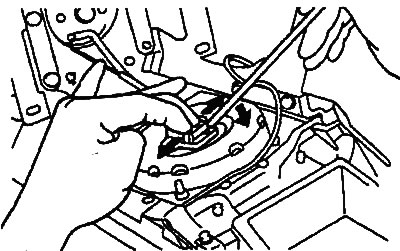
2. After disconnecting the spiral wire connector, press the lock as shown in the figure and remove the steering wheel cover.
3. Unscrew the steering wheel mounting nut and remove the washer.
4. Remove the steering wheel.
Caution: Do not use a hammer to remove the steering wheel as this may damage the steering column telescopic mechanism.
5. Loosen the screws and remove the upper and lower steering column covers.
6. Disconnect the connectors from the steering column combination switch and remove it.
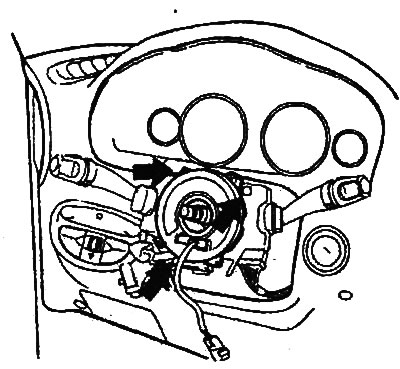
7. Remove the steering column combination switch assembly.
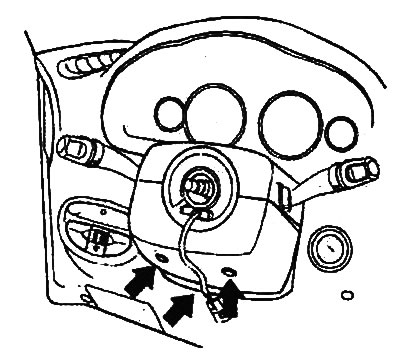
8. Loosen the intermediate shaft mounting bolts and disconnect the intermediate shaft from the steering gear.
9. Unscrew the four steering column mounting bolts.
10. Remove the steering column assembly with the intermediate shaft.

Disassembly
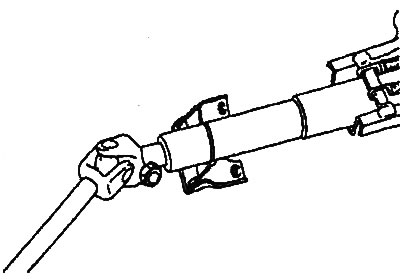
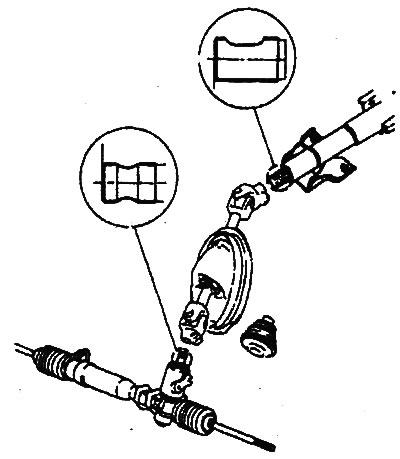
1. Disconnect the intermediate shaft from the steering column.
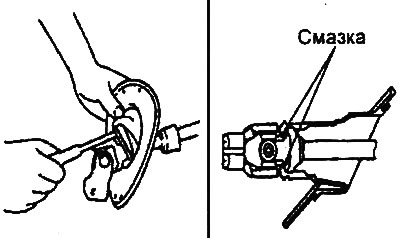
2. Remove grease from the edges of the protective cover.
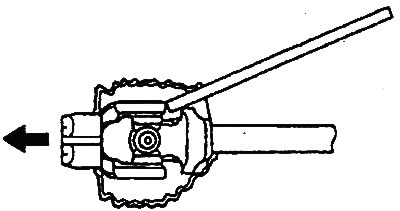
3. Using the rod, remove the protective cover.
4. Apply grease to the inner edge of the intermediate shaft housing.
Note: Be careful not to damage the hinge.
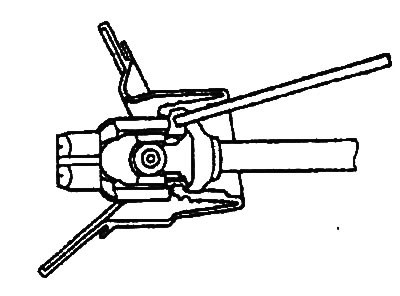
5. Using a rod, remove the intermediate shaft housing from the joint.
Note: Be careful not to damage the hinge.
6. Remove the bearing.
7. If necessary, remove the ignition switch by sawing off the bolts with a hacksaw as shown in the figure.

Examination
1. Check the steering shaft for damage and correct operation.
2. Make sure there is no excessive play in the hinges.
3. Check the steering column bracket for damage.
4. Make sure the casing and protective cover are intact.
5. Check the correct operation of the steering wheel lock mechanism.
Assembly
1. Install the ignition switch.
- a) Install the ignition switch on the steering column and secure it.
- b) Install and tighten the special shear head bolts.
Note:
- Use new bolts and ignition switch bracket.
- Before tightening the bolts, make sure the ignition switch and steering wheel lock mechanism are working properly.
- Tighten the bolts until the heads shear off.
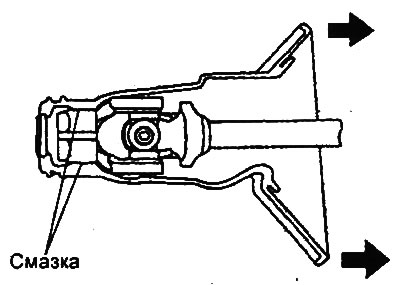
2. Apply grease to the inner edge of the intermediate shaft housing and install it on the joint as shown in the figure.
3. Install the bearing on the shaft.
- a) Apply grease to the bearing.
- b) Wrap the shaft with insulating tape as shown in the figure.
- c) Press on the bearing.
Installation
1. Apply grease to the bearing contact surfaces, intermediate shaft housing and protective boot.
2. Connect the intermediate shaft to the steering gear.
- Tightening torque: 15-20 Nm
3. Connect the steering column to the intermediate shaft
- Tightening torque: 15-20 Nm
4. Install the intermediate shaft housing.
5. Install the steering column assembly and tighten the four bolts.
- Tightening torque: 13-18 Nm
6. Install the steering column combination switch and connect the connectors.
7. Install the upper and lower steering column covers and tighten the screws.
8. Install the steering wheel.
Caution: Do not use a hammer to install the steering wheel, as this may damage the steering column telescopic mechanism.
9. Install the washer and tighten the steering wheel mounting nut.
- Tightening torque: 40-50 Nm
10. Connect the spiral wire connector and install the steering wheel cover.
11. Install the steering wheel side trims and tighten the trim mounting bolts.
- Tightening torque: 8-11 Nm
12. Connect the cable to the negative terminal of the battery.