Contents: Removal ⇓ Installation ⇓
Removal
1. First disconnect the wire from the negative terminal of the battery, then from the positive terminal and remove the battery.
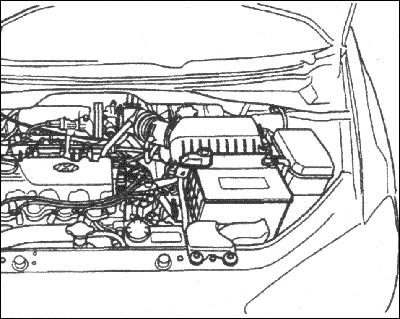
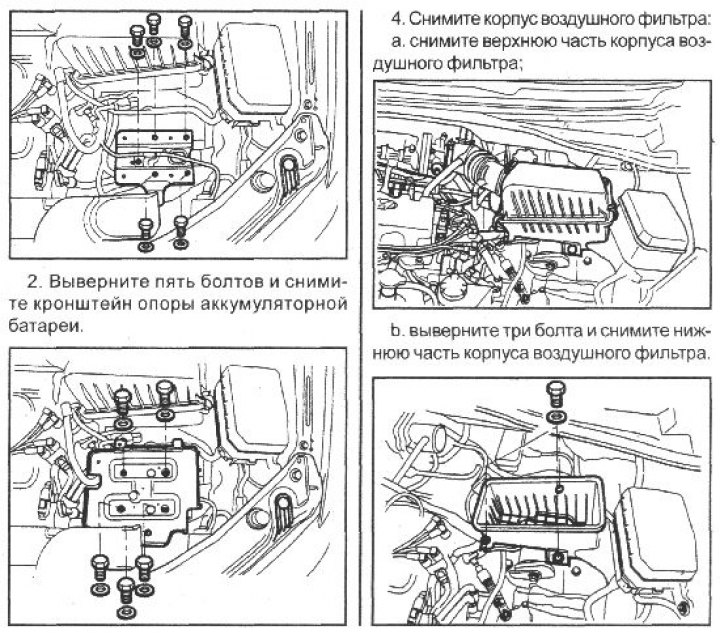
2. Remove the five bolts and battery support.
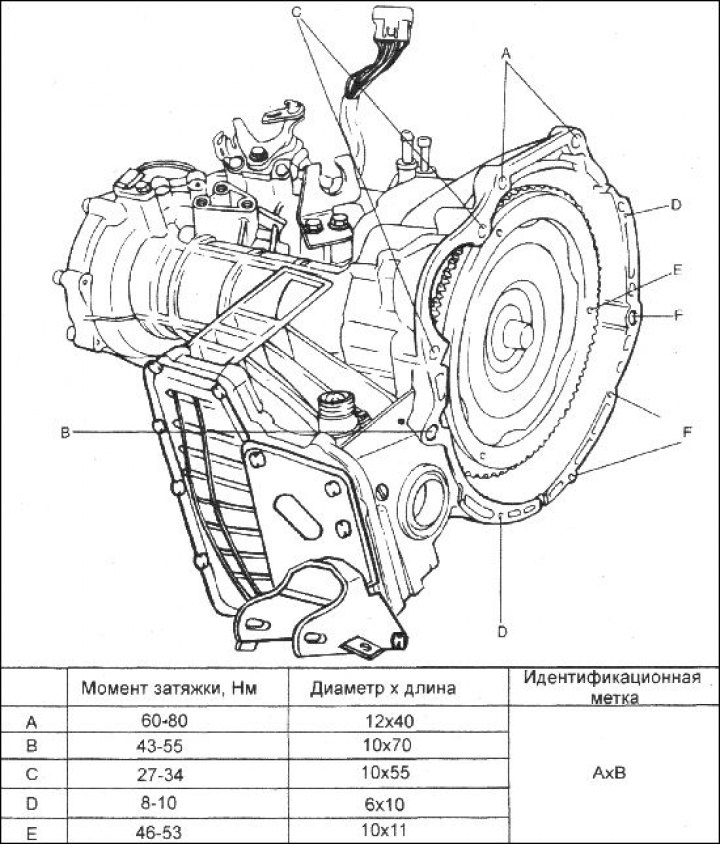
Gearbox mounting elements
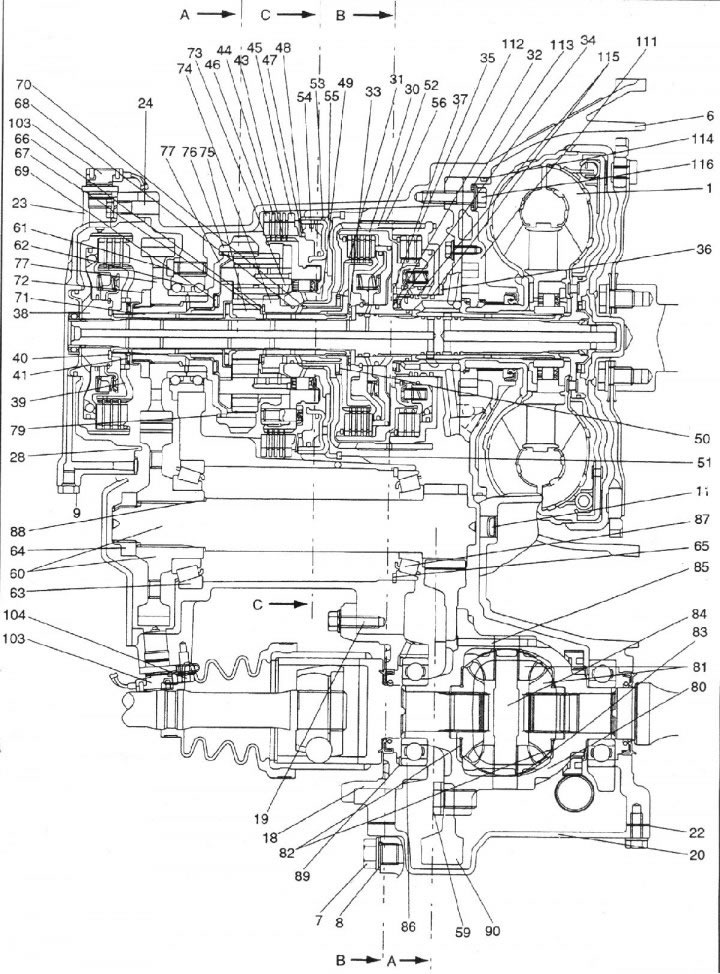
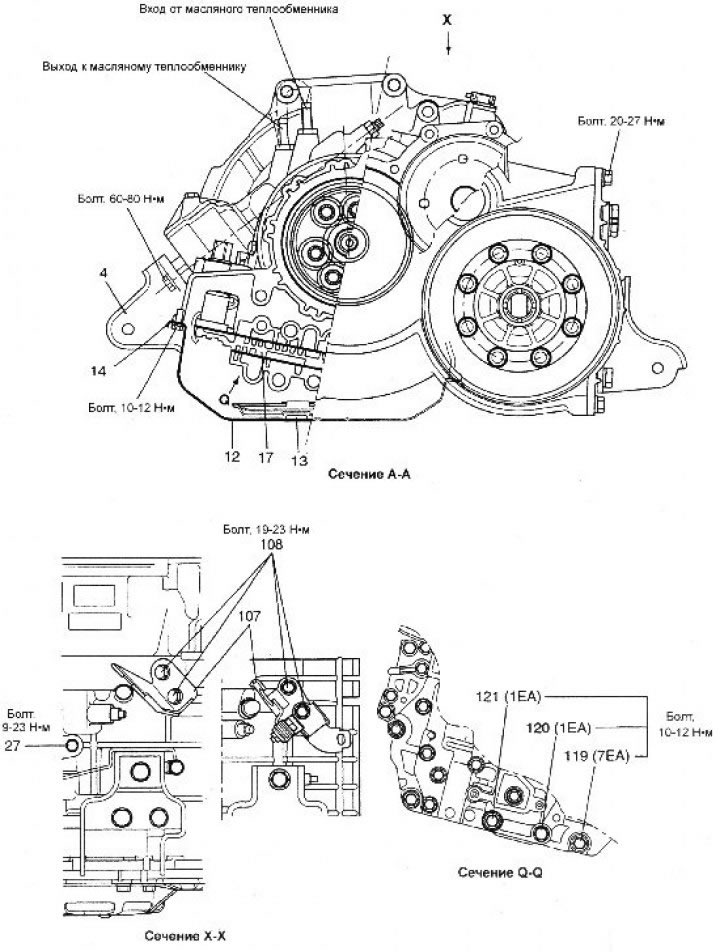
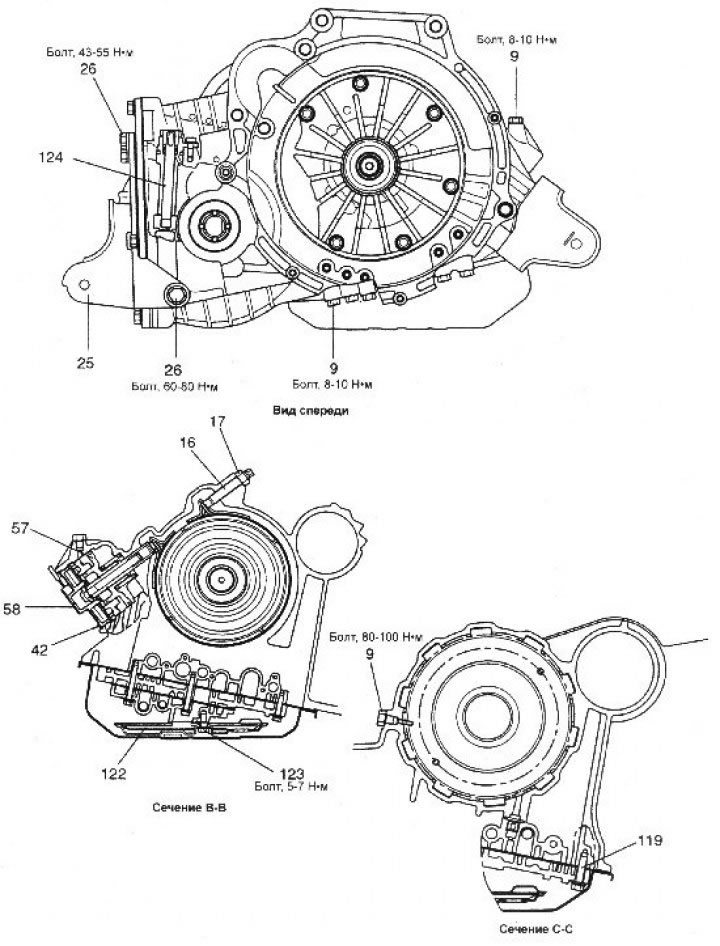
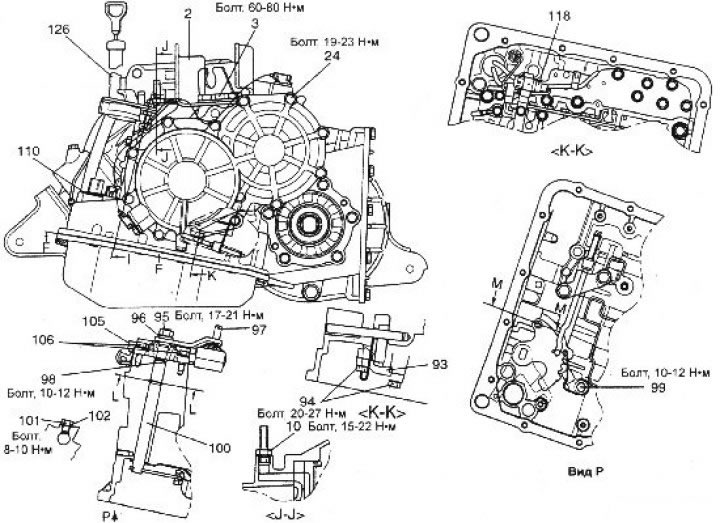
Location of gearbox components: 1 - torque converter; 2 - gearbox support bracket; 3-washer; 4 - front suspension roller support; 5 - washer; 6 - gearbox housing; 7 - oil drain plug; 8 - gasket; 9 - plug of the hole for measuring the pressure of the transmission fluid; 10 - branch pipe for transmission fluid heat exchanger hose; 11 - sealing cap; 12 - oil pan; 13 - magnet; 14 - Oil pan gasket; 15 - bolt; 16 - adjusting screw; 17 - nut; 18 - differential housing bearing cover; 19 flange bolt; 20 - differential cover; 21 - washer; 22 - gasket; 23 - back cover; 24 - flange bolt; 25 - rear suspension roller support; 26 - lock bolt; 27 - bolt M10x20; 28 - sealing ring; 29 - Ventilation cap; 30 - rear clutch; 31 - rear clutch hub; 32 - thrust bearing; 33 - thrust bearing; 34-thrust bearing; 35- front clutch; 36 - thrust ring; 37 - thrust ring; 38 - output coupling; 39 - output clutch hub; 40 - thrust ring; 41 - thrust bearing; 42 - retaining ring; 43 - brake disc; 44 - brake disc; 45 - brake pressure disc; 46 - Reactive brake disc; 47 - return spring; 48 - disc spring; 49 - thrust bearing; 50 - outer ring of thrust bearing; 51 - retaining ring; 52- kickdown brake drum; 53 - seal; 54 - piston of brake of downshift and reverse gear; 55 - central support; 56 - kickdown brake band; 57 - kickdown servo piston with spring; 58 - servo kickdown switch; 59 - bolt for fastening the driven gear of the main transmission; 60 - intermediate gear driven gear; 61 - bolt; 62 - clip; 63 - tapered roller bearing; 64 - lock nut; 65 - retaining ring; 66 - thrust bearing; 67 - outer ring of thrust bearing; 68 - oil seal; 69- thrust bearing; 70 - retaining ring; 71 - output clutch shaft; 72 - lock nut; 73 - planetary gear carrier; 74-reverse sun gear; 75 - Forward gear sun gear; 76 - Crown wheel; 77 - intermediate gear drive pinion; 78 - outlet flange; 79 - retaining ring; 80 - differential housing; 81 - differential; 82 - differential spacer ring; 83 - washer; 84 - satellite axis; 85 - locking pin; 86 - ball bearing; 87 - support bearing; 88 - spacer ring; 89 - spacer ring; 90 - main gear drive pinion; 91 - speedometer drive pinion; 92 - locking plate; 93 - support of the wedging cracker; 94 - flange bolt M8x25; 95 - nut; 96 - spring washer; 97 - manual control lever; 98 - sealing ring; 99 - bolt; 100 - manual control rod; 101 - screw; 102 - sealing washer; 103 - pulse generator; 104 flange bolt; 105 - selector switch; 106 - flange bolt; 107 - control cable holder; 108 flange bolt; 109-clamp; 110 - retaining ring; 111 - oil pump; 112-oil pump gasket; 113 - sealing washer; 114 - sealing ring; 115 - oil seal; 116 - sealing bolt; 117-valve block; 118-transmission fluid temperature sensor; 119 - bolt M6x26; 120 - bolt MbxZb; 121 - bolt M6x41; 122 - oil filter; 123 - flange bolt; 124 - speedometer drive driven gear bushing; 125 - flange bolt M6x14; 126 - transmission fluid dipstick and filler tube; 127 - flange bolt; 128 - oil dipstick.
The original can be found on the resource (HyundaiBook.ru)
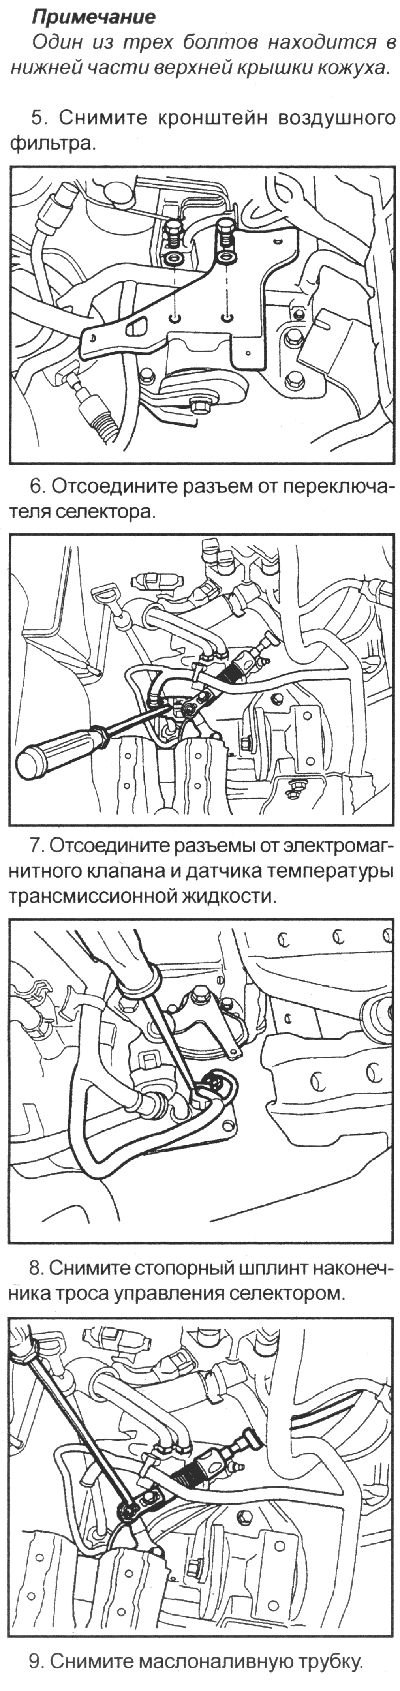
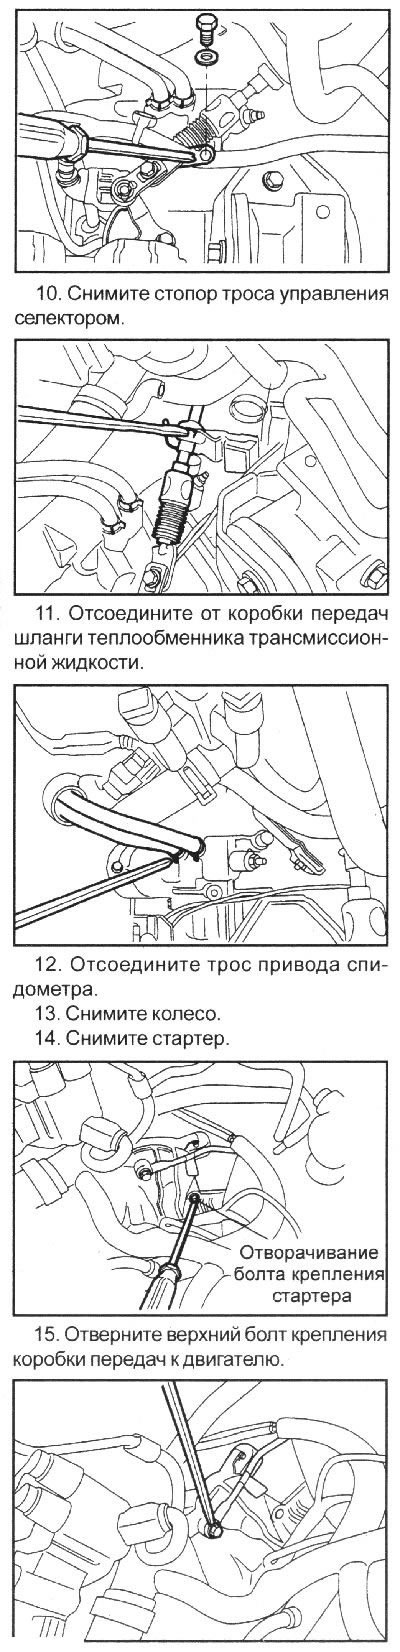
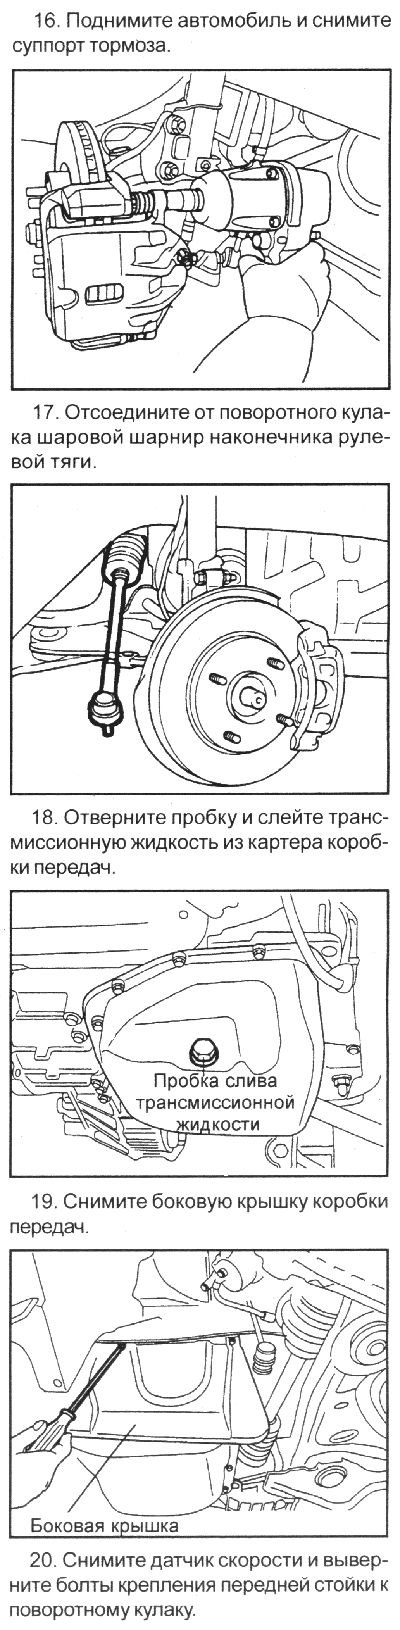
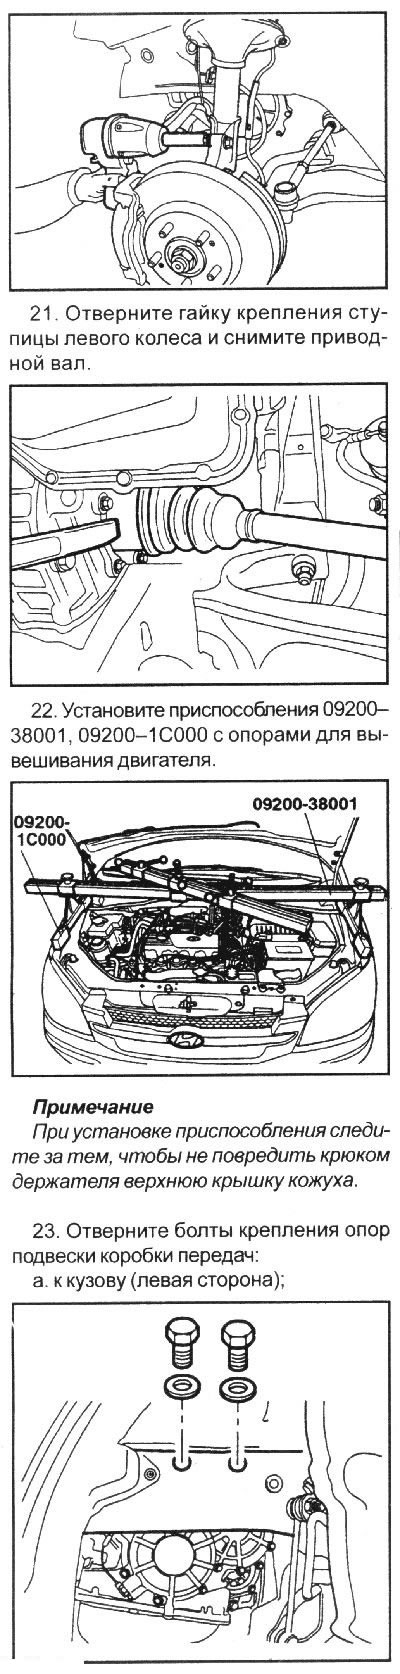
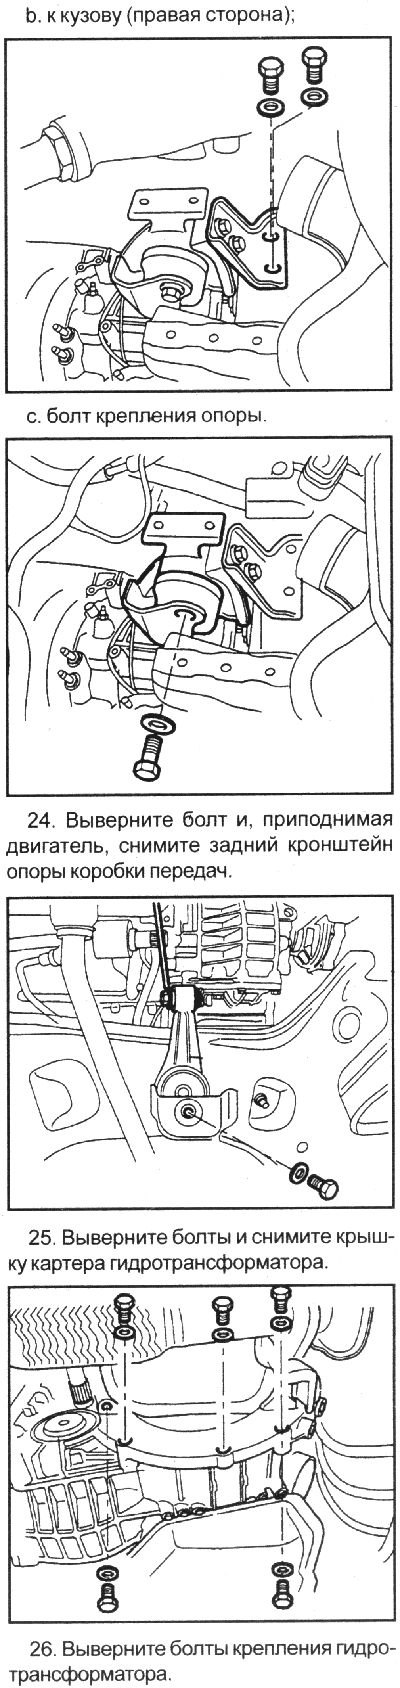
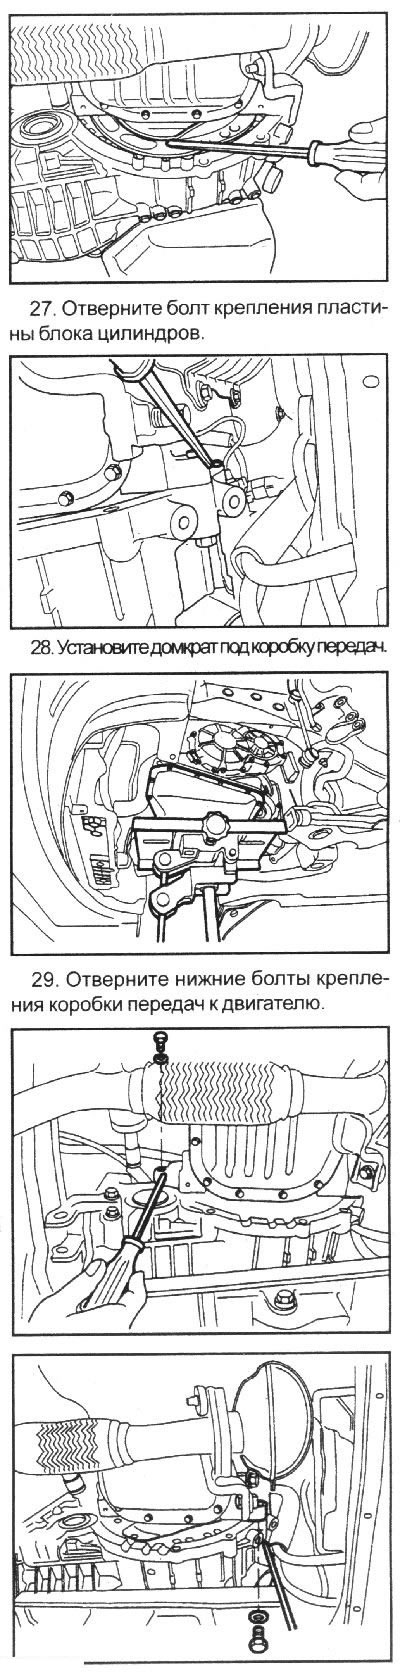
30. Remove the gearbox.
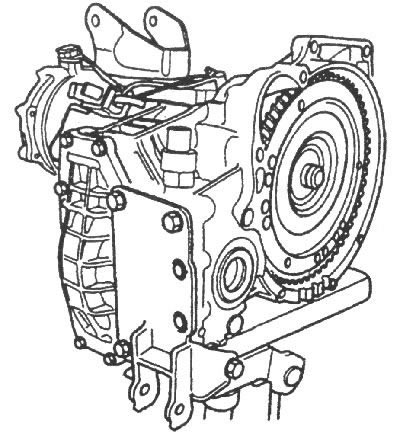
Installation
1. Install the torque converter to the front of the transmission and install the transmission to the engine.
Caution: If the torque converter is installed on the engine first, the transmission sealing ring may be damaged when installing the transmission.
When installing the roller support bracket, do not allow the elastic cushion to collapse. Collapsing the cushion may cause vibration when the engine is idling.
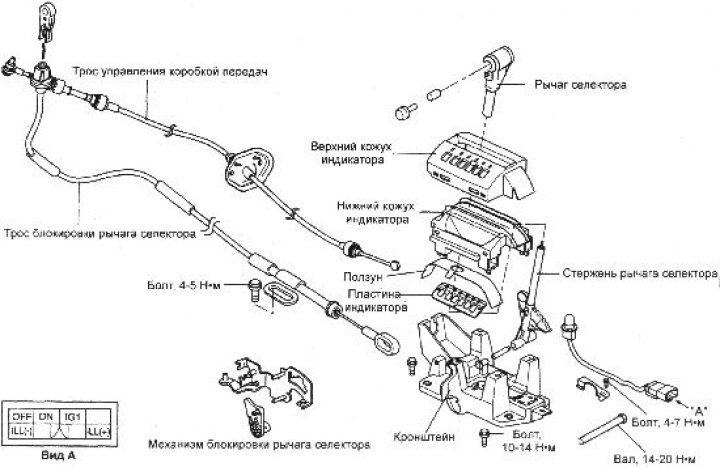
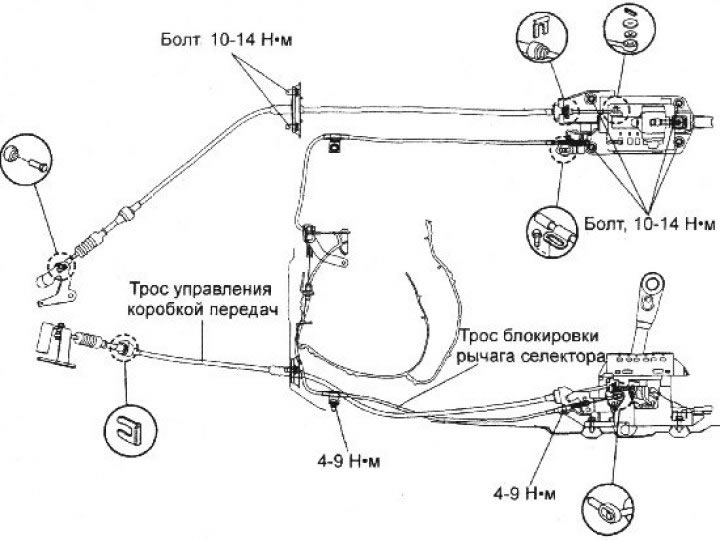
2. Install the transmission control cable and adjust as follows.
- a. Move the selector lever and gearshift switch to the "N" position and install the gearshift control cable.
- b. When connecting the control cable to the transmission mounting bracket, install the clamp so that it comes into contact with the control cable.
- c. Use the adjusting nut to select any free play in the control cable and check that the selector lever moves smoothly.
- d. Check that the control cable is adjusted correctly.