
2. Make sure that the selector lever is set to all positions.
3. Start the engine and check that the vehicle moves forward when the lever is moved from the "N" position to the "D" position and moves backward when the lever is moved to the "R" position.
4. If necessary, adjust the control cable and selector lever bushing. Check the moving parts of the selector lever for wear.
Adjusting the selector lever position indicator switch
1. Move the selector lever to the "N" position.
2. Loosen the control lever lock nut where the cable and accelerator drive lever connect.
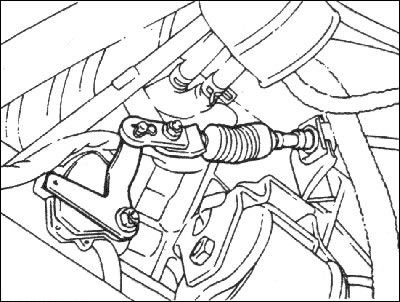
3. Move the selector lever to the "N" position.
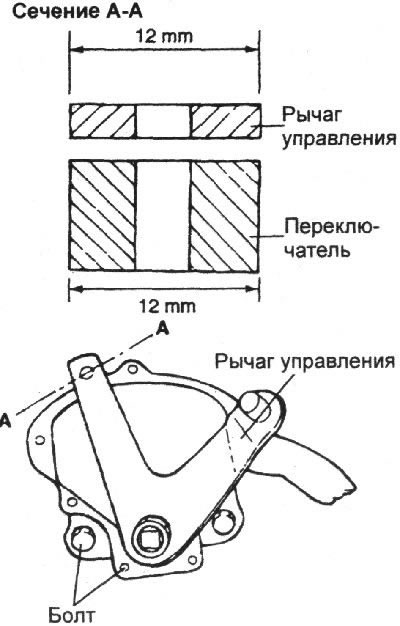
4. Turn the selector lever position indicator switch housing and align the 12 mm wide end of the control lever with the 12 mm wide flange portion of the switch housing.
5. Tighten the switch mounting bolts to a tightening torque of 10–12 N·m.
6. Check that the selector lever is in the "N" position.
7. Adjust the position of the flange nut so that there is no slack in the cable and the selector lever moves smoothly.
8. Perform a test drive and ensure that the transmission is in the position corresponding to each selector lever position.
Adjusting the forced downshift switch
1. Clean all dirt from the forced downshift adjustment screw.
2. Loosen the locknut.
3. Loosen and tighten the adjustment screw twice to a tightening torque of 5 N·m.
4. After tightening the adjustment screw to a tightening torque of 5 N·m, loosen it by 3–373 turns.
5. Tighten the lock nut to the specified torque.
Tightening torque: 15–22 Nm
Note: Apply DC780 sealant to the center of the downshift adjustment screw threads before adjusting.